
DIY Hanging Terrarium
We were invited to participate in a super fun and creative project called the Ultimate Upcycle Challenge: Planted. A challenge that combines two of our favourite things: Upcycle and Charity. Of course we said yes to the challenge! The goal was to create a planter from some repurposed materials and in the end it will be auctioned for charity. Here's what we had to work with:
- Given a $70 budget at ReStore to pick out some items that will become the bones of our planter.
- Handed a box of surprise goodies from Rustoleum that will be used to refinish and bring it all together.
- And a $50.00 Visa card to purchase any little extras that might be needed to build and finish the planter.
Once our planter is complete, it will be taken to a local greenery to be filled with plants! The completed piece will be on display at the Calgary Home + Garden Show February 25 to 28, 2016 along with several others. These planters are up for auction with the proceeds going to Habitat for Humanity. I can’t wait to see what the other contestants came up with!Let me walk you through the process so that you can create your own upcycle planter just like we did. 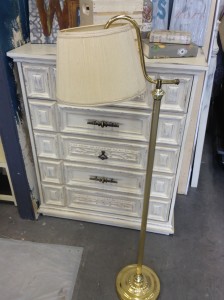

![hanging-terrarium-1-8234[1]](http://static1.squarespace.com/static/55b7d655e4b058d22b891eda/5cbab33d448c8ab9f5edac69/5cbab397448c8ab9f5edbed2/1555739543256/hanging-terrarium-1-82341-300x300.jpg?format=original) Melissa was the lucky one who got to visit ReStore and pick the initial items. As she browsed the isles her creative juices started to flow. This dated lamp started to look like it could be a stand. These old light globes looked interesting. And a plan started to form, a hanging terrarium! (See inspiration photo above right). We were all so excited to see the treasures that Melissa had picked out and to open the mystery box of goodies. Here’s a photo of all of our products and second hand finds.
Melissa was the lucky one who got to visit ReStore and pick the initial items. As she browsed the isles her creative juices started to flow. This dated lamp started to look like it could be a stand. These old light globes looked interesting. And a plan started to form, a hanging terrarium! (See inspiration photo above right). We were all so excited to see the treasures that Melissa had picked out and to open the mystery box of goodies. Here’s a photo of all of our products and second hand finds. 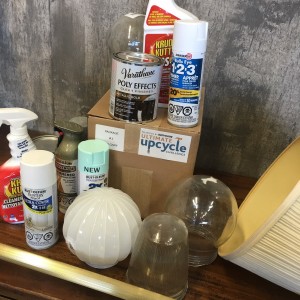 Now for the fun part, how do we pull this together? Follow along with me as I go over the steps we took to upcycle this pile of stuff into a breezy hanging terrarium.Materials donated by Rust-Oleum for finishing and how we used them:
- Krud Kutter Gloss off to remove the surface gloss finish
- Krud Kutter Degreaser to clean and degrease the surface
- Zinsser Bulls Eye 1-2-3 Primer to prime the surface
- Rust-Oleum Accents Stone to create a small amount of texture on the surface
- Rust-Oleum Painter’s Touch Gloss-White to spray the base of the stand
- Rust-Oleum Painter’s Touch Gloss-Ocean Mist to spray the ombre effect on the top half of the stand
- Varathane Poly Effects Clear Finish-Metallic Gold to seal and add sparkle
- Rust-Oleum Chalked Ultra Matte-Blush Pink to dip the bottoms of the glass
- Rust-Oleum Hammered Paint-Rosemary adding some shimmer to our twine
Items from Re-Store:
- Old brass floor lamp
- Various Glass light globes
Extra Items Purchased:
- Spool of thin twine/rope
Tools Used:
- Tape measure
- Screw driver
- Scissors
- Utility knife
- Wrench
- Cardboard or Drop cloth
- Terry Towel Rags
- Empty Coffee Tins/ Plastic containers
- Gloves
- Kitchen sponge
Let's get started....Prep:1. Remove lamp shade.2. Unscrew light bulb housing as we didn't need this to function as a lamp anymore. 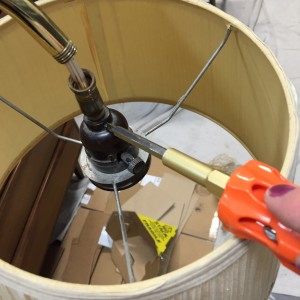
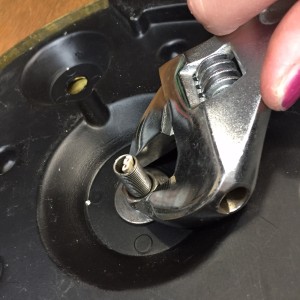
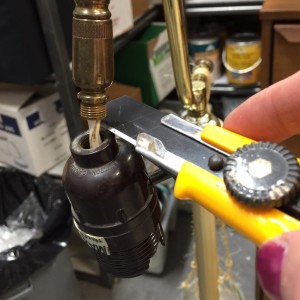 3. Cut wire with a sharp utility knife at the top and pull the wire out from the bottom. I had to cut the wire at the bottom as the last little bit was stuck4. Tighten base and bolts to ensure a sturdy base.
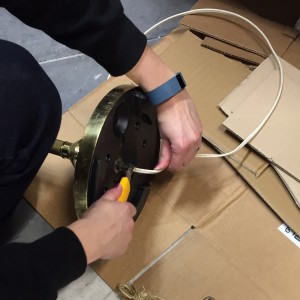
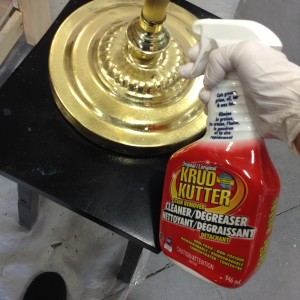
 Clean: I wore some disposable gloves to protect my hands and used a kitchen sponge to scrub the grimy parts. I used a thick terry towel rag to rinse with warm water after using the cleaners.1. Krud Kutter Gloss off to remove the surface gloss finish. Because this was shiny metal I went ahead with this step, I didn't see too much of a difference but think this would work great on a shiny varnished piece of furniture you might want to paint.2. Krud Kutter to clean and degrease the surface. This one really worked, I had some sticky parts where it looked like the glue from a sticker or tape and it took that off no problem.3. Rinse with warm water to remove any chemical residue and then allow to completely dry before painting.
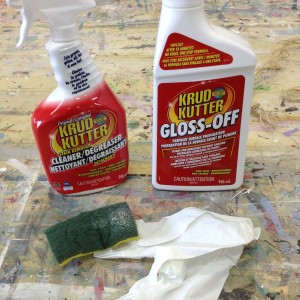
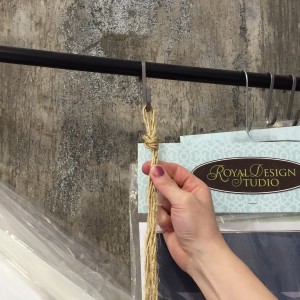
 The biggest challenge was figuring out how to hang the light globes from the stand. Of course I checked out Pinterest for hanging terrarium inspiration and came across this easy macramé tutorial. After watching this video I thought this was the perfect way to hang our glass globes. This video is a great tutorial, I have also posted photos and the steps I took to create the hangers for our glass globes. I like to call them "Nets" because they remind me of fishing nets. [embed]https://youtu.be/XxeF6UdfA-A[/embed] Instead of using white cord like in the video we picked up a ball of twine which has a beachy sort of nautical feel which would go perfect with the paint colours we were given. Here's what I did to tie my "nets"Tie The "Nets1. Measure. I wasn't sure how long my pieces needed to be so I just started with 4 - 8 Foot lengths (which miraculously turned out to be just right!)2. Find a space where you can hook your twine, slightly taller than your height works best. I ended up using our stencil rack. Fold your 4 pieces in half and create a loop at center and hook it on your hook.
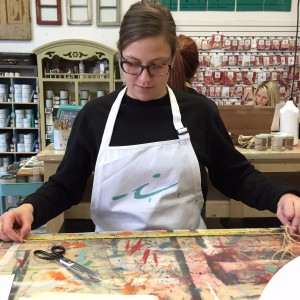
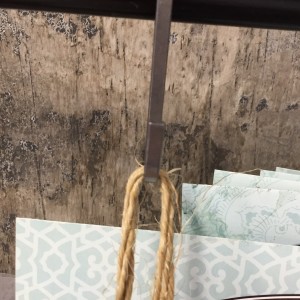 3.Tie a knot at the center to create a loop. This will help keep your twine on the hook and it can be used later when you go to hang your "net".
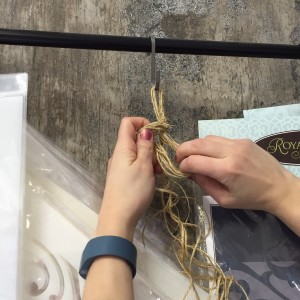
 4. Divide your 8 strands into groups of 2, so you now have 4 groups of 2. Tie a knot about 8 – 12 inches from the top to join each of these groups of two. You will end up with four knots like in the photo below.
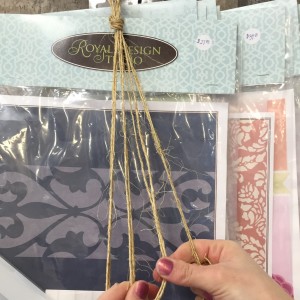
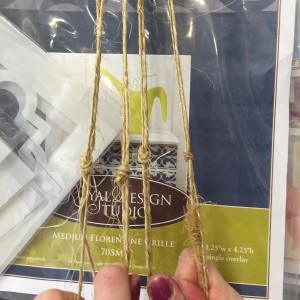 5. From here, continue to tie knots by grabbing strands from adjacent clusters. Your next row of knots will be about 3-4 inches below the previous row of knots. See where I am pinching the two strands together in the photo on the left below? That is where I will tie my next knot. You will tie 4 knots in this row.
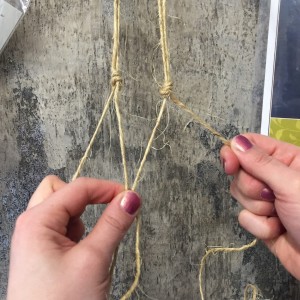
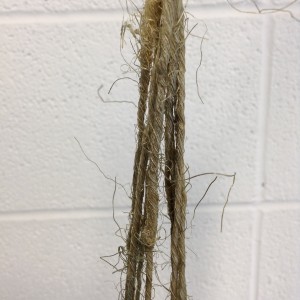
 6. Continue adding rows of knots for 3 - 5 rows until you are close to the bottom of your strands. The more rows the deeper your "net" will be. To finish off tie a knot at the base and you can leave the long strands or cut them off like I did.
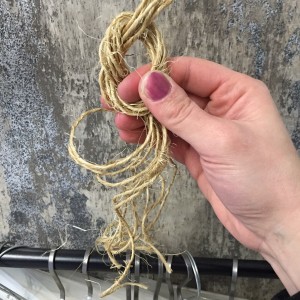
 I made three of these because we decided that we were going to hang 3 of the clear glass globes from our stand. 7. Once the "nets" were done I sprayed them with Rust-Oleum Hammered Paint-Rosemary to add some shimmer to our twine.
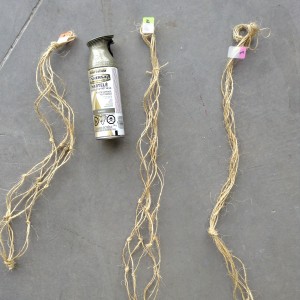
 Check out how the glass globes fit into the "nets" [video width="1920" height="1080" mp4="http://www.interiorstoinspire.com/wp-content/uploads/2016/02/Fitting-Glass-Globe-into-Net.mp4"][/video] At this point the lamp stand had been sitting for a couple of hours so it was thoroughly dry, time to revamp the stand! Painting the Lamp Stand1. Zinsser Bulls Eye 1-2-3 Primer to prime the surface. I took the stand outside, laid out some cardboard and then sprayed one coat over the entire surface. Once the primer was done I let is sit outside for an hour to dry. Normally I like to do spray painting outside because of the over spray and the smell, since it was a cold day the stand came back inside for the next couple of layers.
 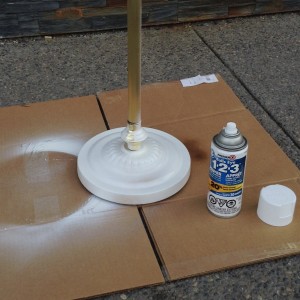 2. Rust-Oleum Accents Stone was sprayed in some areas to create a small amount of texture on the surface. This is a fun product that adds a stone texture, it's like there are little sand grains mixed in with the paint. I think this would look really cool on a flower pot or little statue to make it look like concrete or stone.
 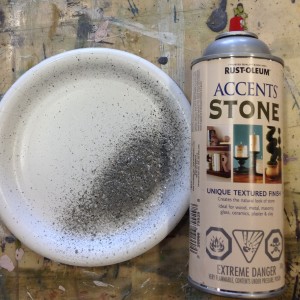 3. Rust-Oleum Painter’s Touch Gloss-White to spray the base of the stand and about a third of the way up. This one is a classic bright white with a slightly shiny finish. The white was sprayed first, allowed to dry for a few minutes before spraying the next colour.
 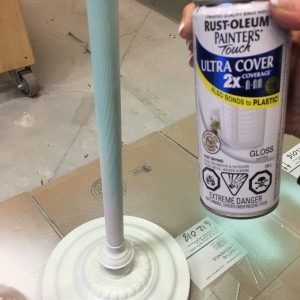 4. Rust-Oleum Painter’s Touch Gloss-Ocean Mist was sprayed from the top down. As we got to the bottom third we allowed this colour to fade out over top of the white to create an ombre effect. This colour inspired the beachy theme and helped to create the breezy nautical feel along with the twine nets for our glass globes.
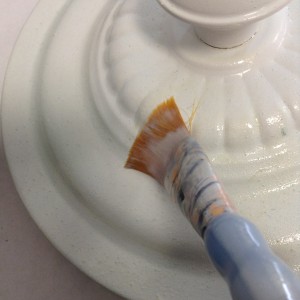
 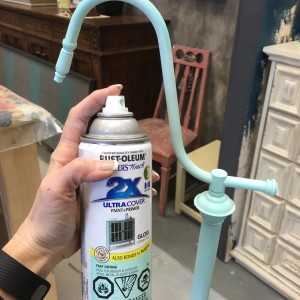 5. Varathane Poly Effects Clear Finish-Metallic Gold was used to seal and add sparkle. This clear coat is super cool because it has this gold shimmer effect that is very subtle but just adds that extra little sparkle. I will use this one again!
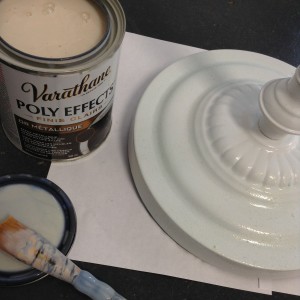
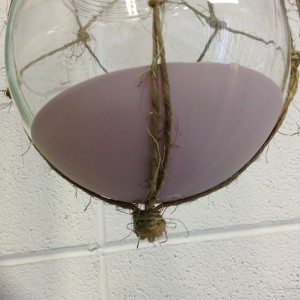
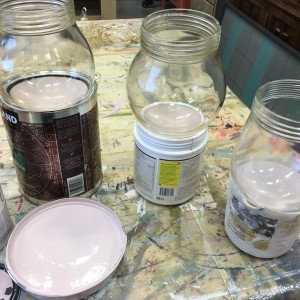
 6. Rust-Oleum Chalked Ultra Matte-Blush Pink to dip the bottoms of the glass. I poured some paint into a container that is was wider than the bottom of the glass globes. Then just dip the bottom of the glass into the paint. Then it needed to dry so I used various cans and containers that the globes would sit in without the paint touching the sides. I left them to sit overnight to drip and dry.
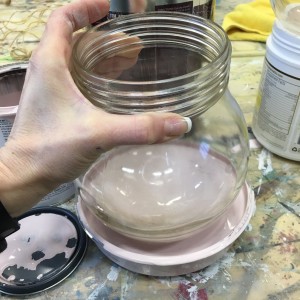
 The next morning everything had dried completely and I was ready to put it together. Check out the video below to see it all come together! [embed]https://youtu.be/fQe6rPMq5Mo[/embed] If you'd like to check out our breezy Hanging Terrarium visit the Calgary Home + Garden Show February 25 to 28, 2016. A local greenery is going to fill the globes with plants for us, we can't wait to see it complete. If you love it you can place a bid to win it or now you know how to create your own version!Please comment and post your questions below, thanks for checking out this blog post.Until next project,Deanna