
Making Monogram Wall Art
‘Tis the season to be making homemade gifts! So instead of getting caught up on buying the latest and greatest gadgets why not create something simple and from the heart. A monogram is a simple way to personalize your gift and can be applied to so many different projects. Check out the steps below to see how you too can create some monogram wall art for your friends and family without spending a ton.Gather some materials: The first step is to find a background. Start by looking around the house to see what you might already have. A blank wooden canvas? An old piece of art you no longer love? Some pieces of wood? I stopped by the dollar store and found these premade round wooden wall hangings that already had an image on them. I didn’t love the image but I loved the shape and the $3.00 price tag. 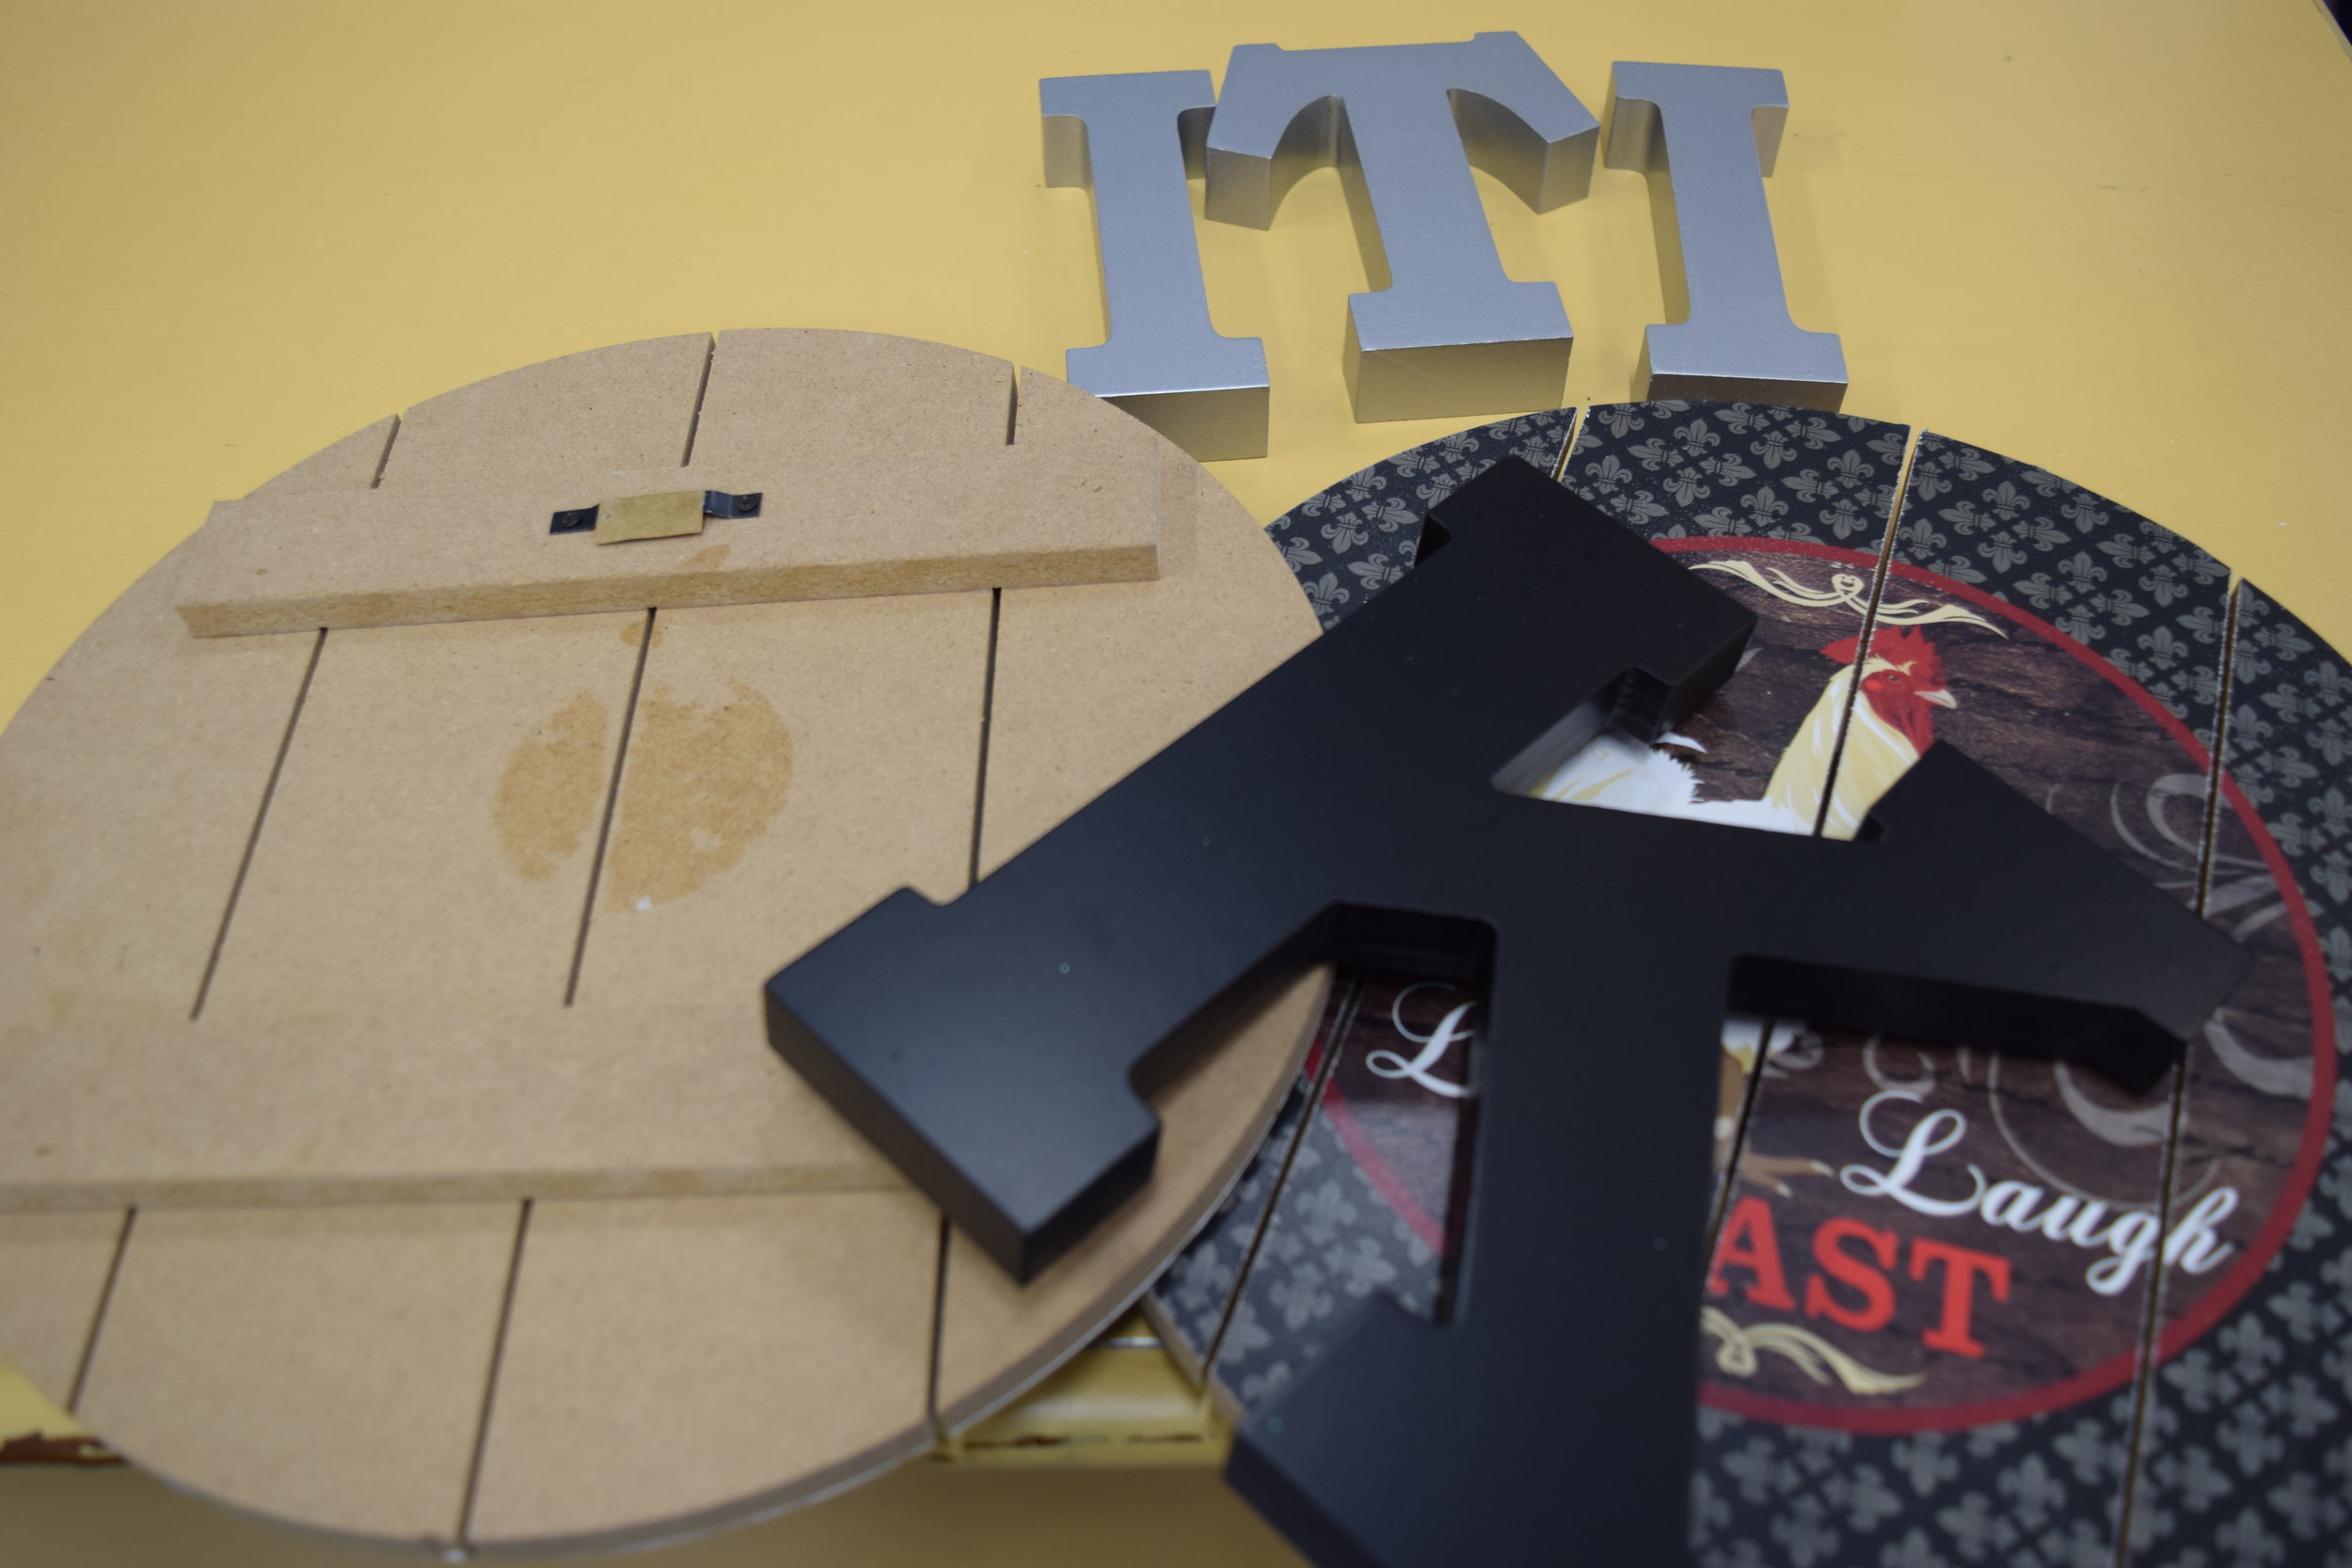 Second step find a letter. You can pick a single letter or a couple letters, I found 3 smaller letters “ITI” for Interiors To Inspire. These were also dollar store finds but I have seen similar at craft and hobby stores. Another option is to hand paint or stencil on the letter if you just can’t find a raised one. Let’s put it together… First step is to paint your background. The first one I started I painted each strip of wood was a different colour.
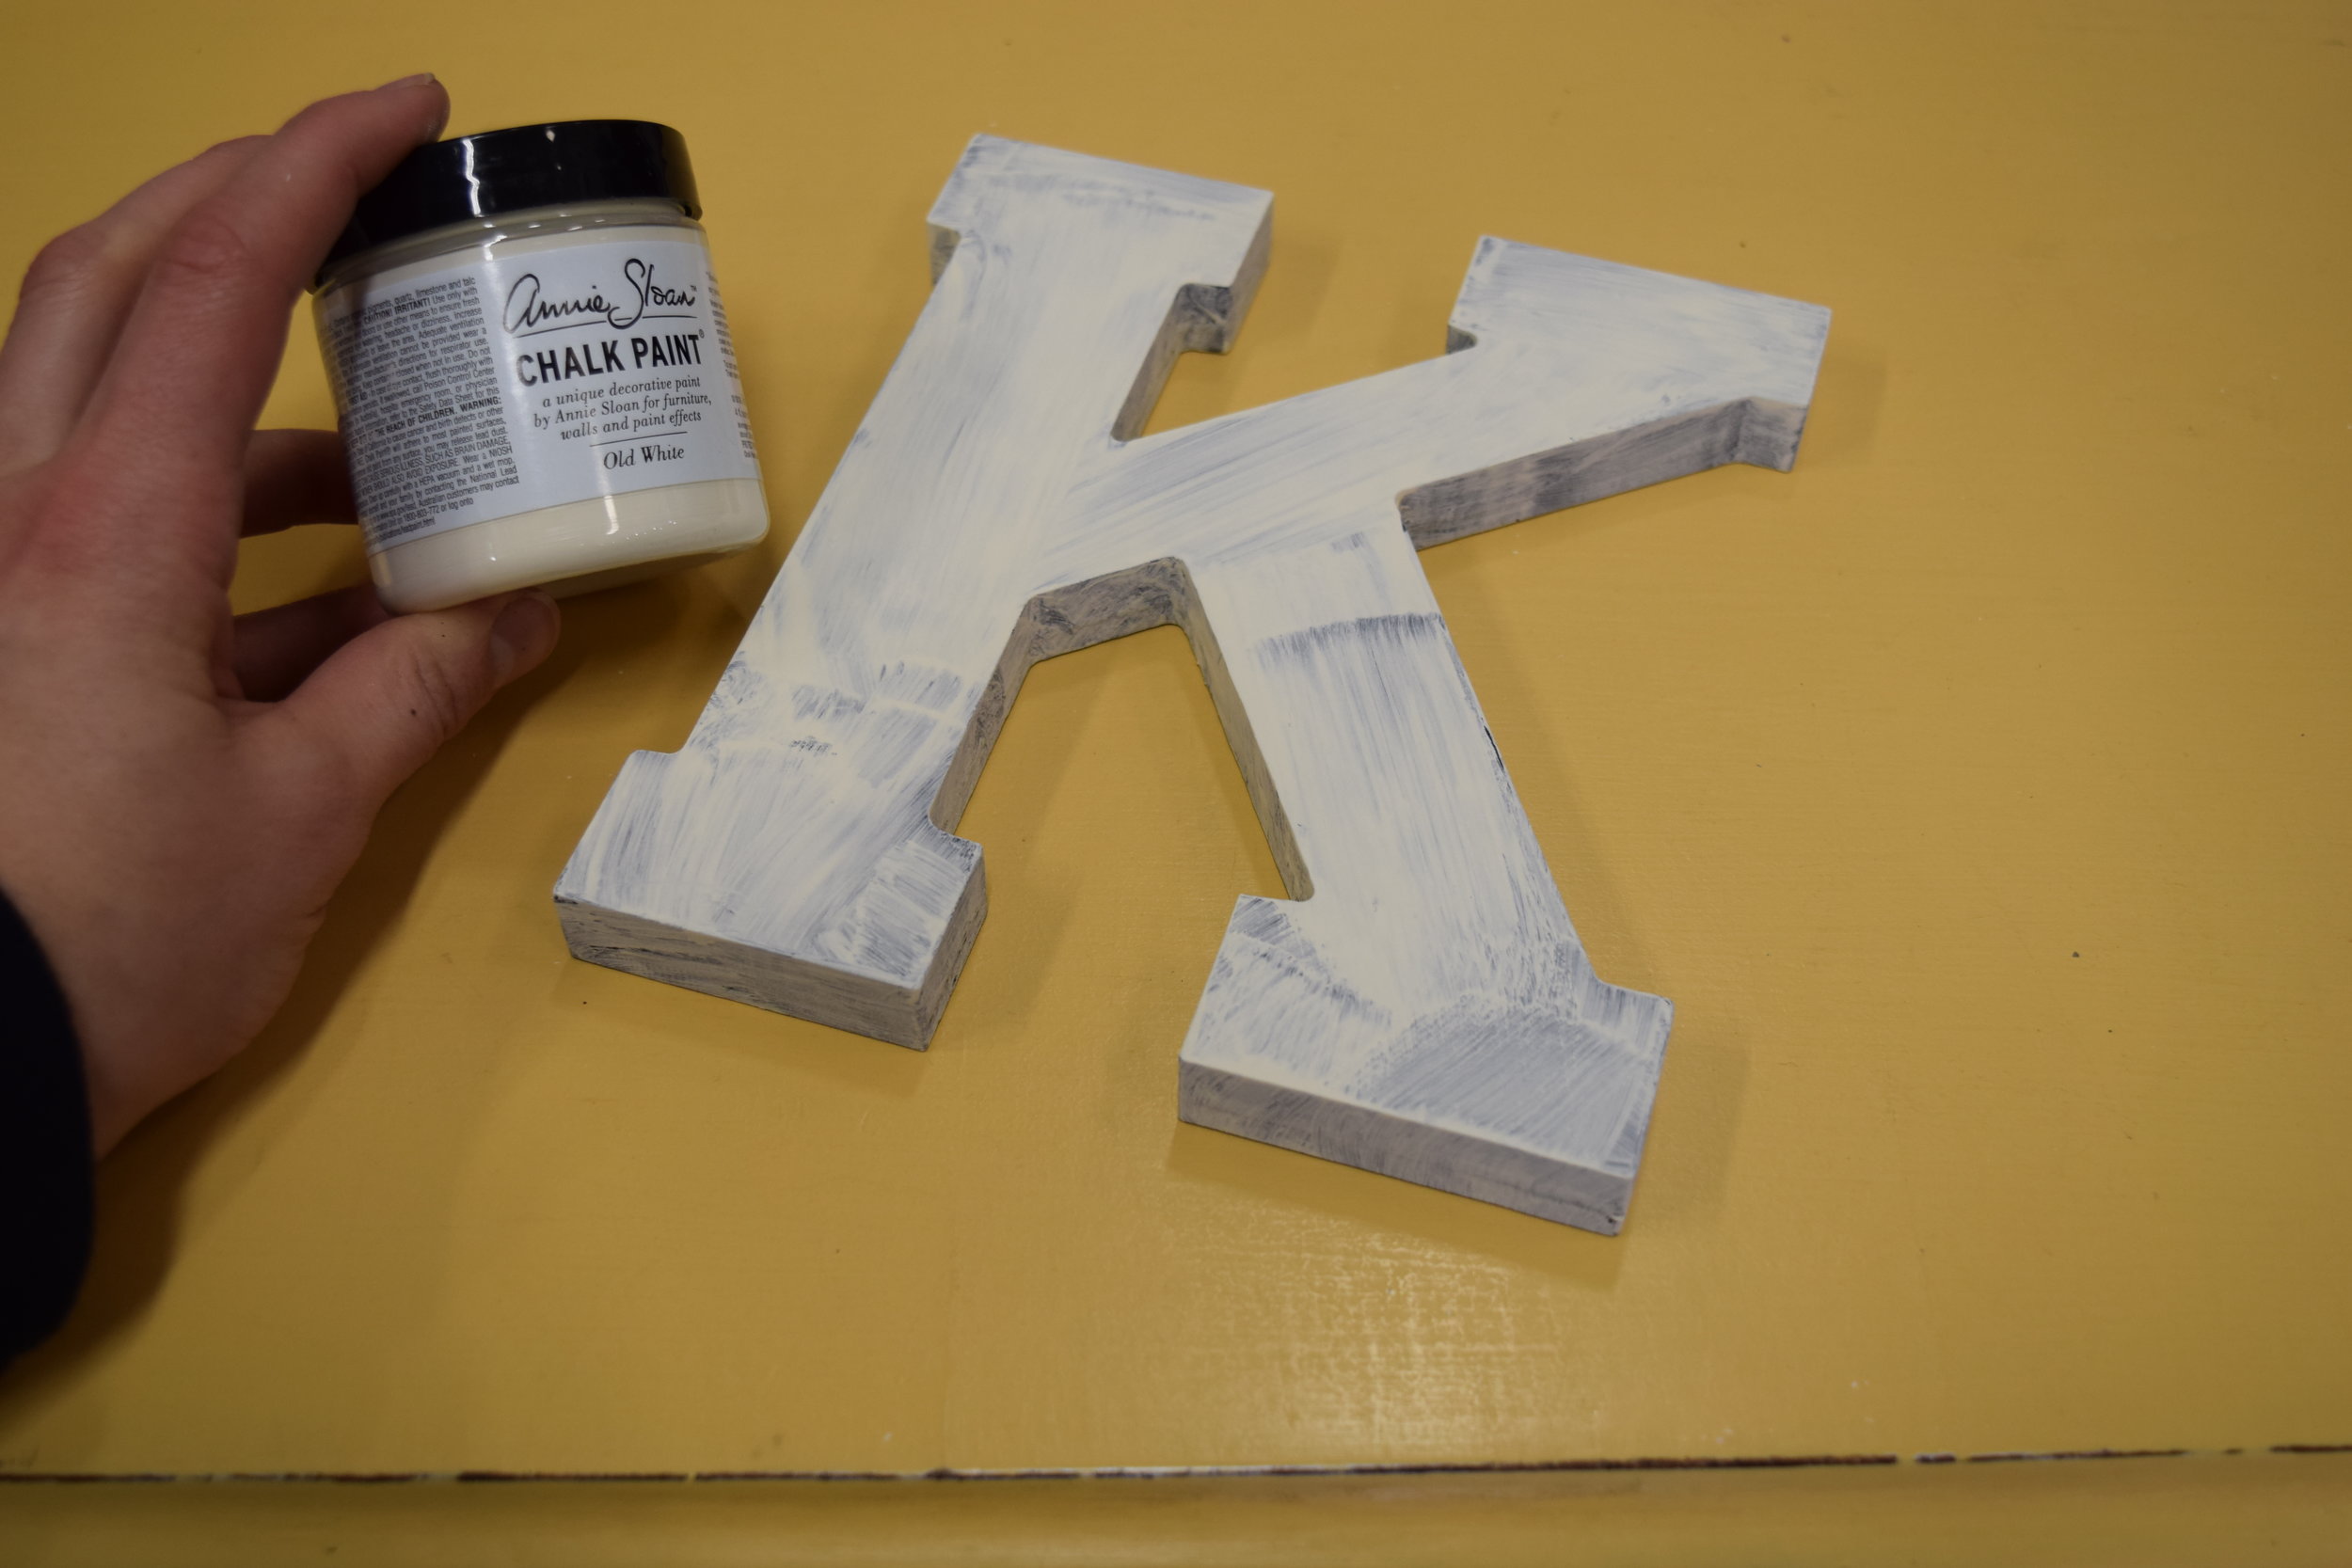
 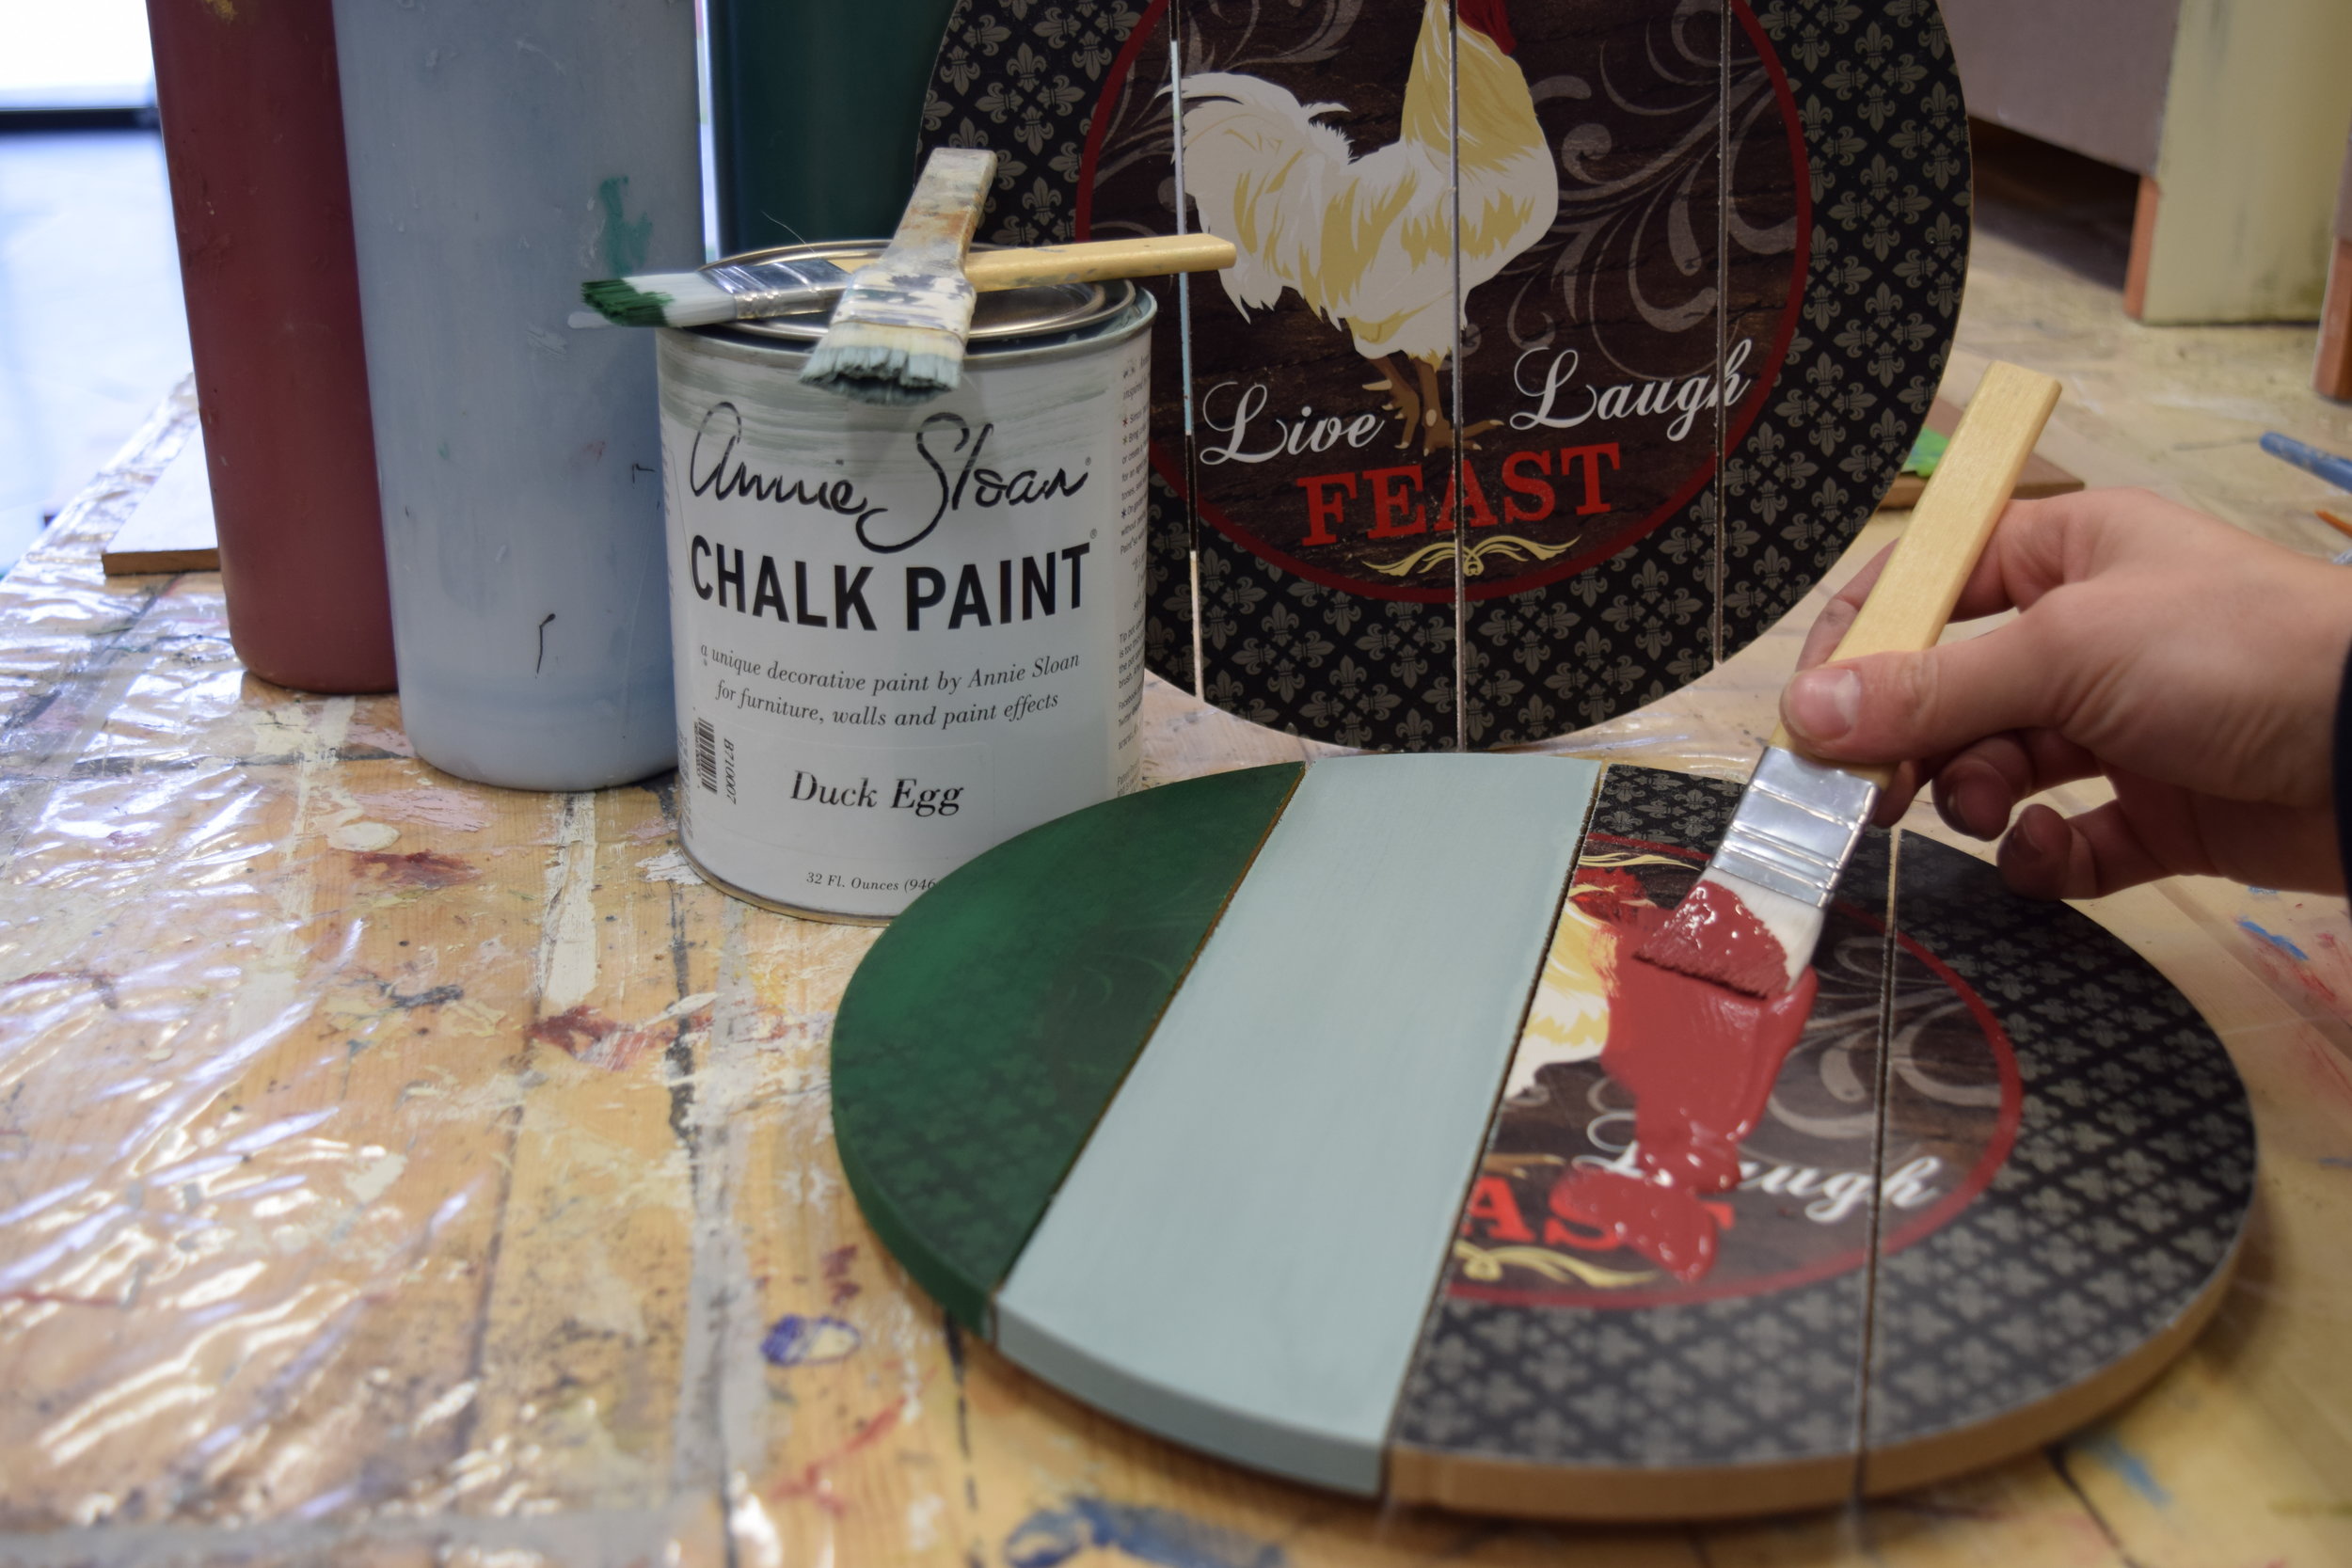 Other ideas are painting in one solid colour or using a stencil to add pattern. Of course I used my favourite Chalk Paint™ by Annie Sloan for this because it sticks to everything without sanding or priming! Who doesn’t love skipping all the prep and saving time?
 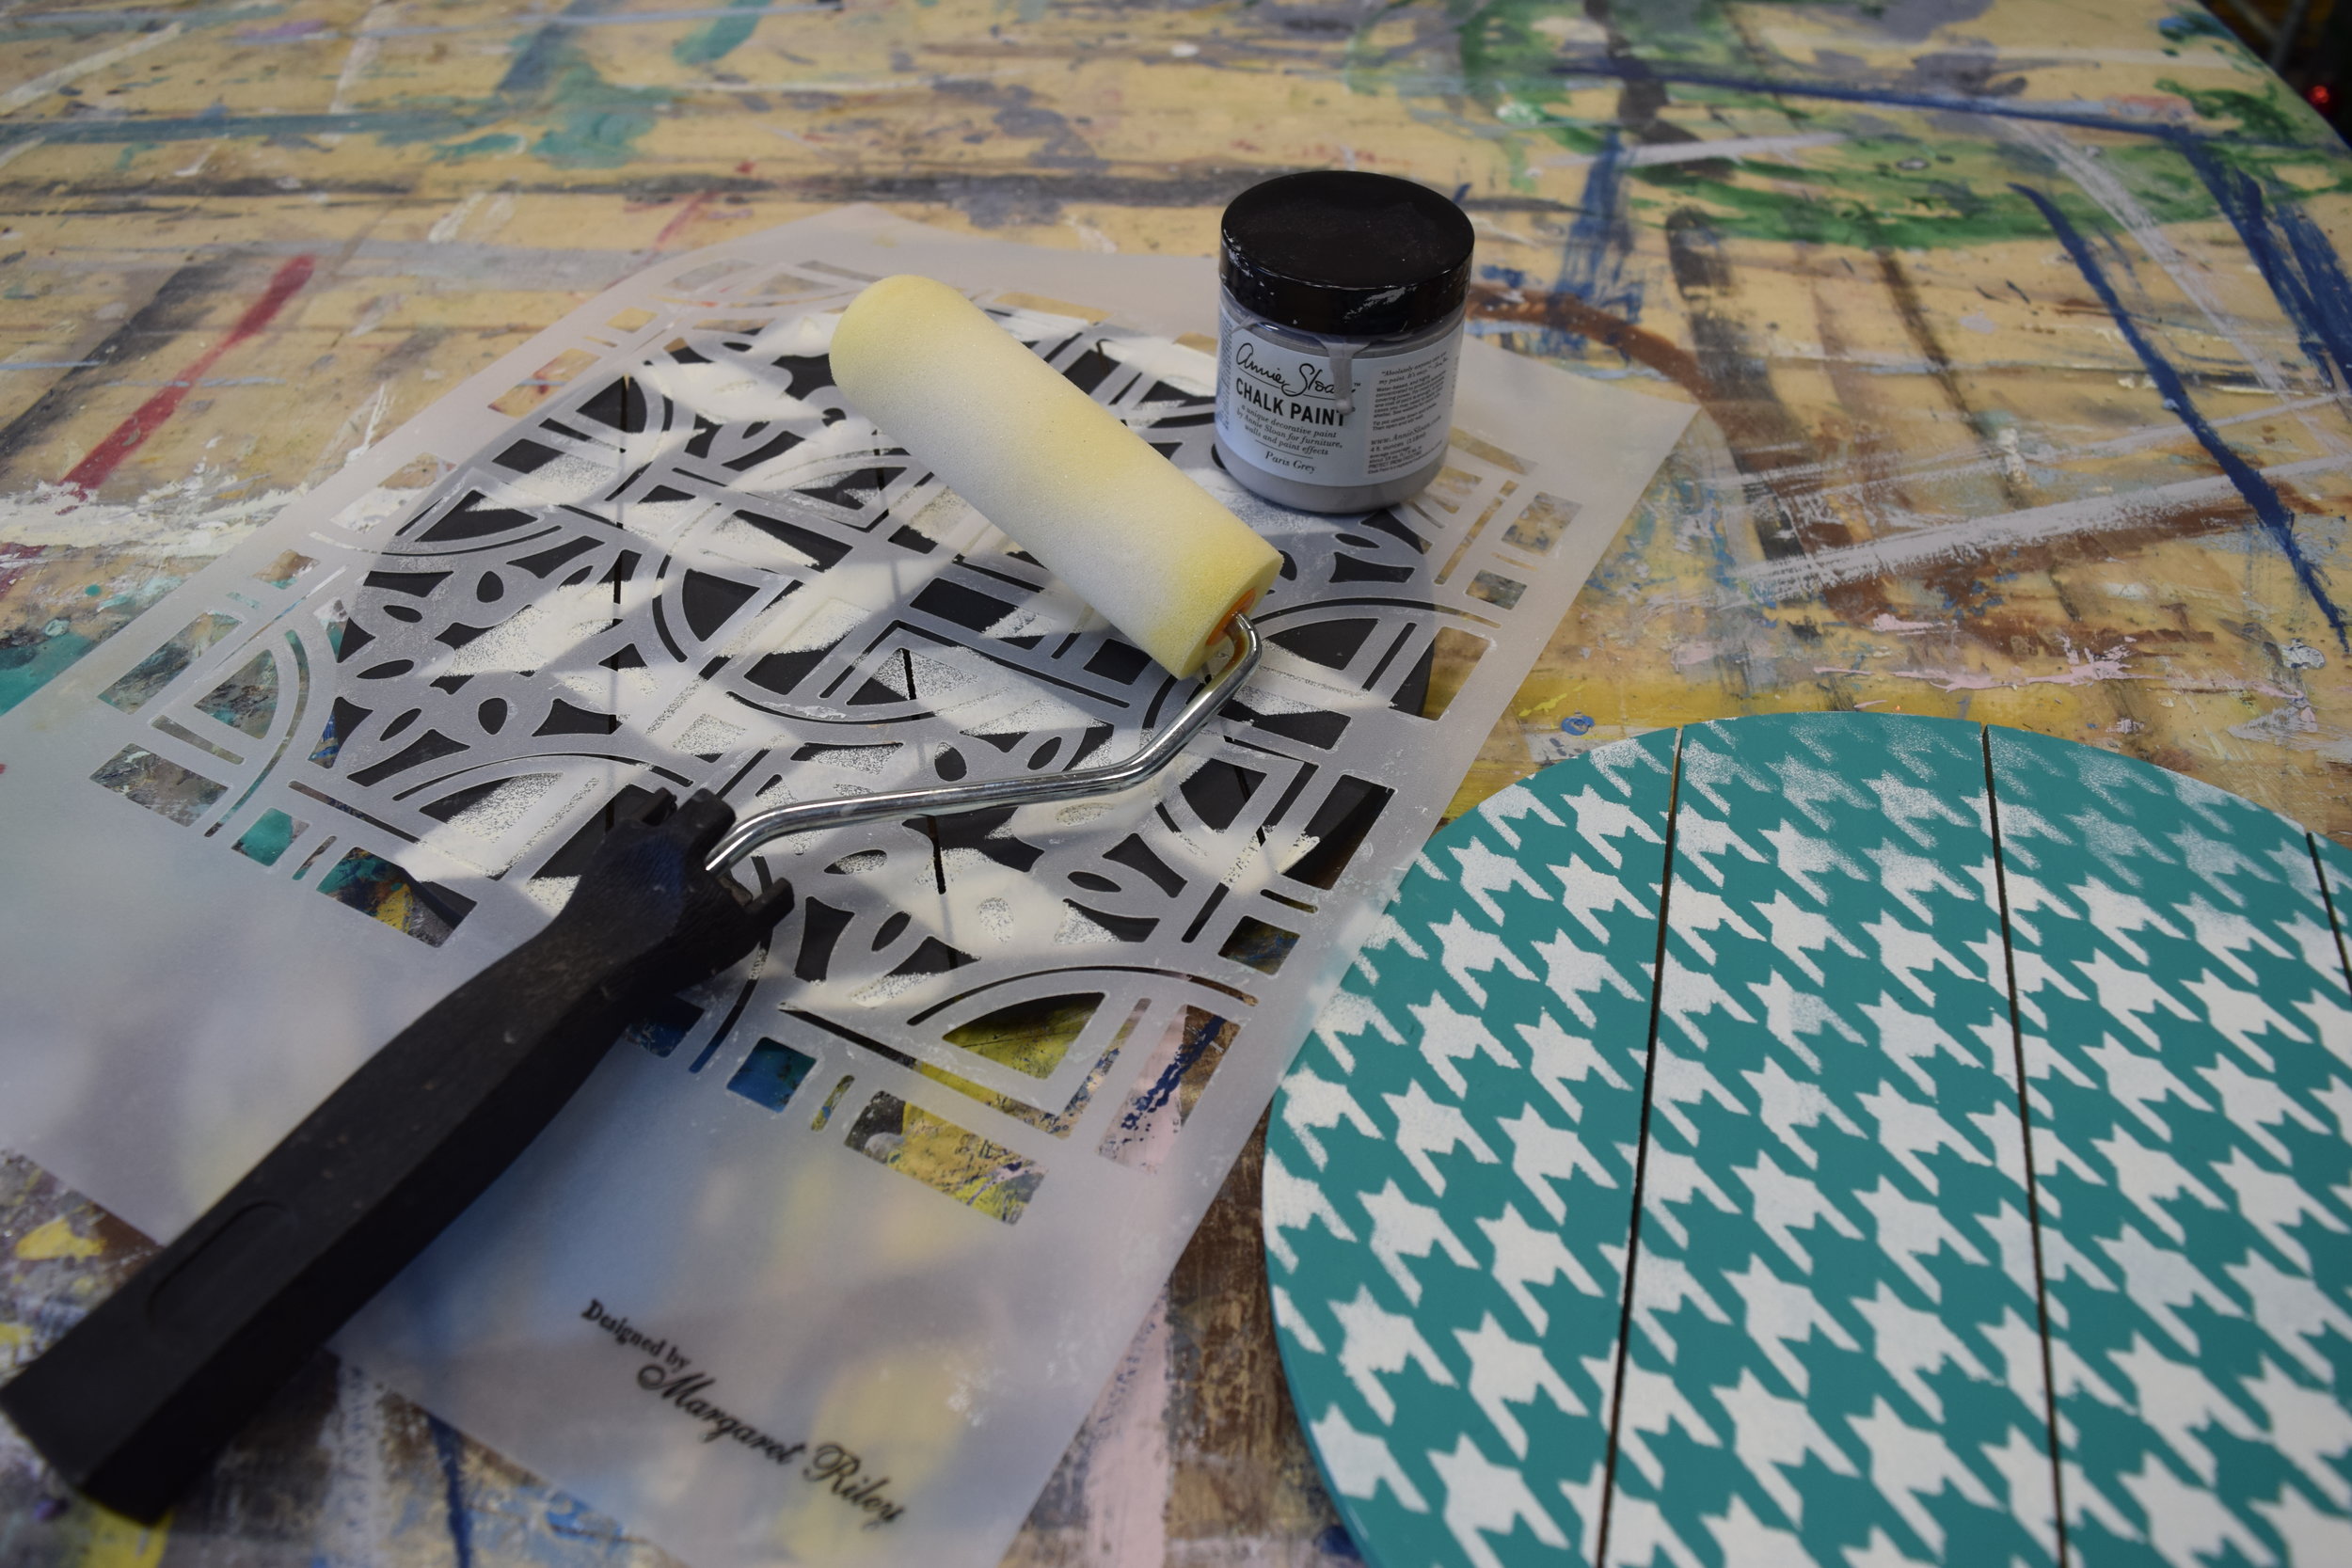 Your letter can be painted to compliment your background, think of the person this is for and what colours do they love? Have you seen their home? What colours do you see in their space? I used the same paint for the letters as the background, Chalk Paint™ by Annie Sloan.
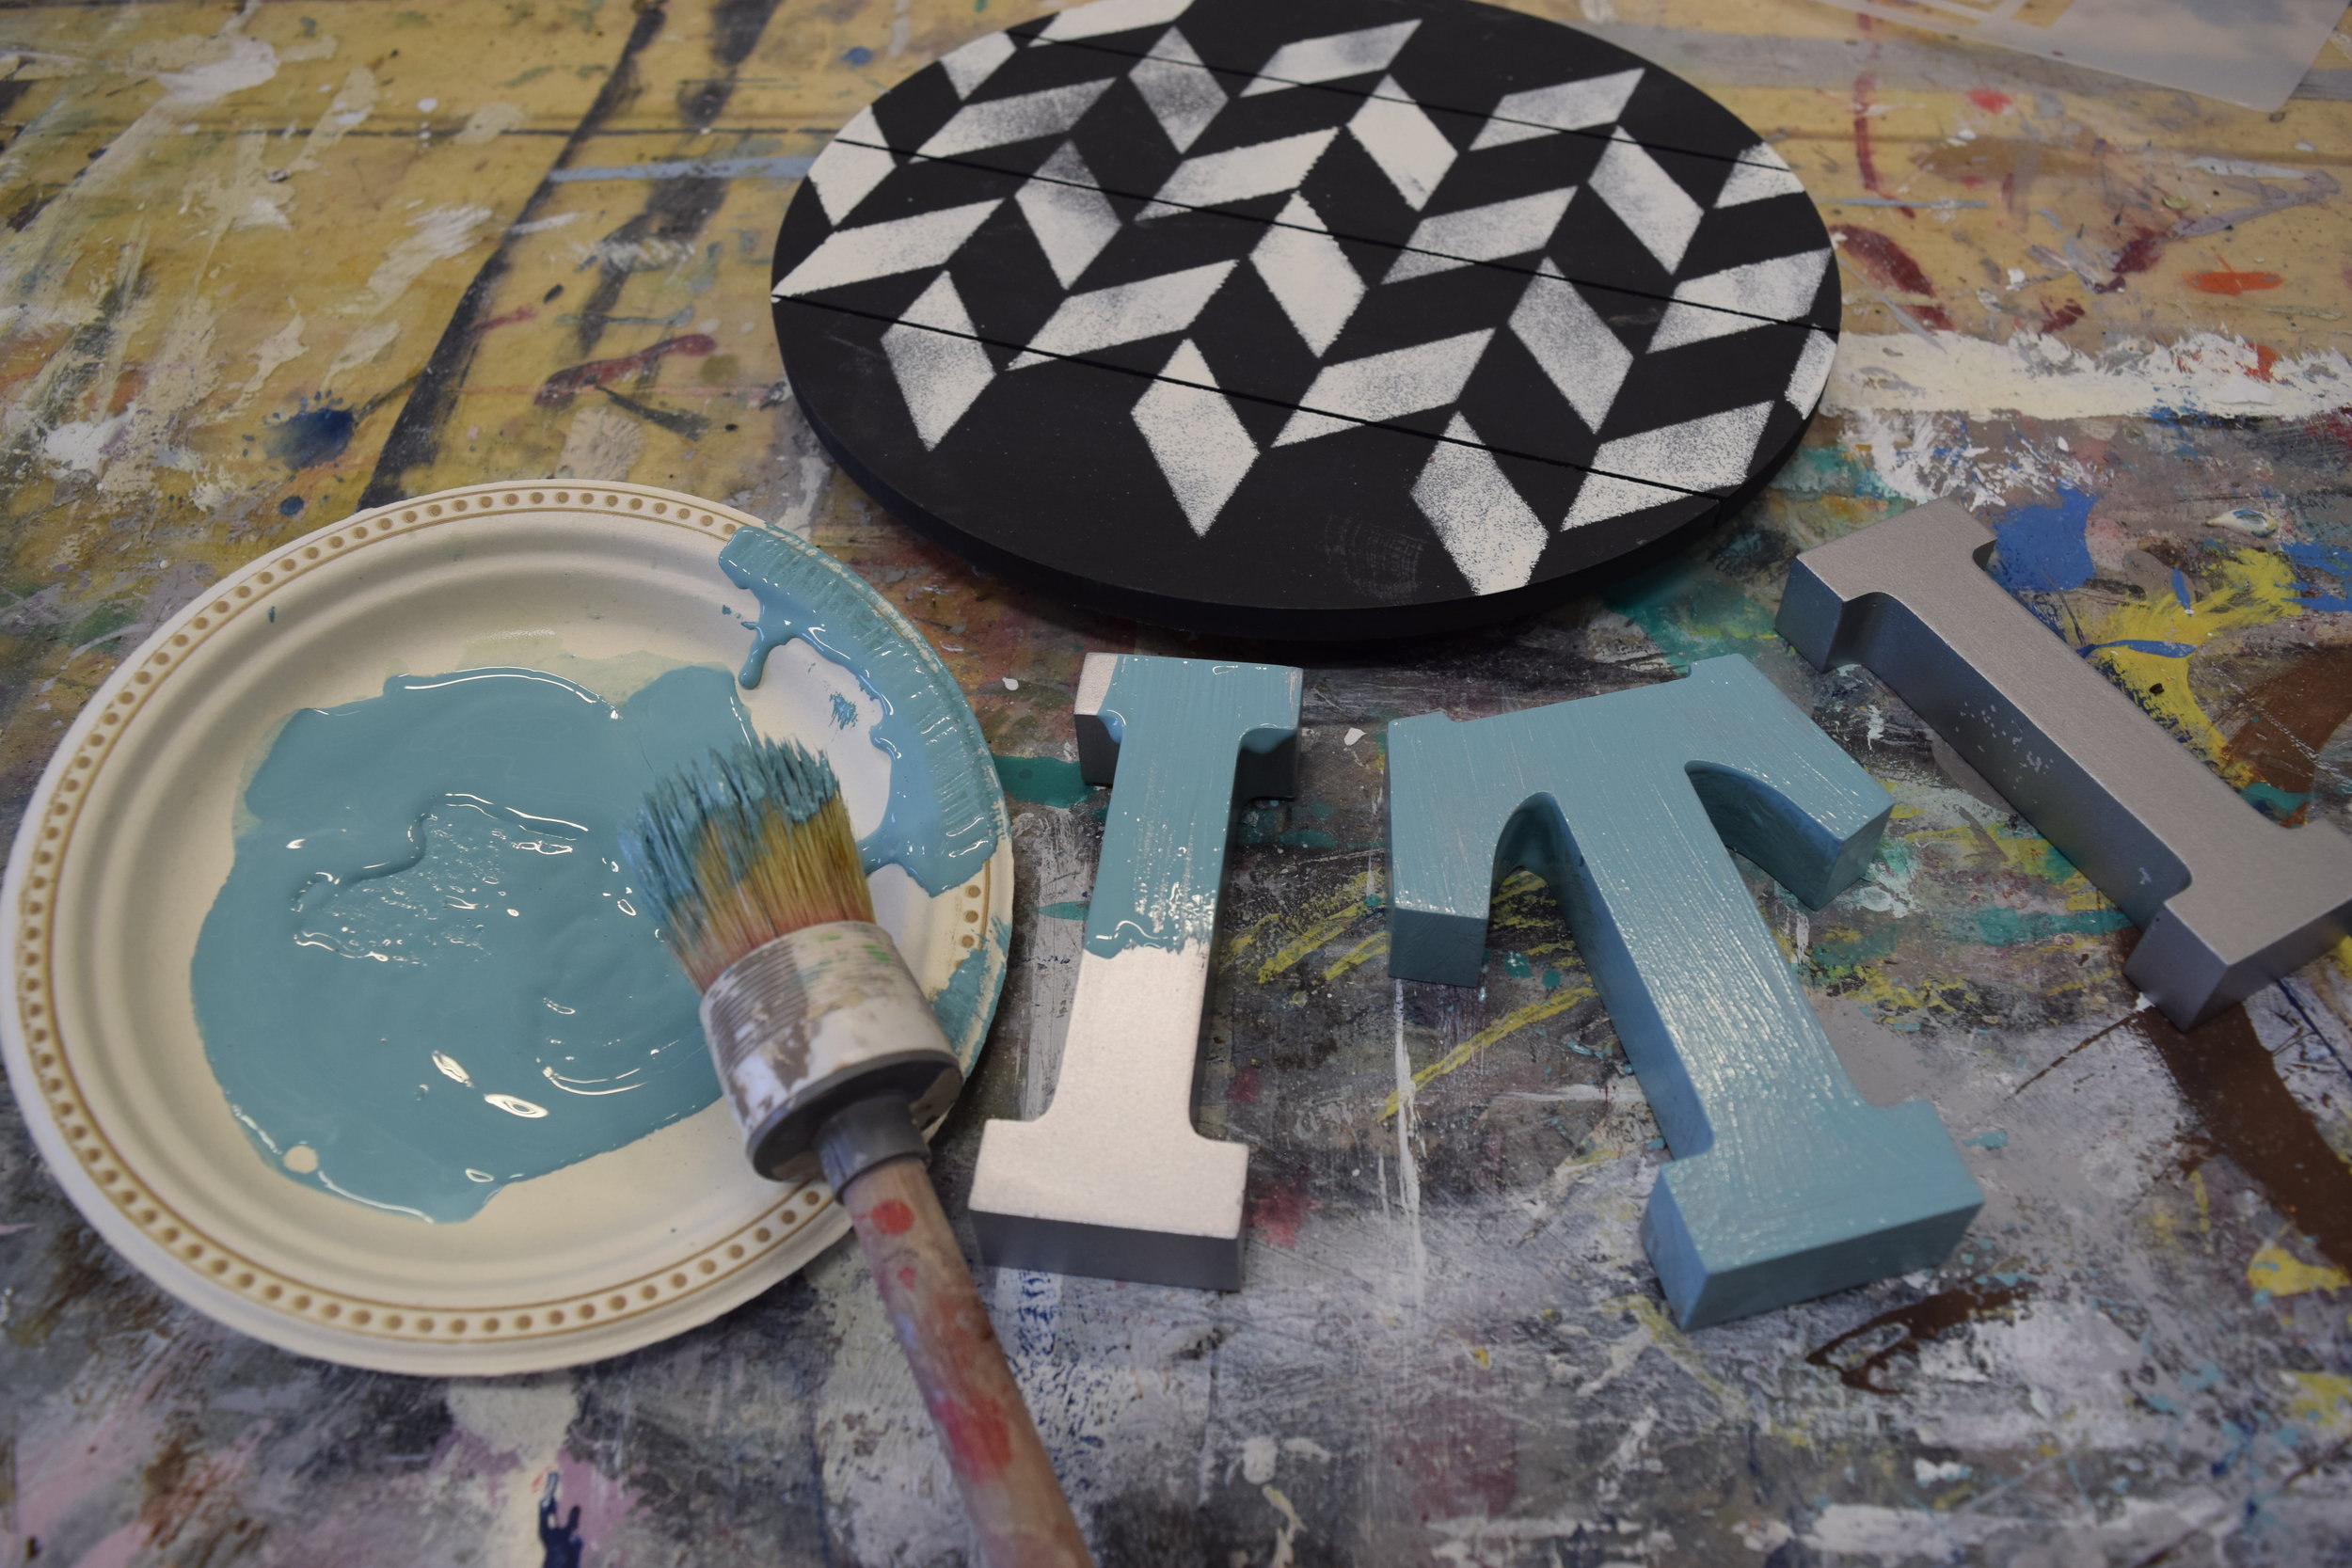
 To create a distressed look, take some sandpaper and sand the edges of your letter to wear away some of the paint. You can distress your background too! Anything goes so just have some fun!
 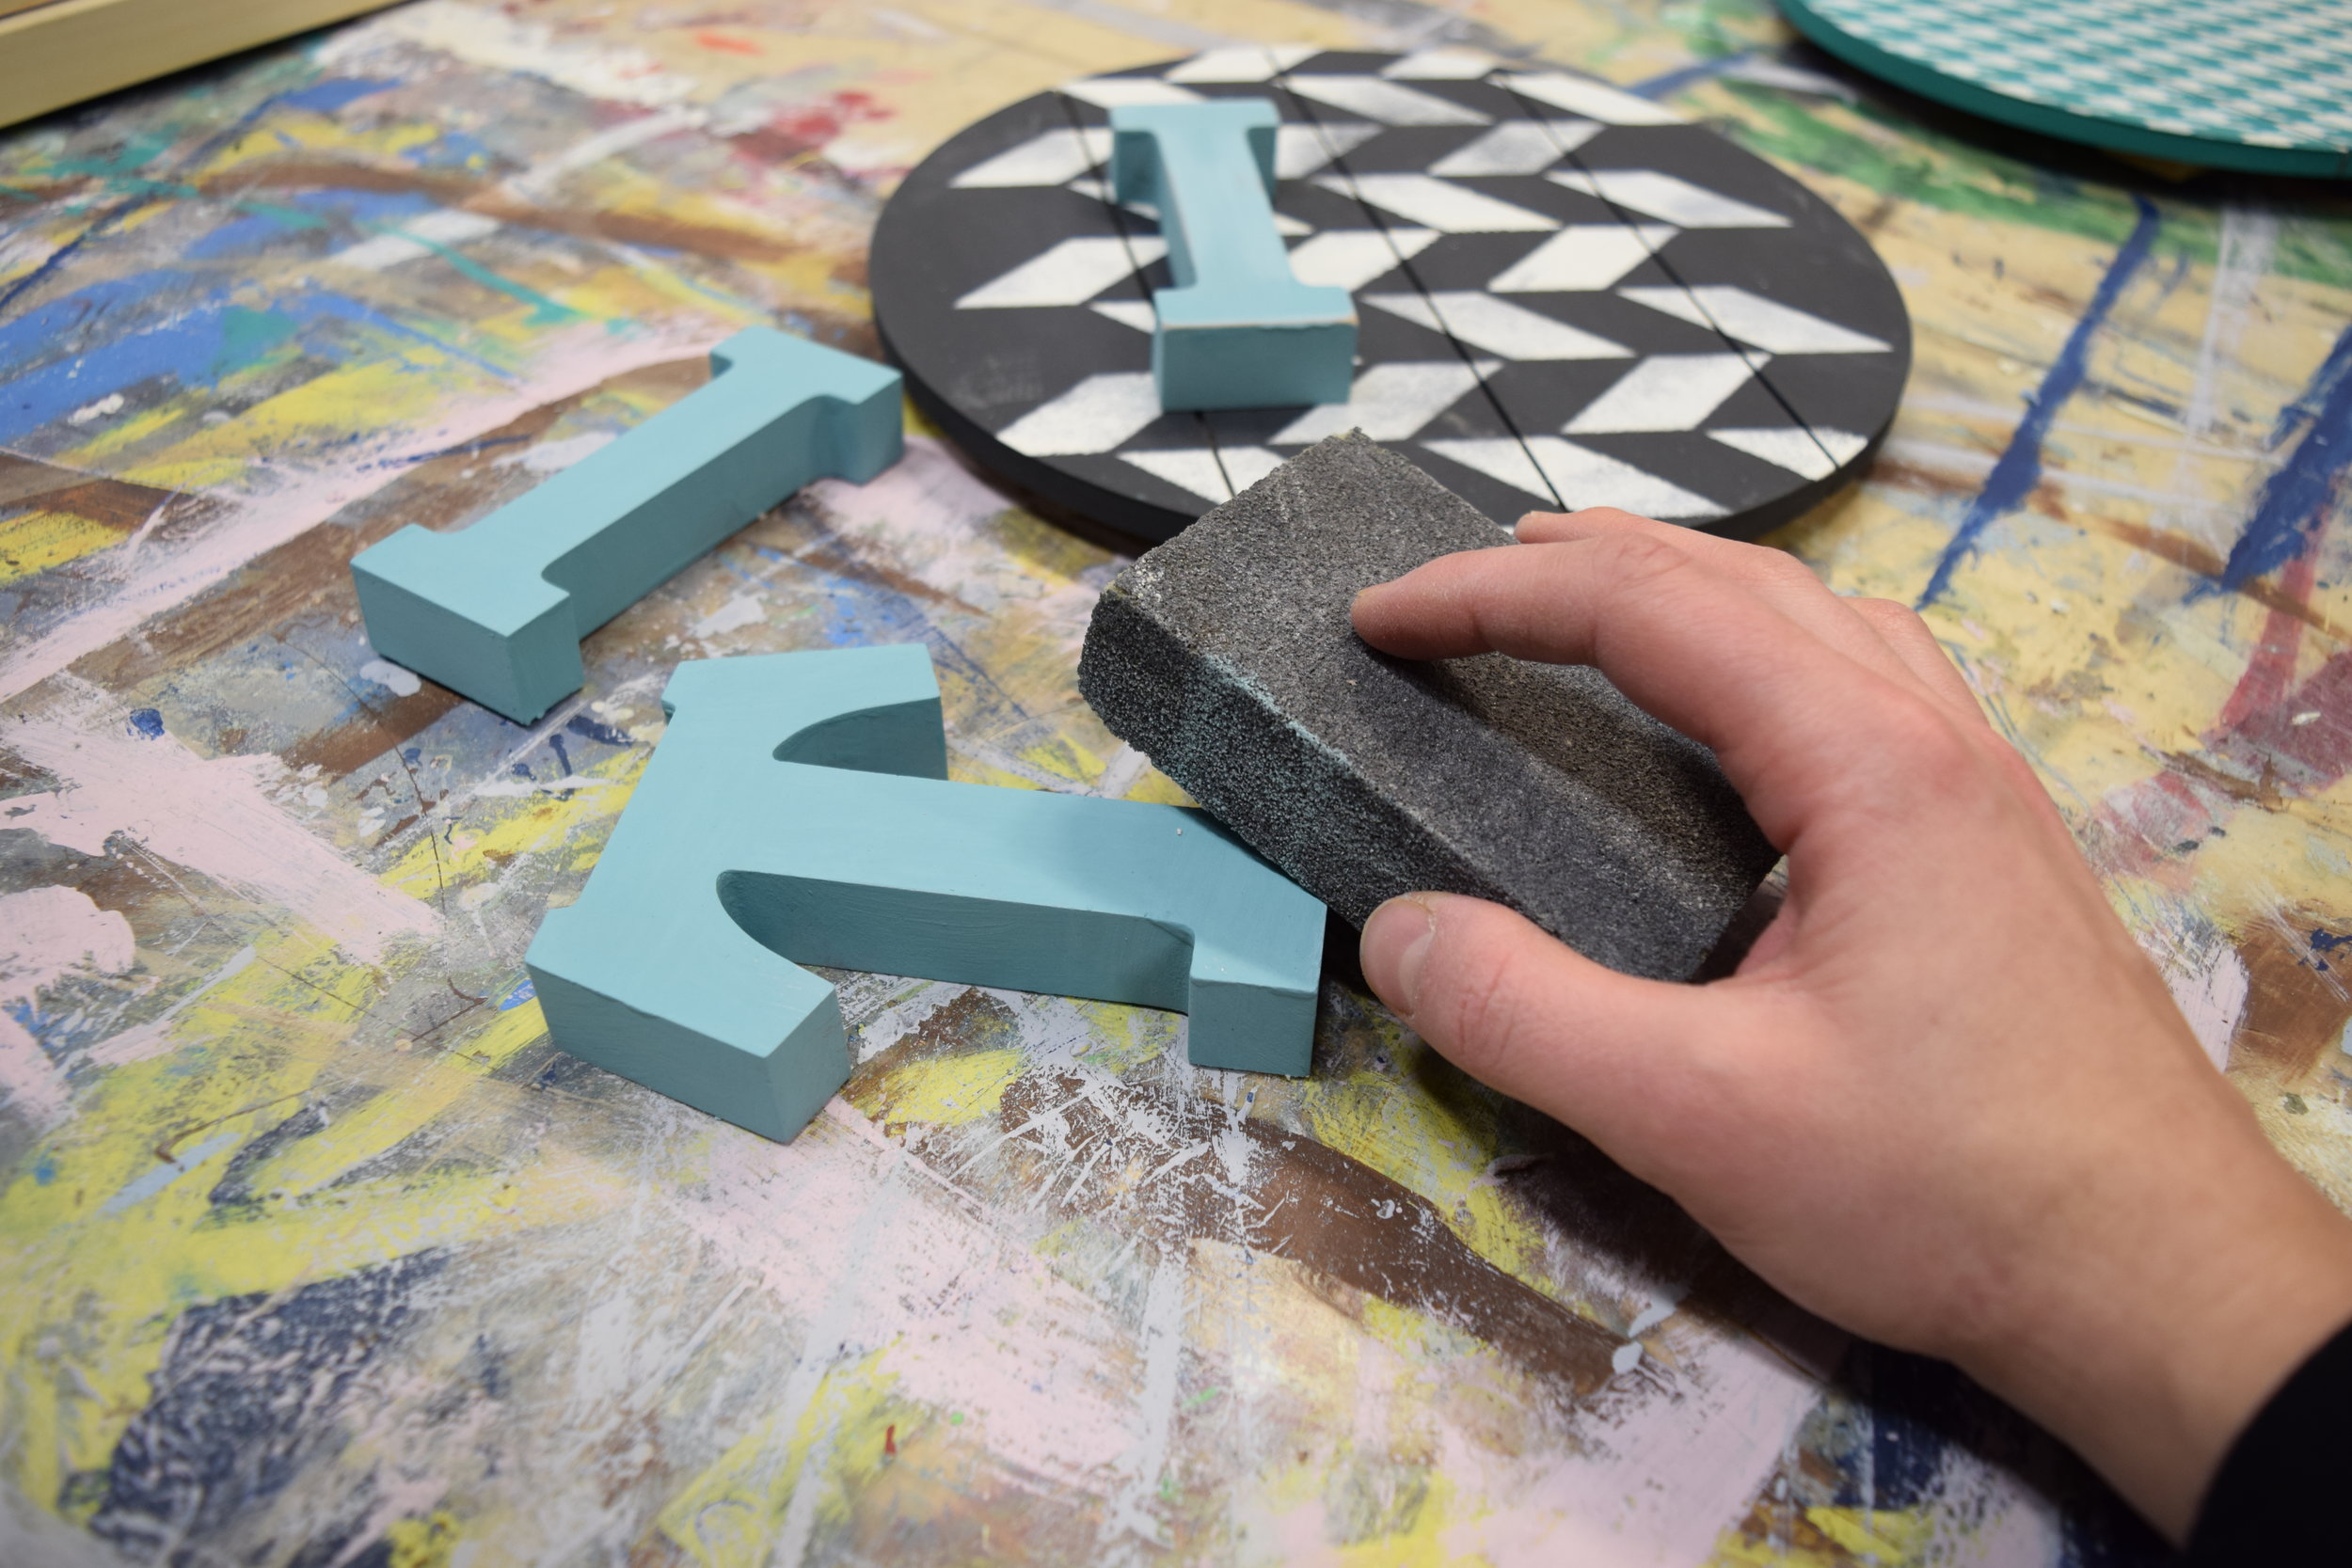 Here’s what the distressed edges of my letters look like, the underneath paint colour was silver and I can see some of the original wood showing through too.
 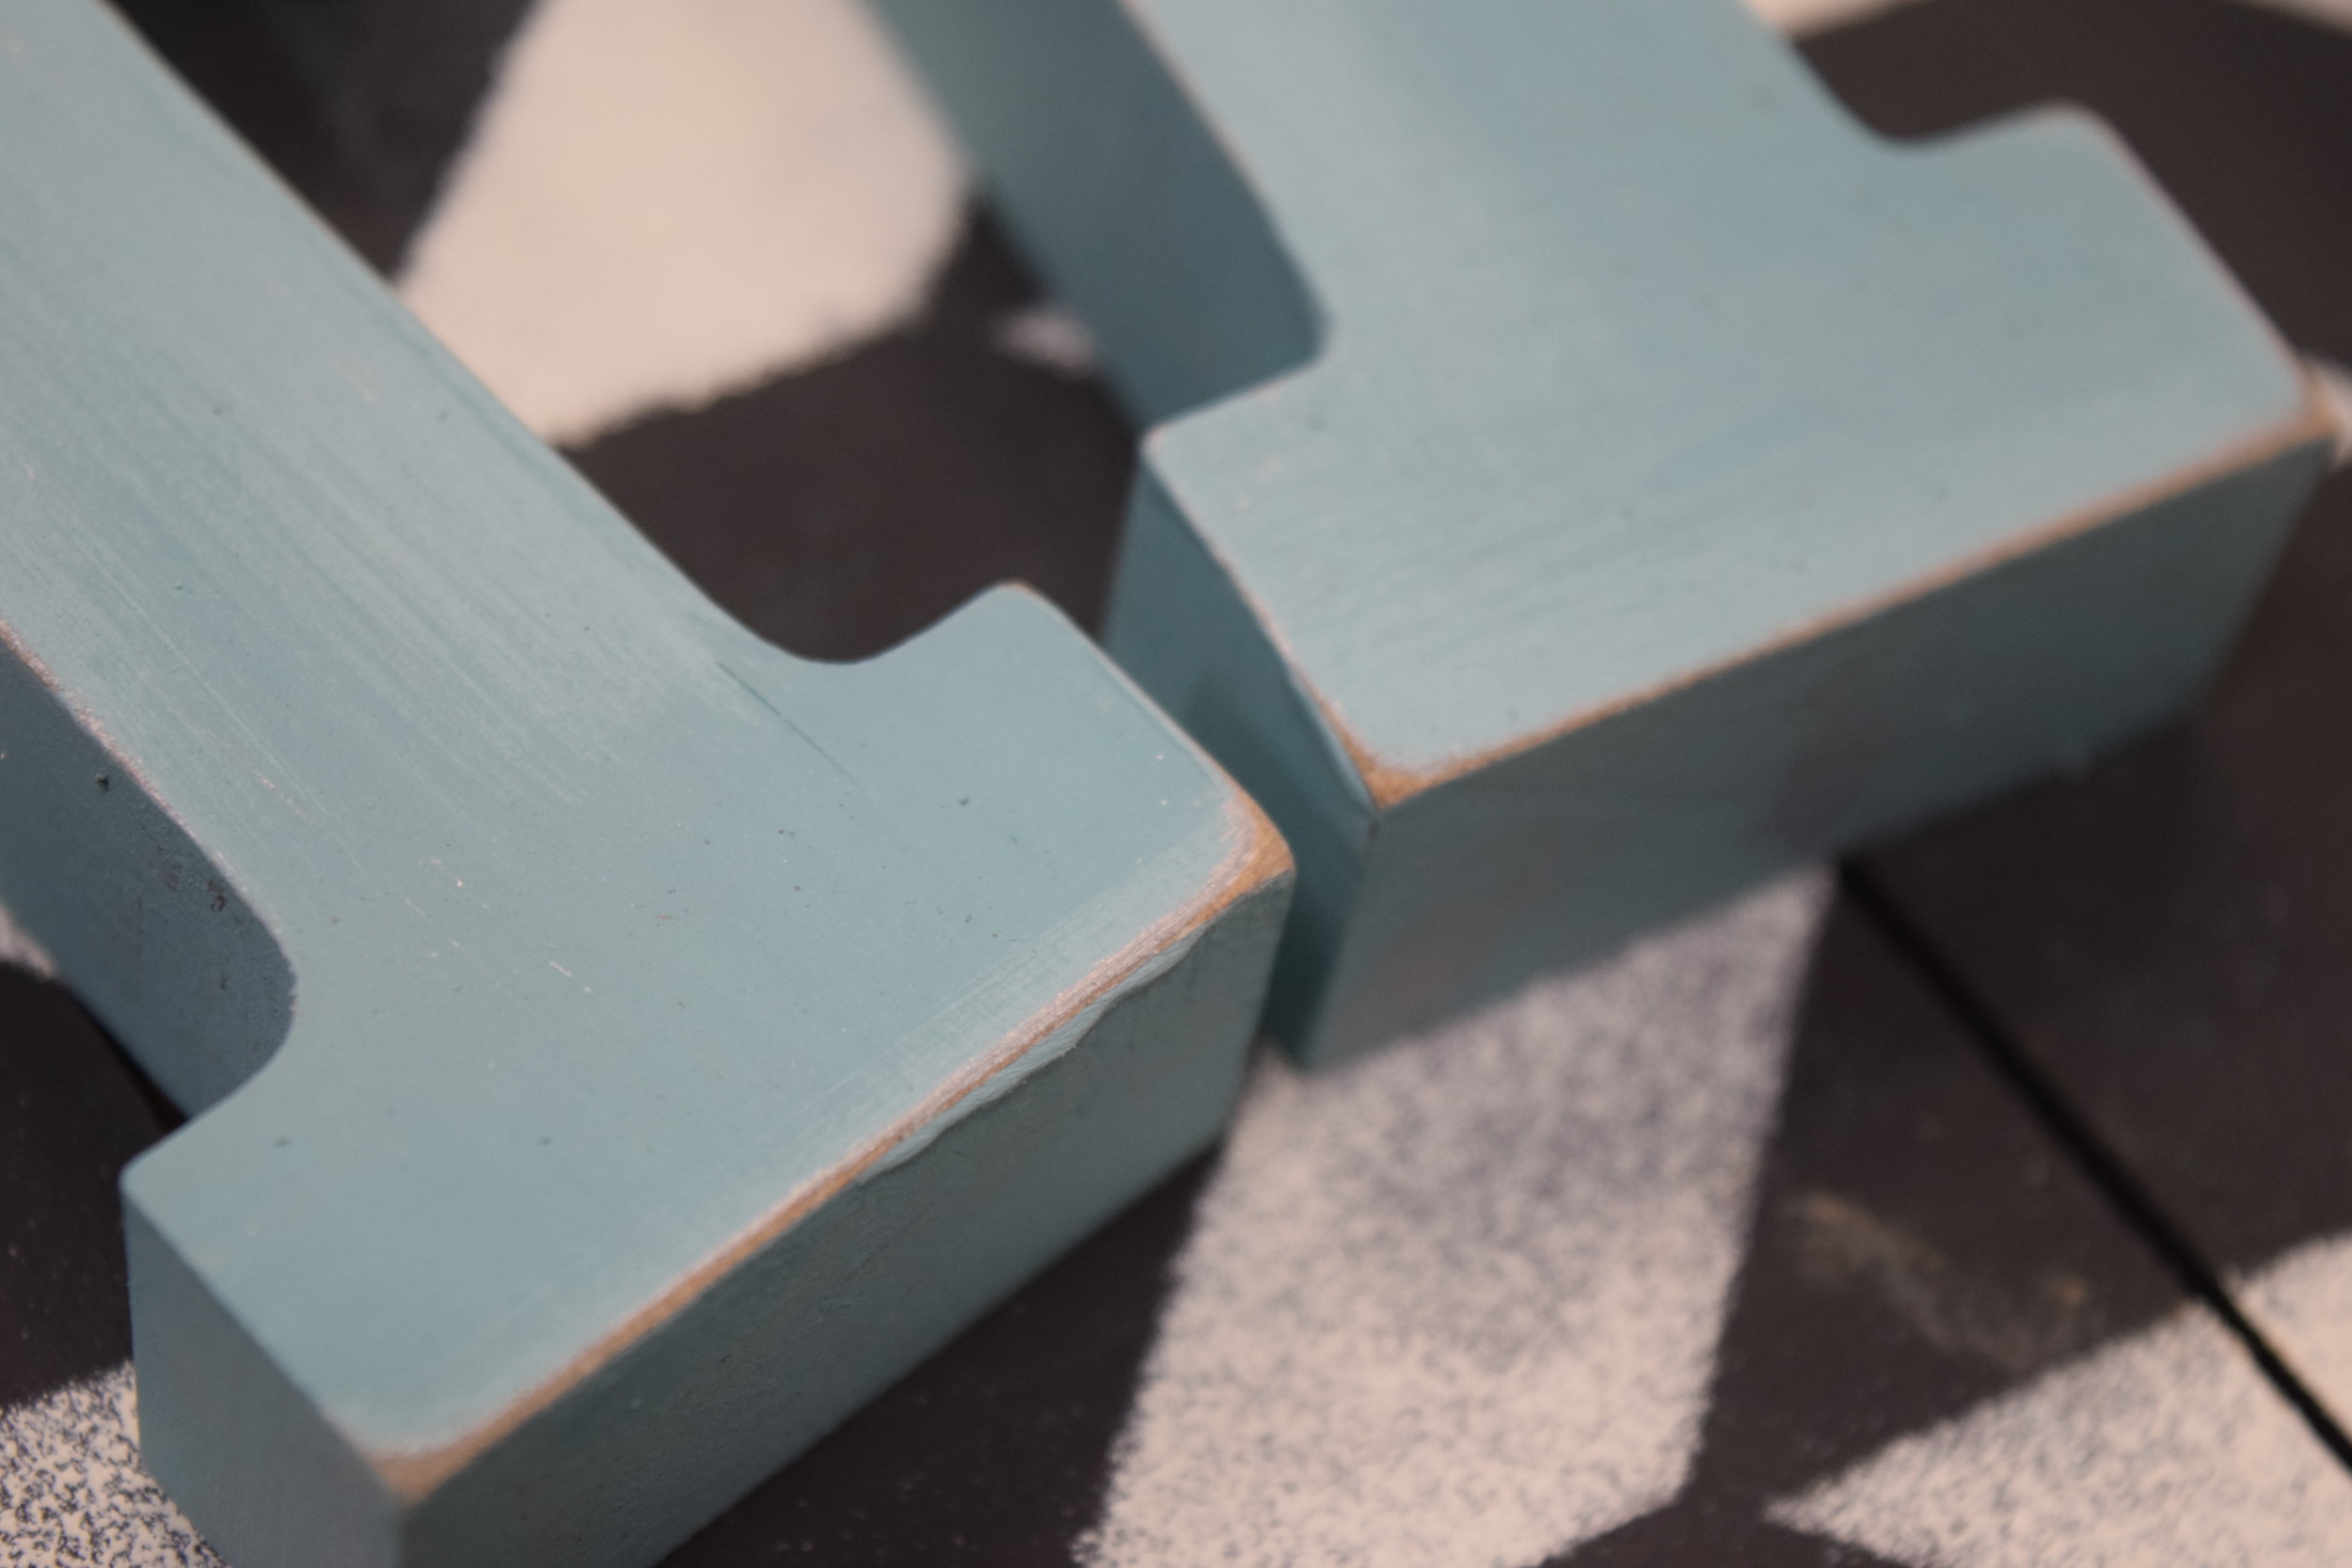 Once your letter and background are complete it’s time to put it all together. Depending on what your materials are made of will determine your glue. I went with Contact Cement because my letters had a paint coating and I wasn’t sure if wood glue would stick to that.
 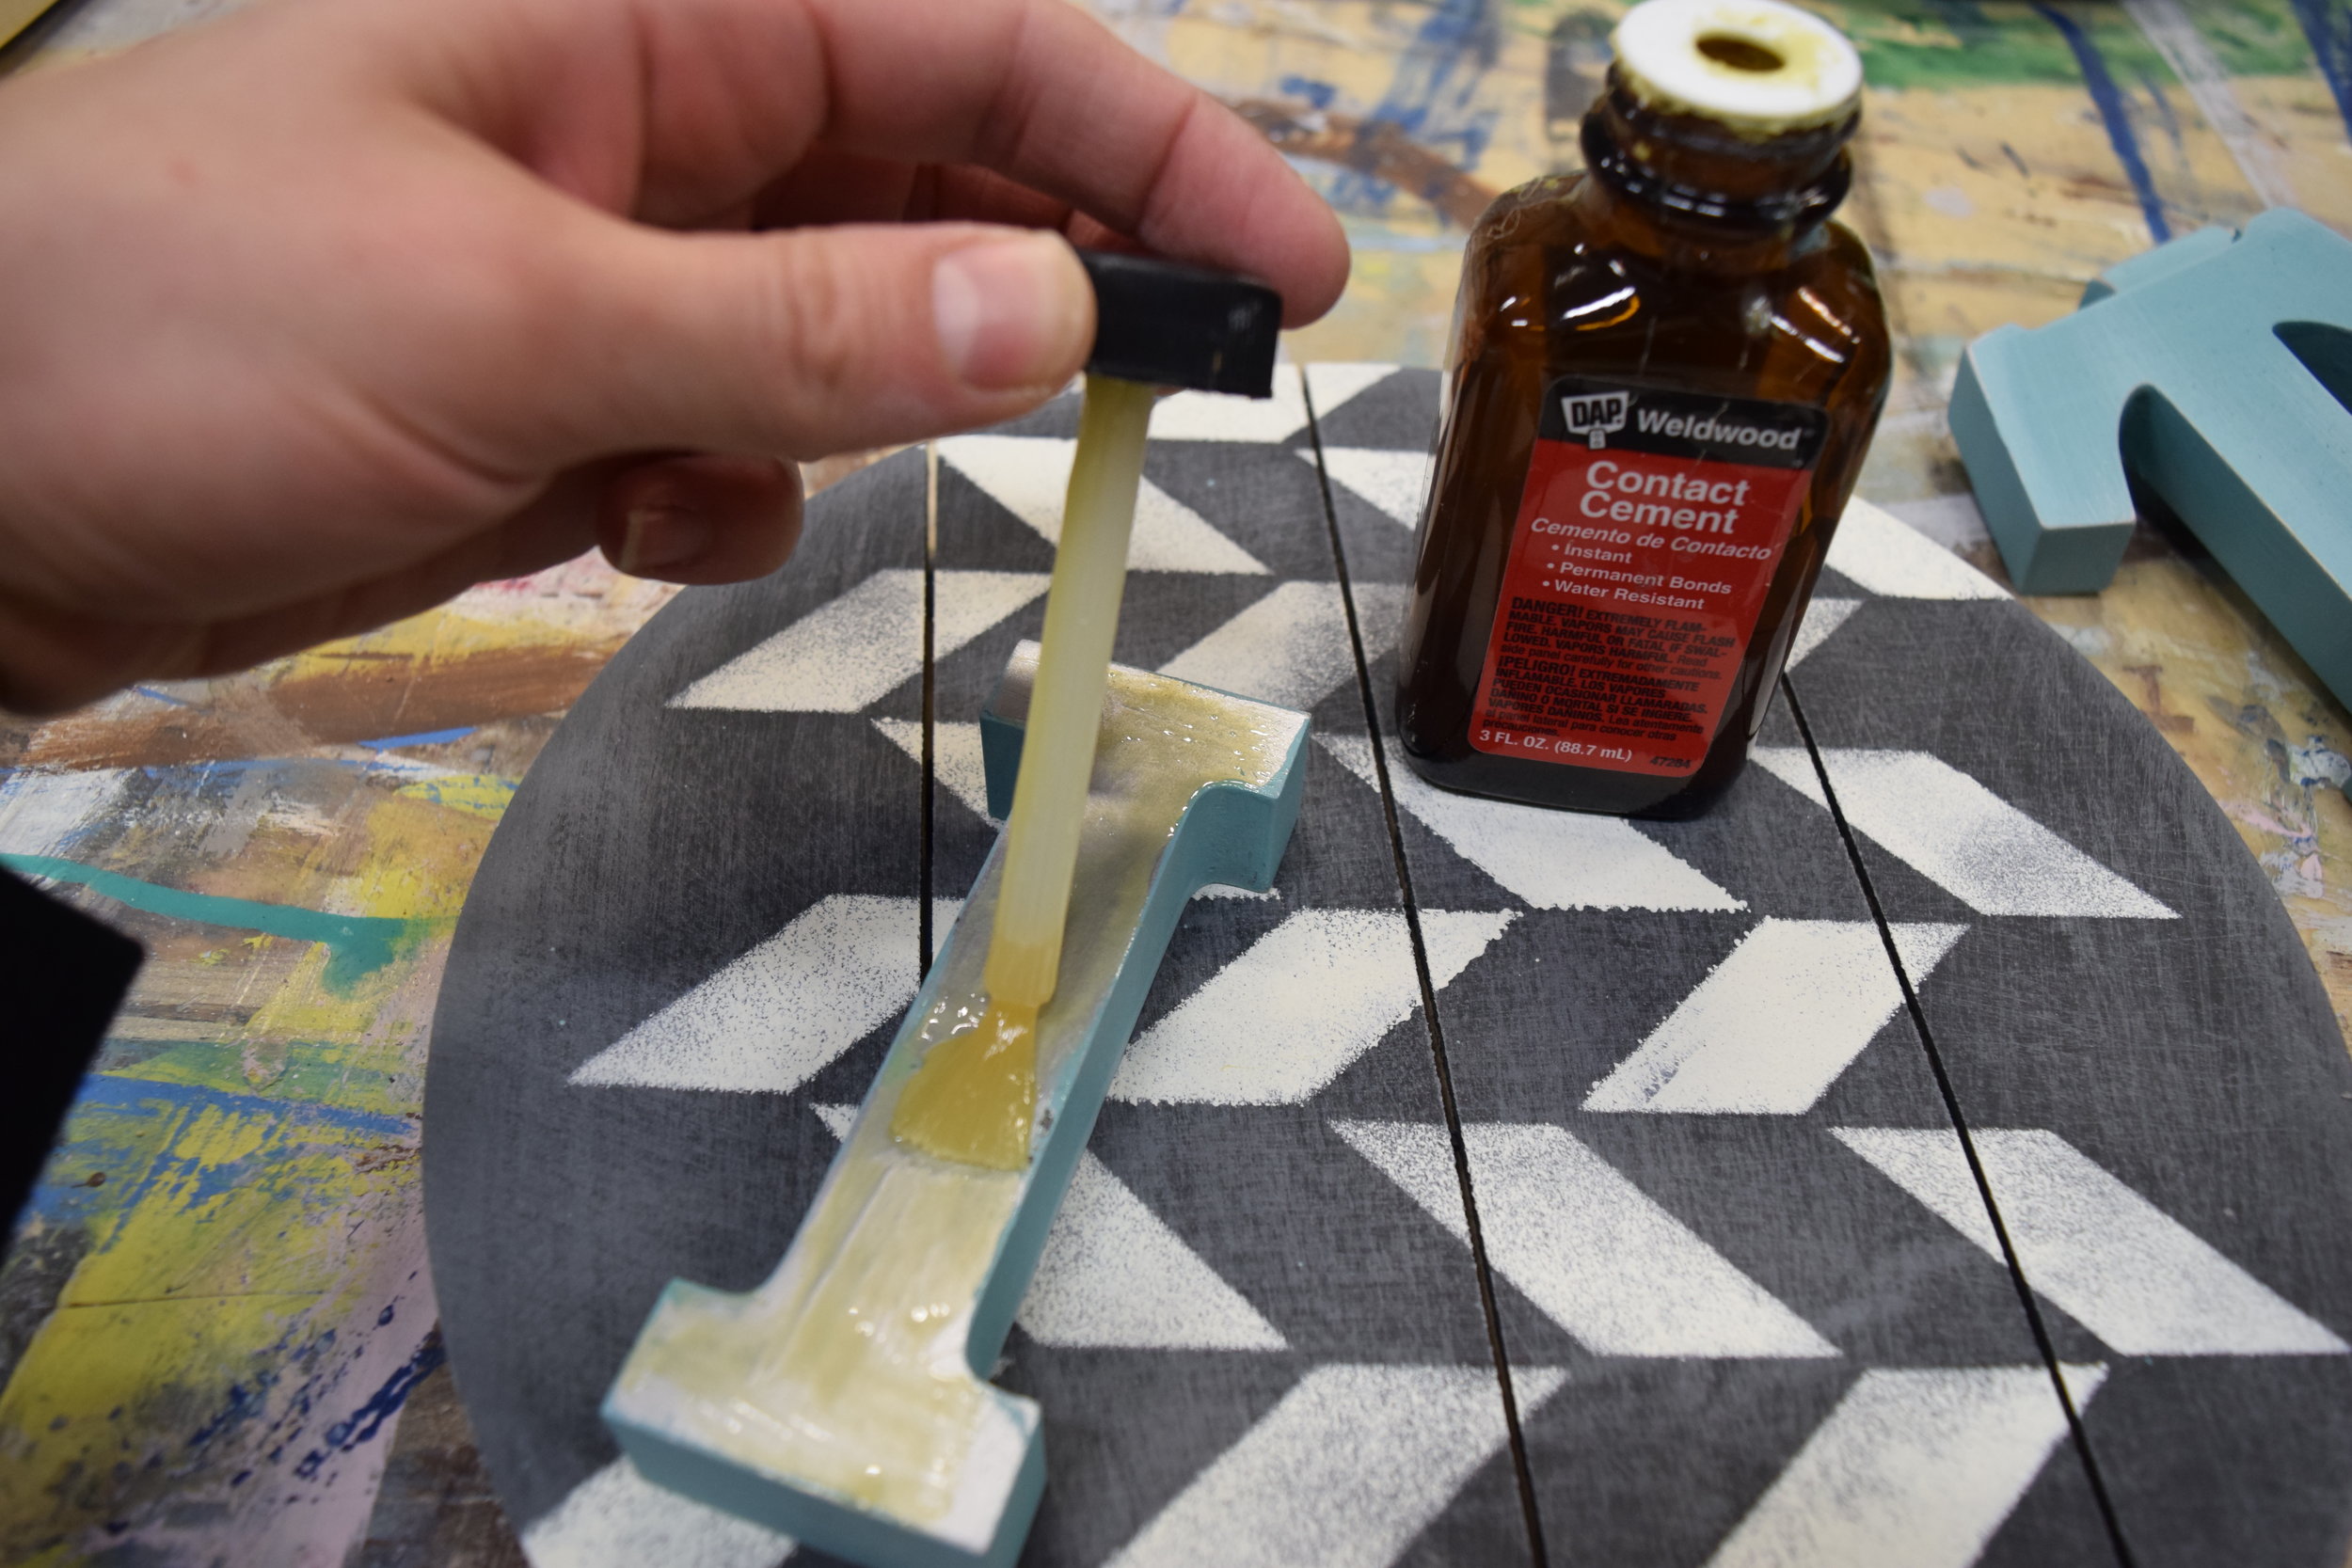 Voila! Project complete, here’s a photo of the one I made for our studio. ITI stands for Interiors To Inspire. Watch Kim’s Kitchen on Shaw in December to see Kim and I put together a monogram just like this for her kitchen.
 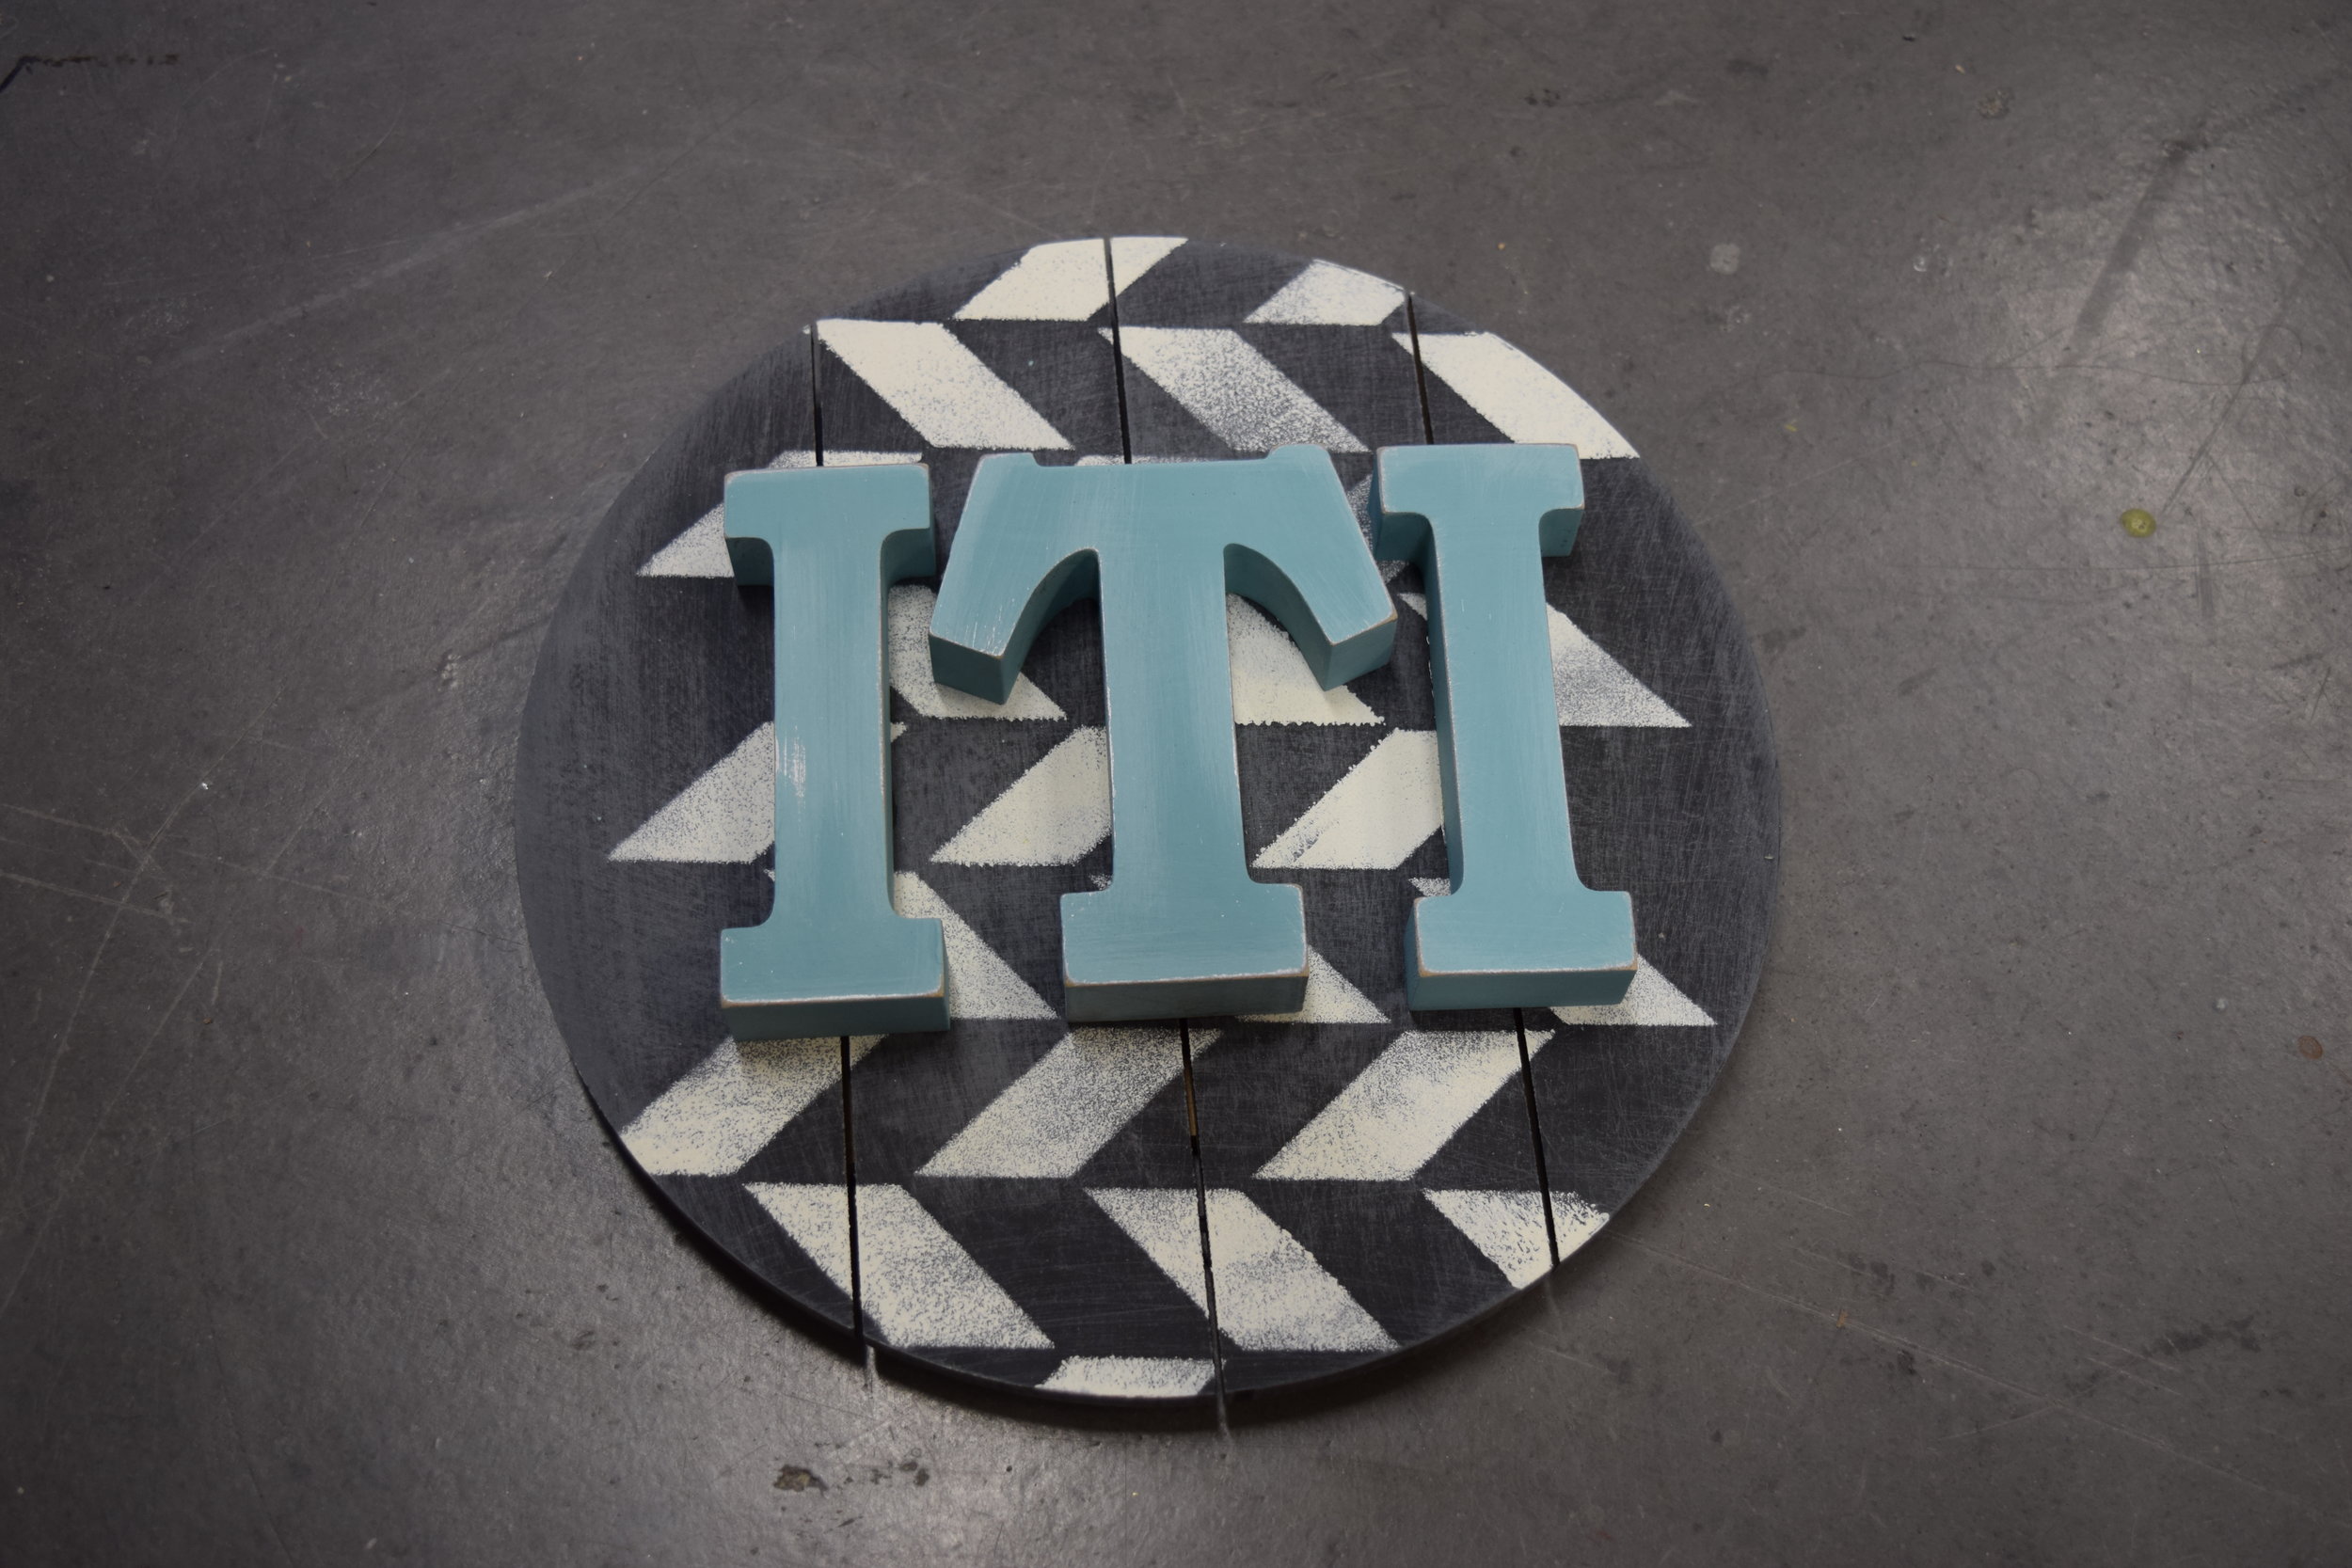 Here are some other monogram examples that I love. This rusty looking monogram art was created following similar steps, the background is 3 strips of wood I cut and glued together. The W is coated in a special paint that makes it look like rusted metal!
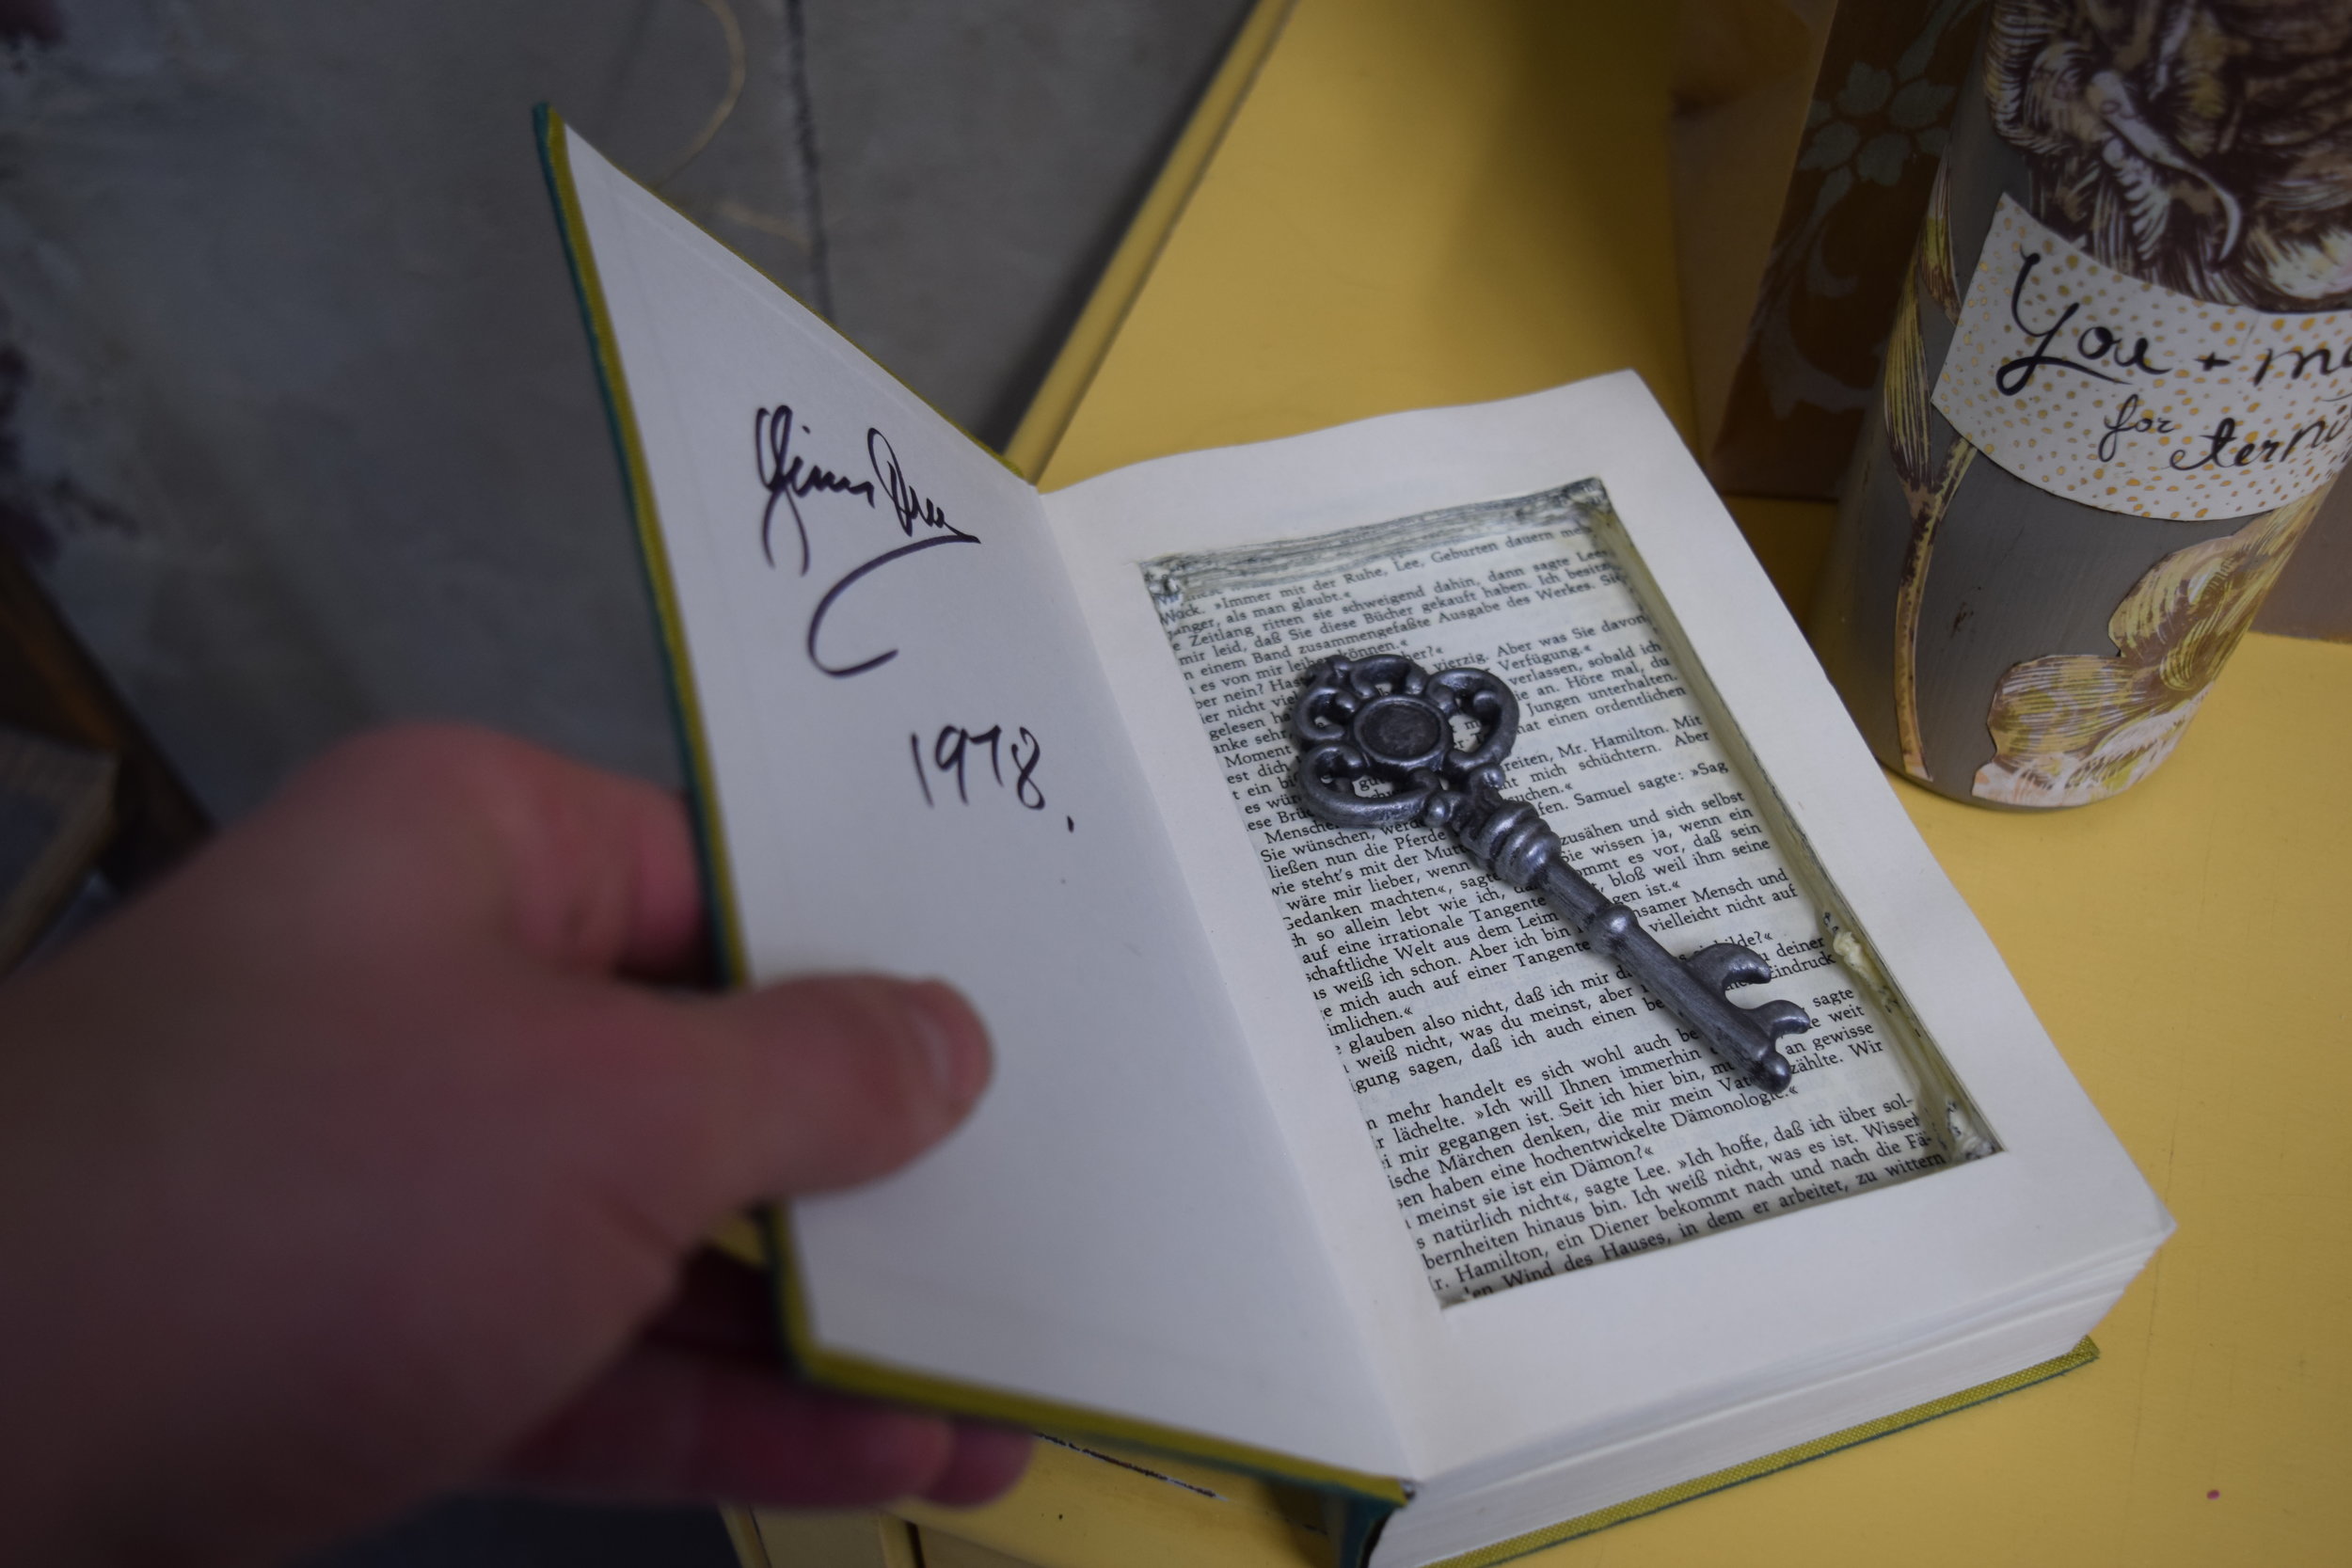
 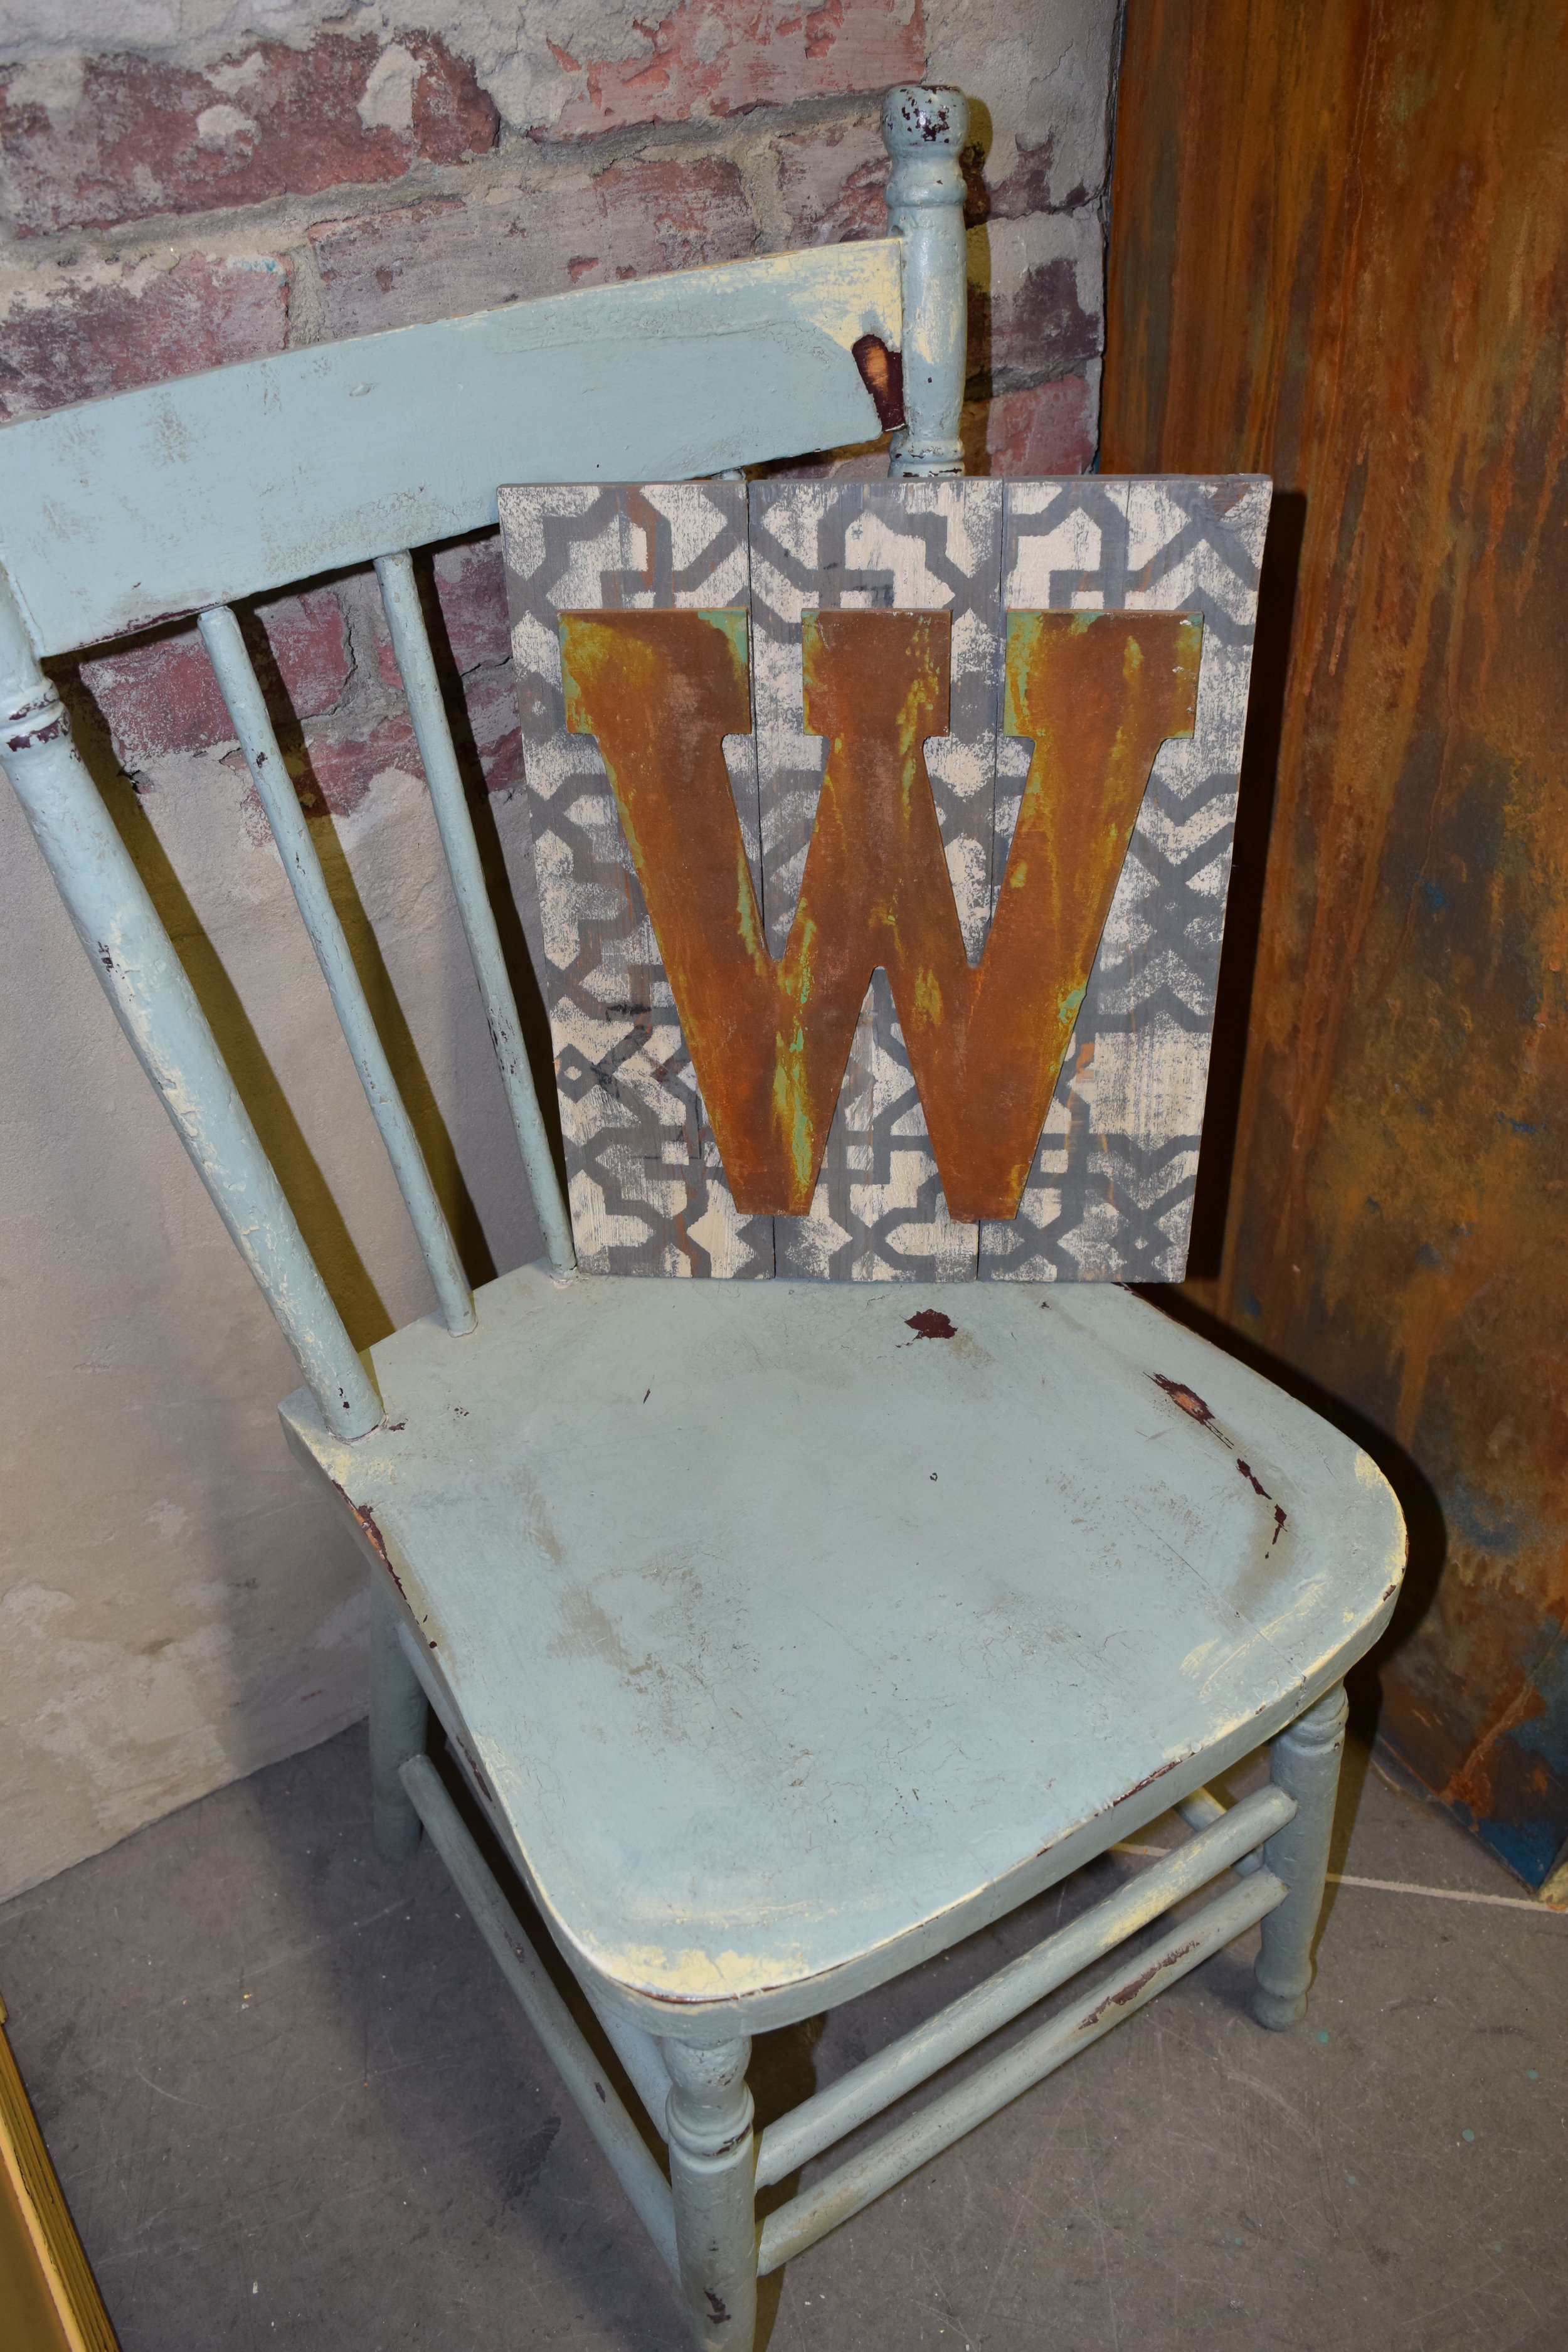 And check out this old book. The cover was painted green with Chalk Paint™ and then a “K” was decoupaged (glued) on top. When you open the cover you’ll notice that I cut out a secret compartment to store your treasures! Perfect for your entrance table to hide keys or nightstand where you store your rings at night!
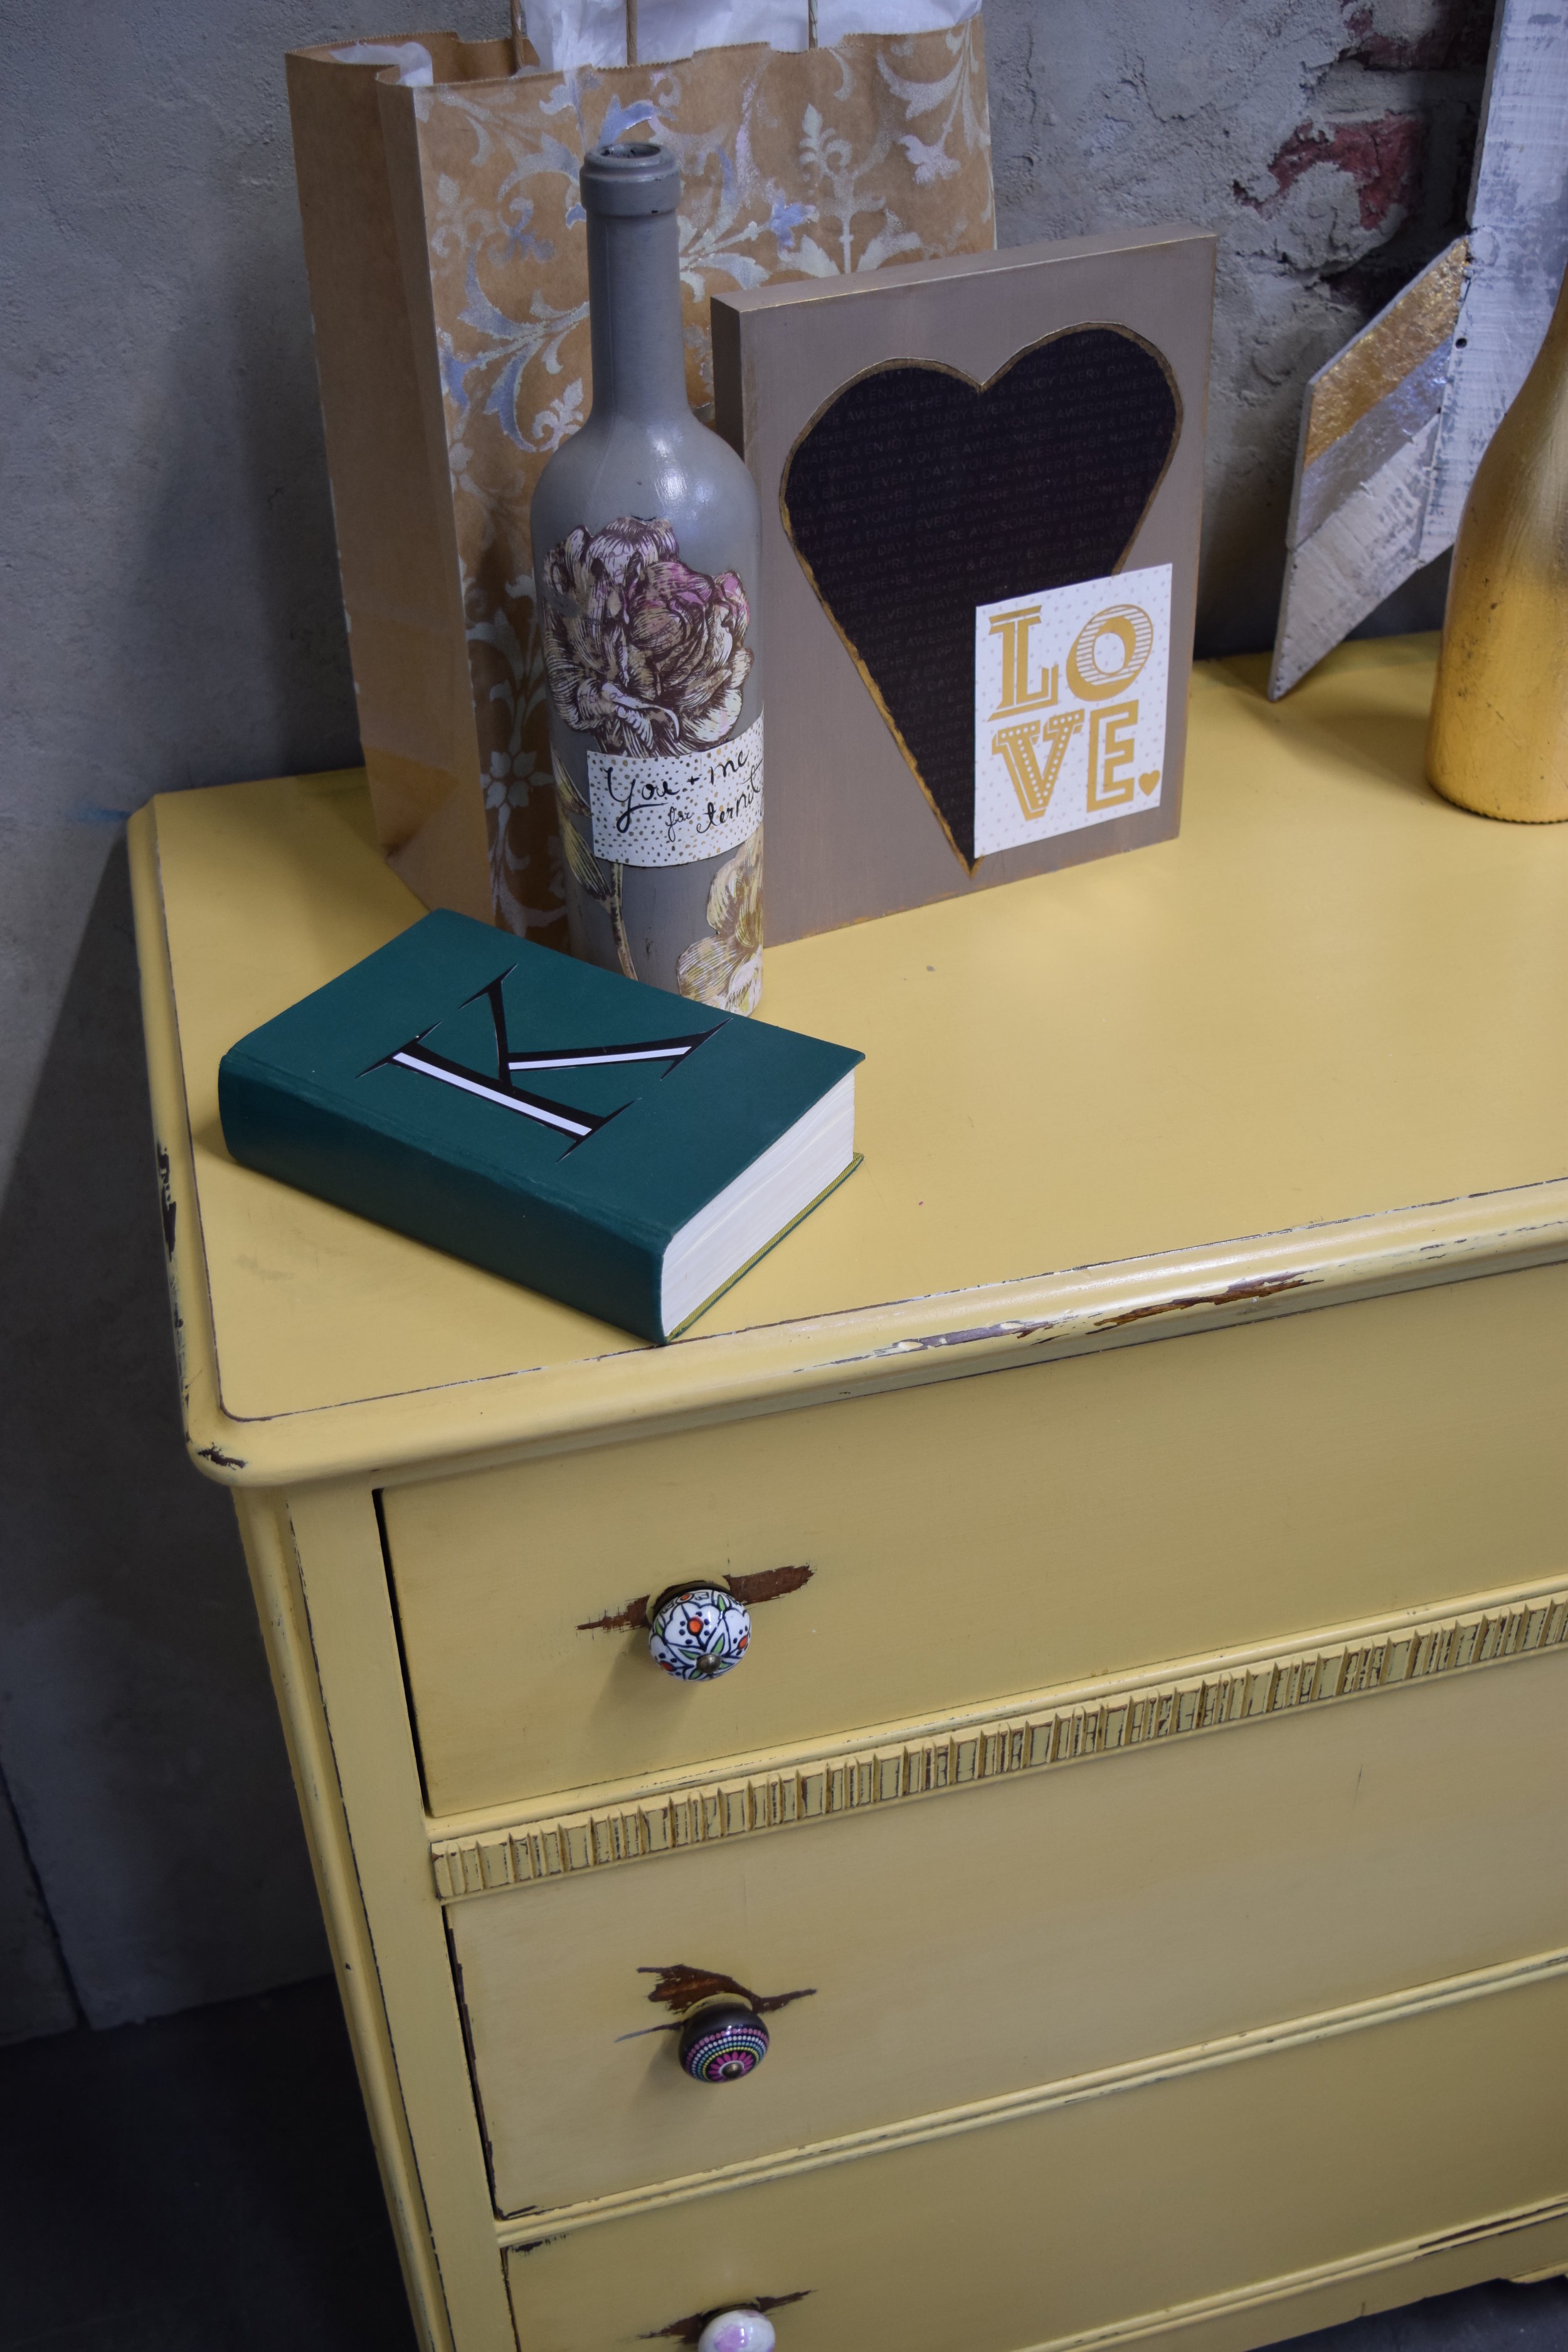
 Now it’s your turn to get creative, I hope this post has inspired you to get crafting and make your gifts this year. Need a place to put your project together? The Paint Bar at Interiors To Inspire is fully stocked with paint, brushes and all kinds of fun supplies. Call me to book your seat 403-243-7433! Bring a friend and spend an afternoon crafting together we’ve got lots of tea, coffee and treats to keep you going! Let me know how I can help you with your homemade gifts, Cheers!Deanna