
Create a Industrial Metal Finish
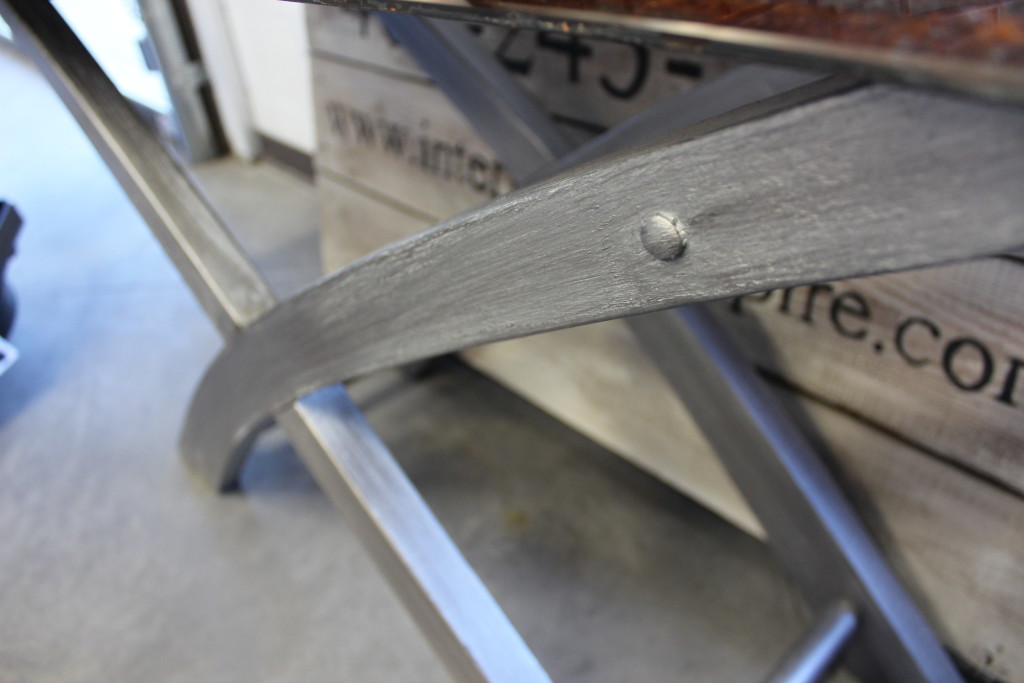
In the steps below, we're going to teach you how to create your very own Industrial Metal Finish! Your first step is to find a piece of furniture. We chose this funky console table and decided to finish the base which is shaped like a giant X. You can choose whatever you like. Remember, Chalk Paint™ sticks to almost anything so don’t worry if your piece is not solid wood or already has an existing finish on it.We invite you to bring your own small piece into the studio and use The Paint Bar to play and experiment with any and all of the products mentioned in this post. Our space, products and tools are all available for your use for just $15/hour. Click here for more info.Let’s get started…What you’ll need:Graphite Chalk Paint™Annie Sloan Large Flat BrushPearl Plaster by Artisan EnhancementsTwo 2” Chip BrushesGeneral Finishes Pearl Effects (Metallic Paint) colours Bronze Pearl & Argentine PearlA piece of furniture! Whatever you like!Step 1: Use your Large Flat Brush to base coat your piece with Graphite Chalk Paint™. Create long linear brush strokes that all move in one direction. Keeping your strokes in one direction will help give the illusion of metal grain. If you’re thinking “What? Metal has grain?” just think about your stainless steel fridge; next time you go to grab a snack notice how there are lines all moving in one direction. Please don’t confuse this with wood grain, you will not see any knots or rings. Make sense?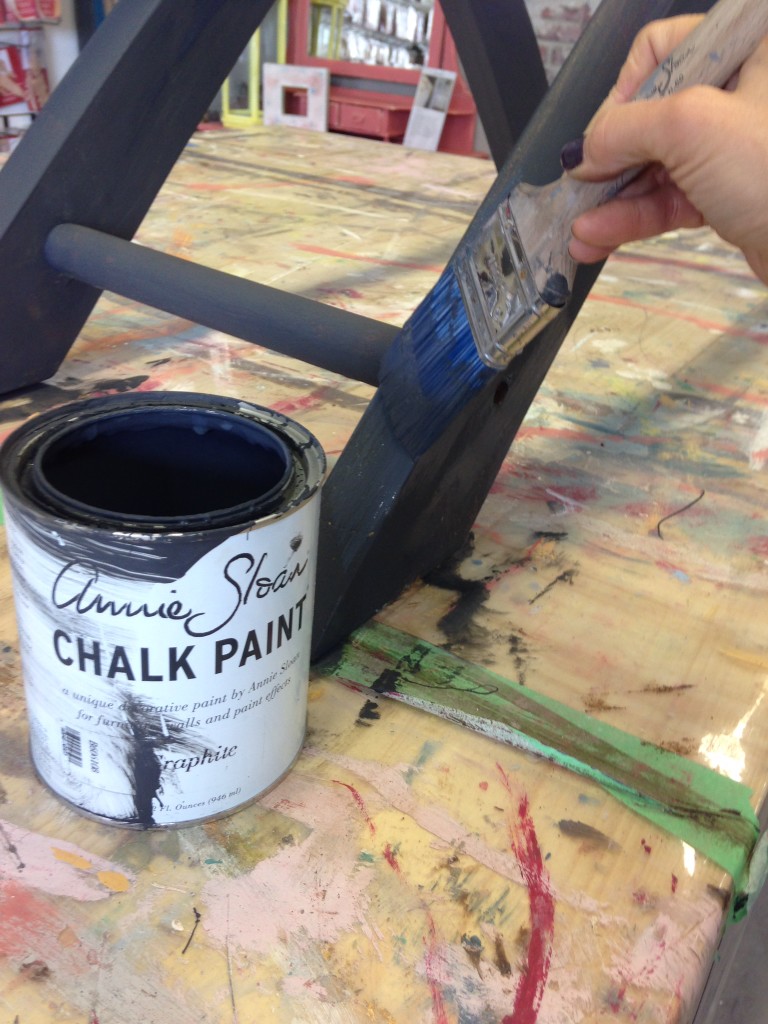 Ok, back to our Graphite. Paint on one coat and let it dry to the touch. It will take about 30min – 1hr. Once dry, apply a second coat (same as the first) to get a more solid coverage. Let the second coat dry.Clean up: wash your flat brush with warm water and mild soap.Step 2: Our next layer is Pearl Plaster. It can be described as a whiteish paste that has a pearly shimmer to it, with a similar to thick pudding. Use your 2” Chip Brush to paint on your Pearl Plaster, following the same strokes you used for your Chalk Paint™; long, linear and all in the the same direction. You will only apply one coat of this as it can be applied thicker than your paint. Allow some of the Graphite to show through, creating some lines that are a little heavier and more opaque. A Chip Brush is the perfect tool for this effect as the ends tend to be a little jaggy (good for linear effects and dry brushing) and it doesn’t have a ton of bristles so won’t hold on to too much product.
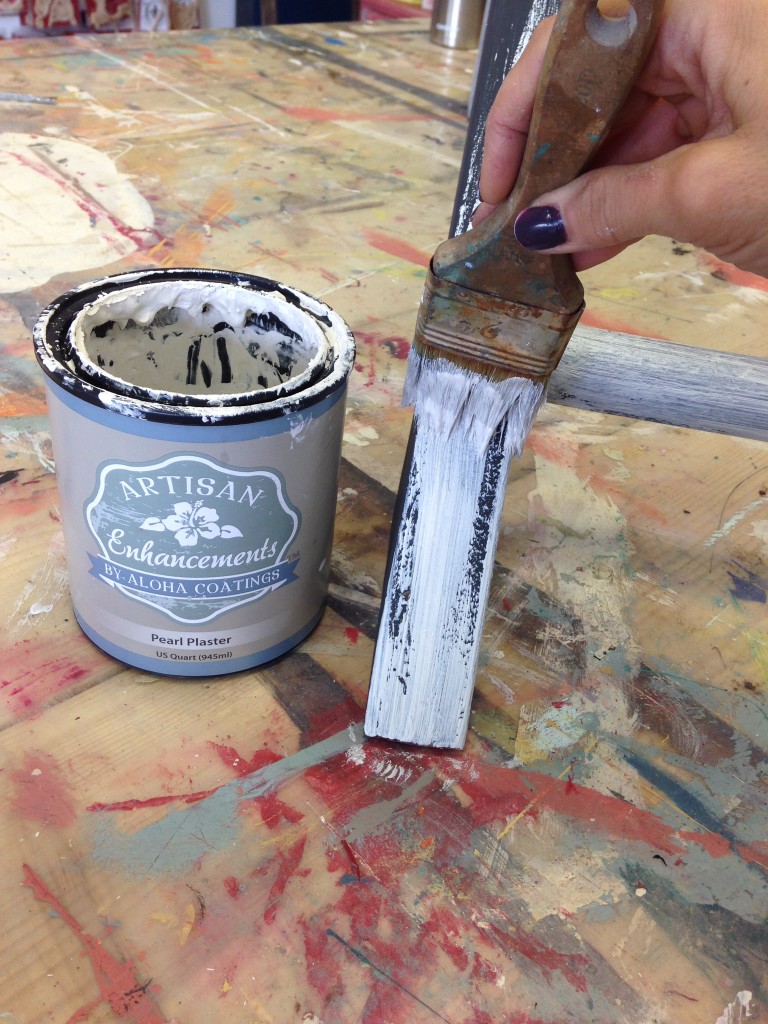 Allow your Pearl Plaster to dry before moving on. How do you know it’s dry? If you touch it and nothing comes off on your hands, the surface doesn’t feel moist or cold and it’s been sitting for an hour or more, you should be good to go! As you can see in the photo, Pearl Plaster has a nice shimmer and is a pretty pearly white. For this project we wanted some deeper metallic tones so we add on one more layer.Clean up: Wash your Chip Brush right away with warm water and a mild soap. Don’t let the Pearl Plaster harden on the bristles because you’ll need this brush again! Lye Soap is a great option for natural bristle brushes as it conditions the hair.Step 3: Next, we are going to use Pearl Effects by General Finishes. These metallic paints are great on their own, layered over textured plasters, and used as glazes over Chalk Paint™! Grab your two 2” Chip Brushes and your two colours; Argentine Pearl and Bronze Pearl. Use a separate Chip Brush for each colour. We dry brushed these two colours on at the same time. Working with both colours at the same time is a technique we refer to as “wet on wet.” This allows the two colours to blend and mix together on the surface so you don’t end up with a patchy finish.
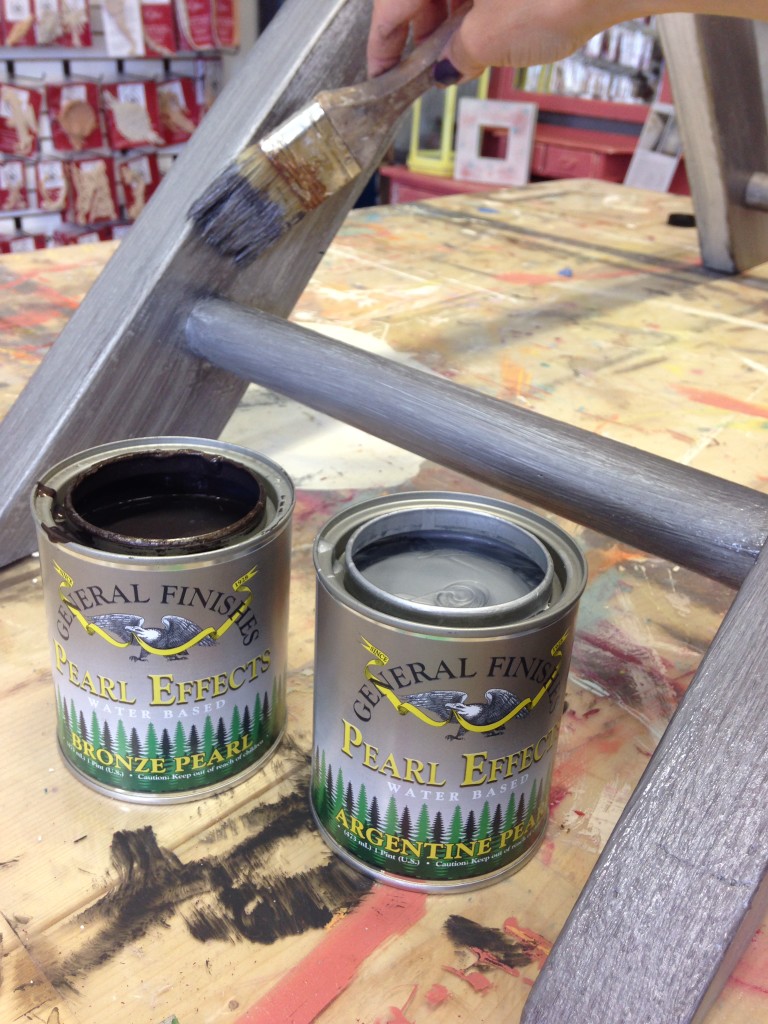 Here's how to apply the "wet on wet" technique:
- Dip one brush in the Argentine and the other in the Bronze (You don’t need a ton of paint. Just enough to wet the end of your brush).
- Begin with the Argentine and work in one section at a time, dry brushing in the direction of your earlier brush strokes (Dry brushing can be described as lightly skimming the tips of your bristles on the surface of your piece).
- Next, come on top of the wet Argentine and add some Bronze. Start with a little, as you can always add more until you get it to the colour you like.
- Just play around, experiment, and have fun. Work your way around your piece until you have metallic paint everywhere.
- If the colour is not quite right, looks patchy or uneven, you can come back and add another layer. Just keep building up until you get the look you love!
Clean up: Use some warm water and mild soap to wash this water based paint out of your chip brushes.We love the metal look we have achieved and hope you have fun recreating it!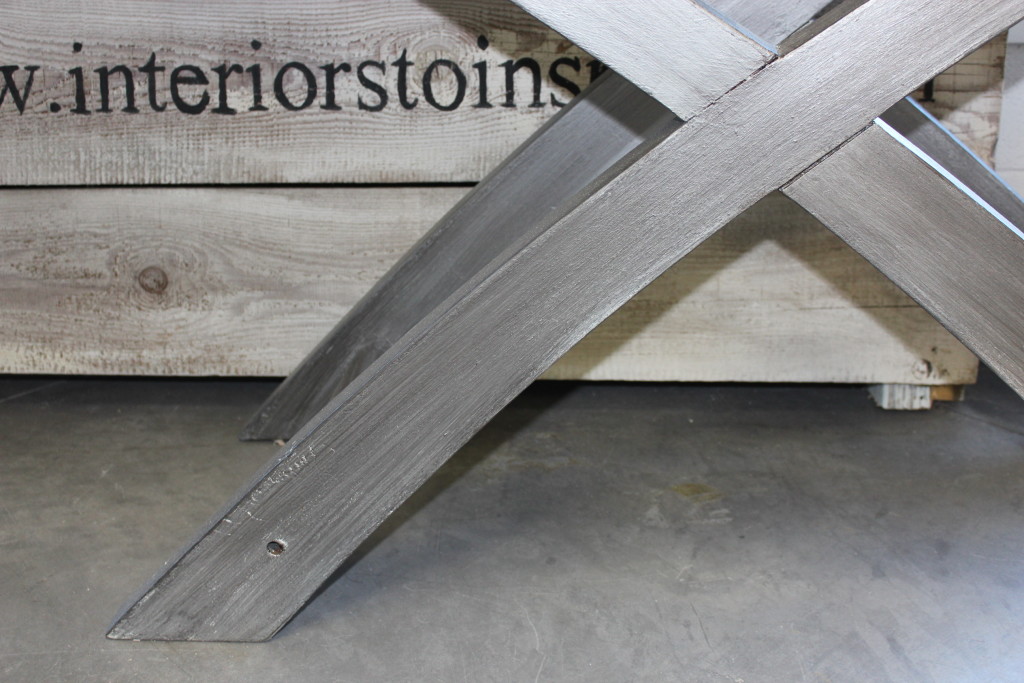
 If you need help estimating how much of each product you’ll need for your piece, or have any questions about these products and techniques, stop by our studio to chat with one of our artists or leave us a message in the comment section below! You can also get a close look at this table in our studio!We invite you to bring your own small piece into the studio and use The Paint Bar to play and experiment with any and all of the products mentioned in this post. Our space, products and tools are all available for your use for just $15/hour. Click here for more info.We're excited to see photos of your Industrial Metal Finishes!Happy Painting!