
Creating an Old Stone Finish
Create the illusion of old stone that’s cracked, chunky and worn looking. This finish was done on an old flower pot that had been painted and was ready for a new look. If you have a new terracotta, plastic or ceramic (etc.) pot, you can start by base coating your pot with Chalk Paint™ in a grey colour like Paris Grey, French Linen or Graphite.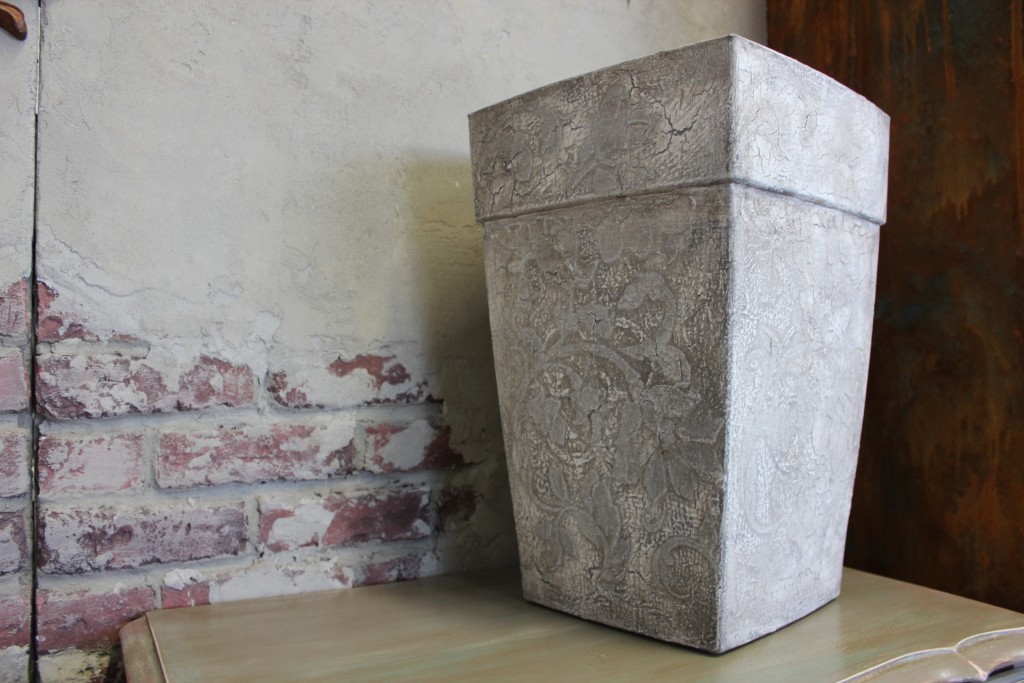 Grab your flower pot and let’s get started!What we used:An old plastic pot that was previously paintedCrackle Tex by Artisan Enhancements2” Chip BrushVP Antico by Artisan EnhancementsTexture Spreader ToolFloral Stencil (Check out our stencils here.)Fine Stone by Artisan EnhancementsScumble Glaze by Artisan EnhancementsGraphite Chalk Paint™T-Shirt Rag220 Grit Sanding SpongeClear Topcoat SealerTopcoat Brush Base coat your pot if needed. Ours was Paris Grey with some English Yellow showing through, and had a raised pattern on it. Your base colour will get covered quite a bit but will peek through some of the crackles so make sure you pick a colour you’re ok with seeing in the end.
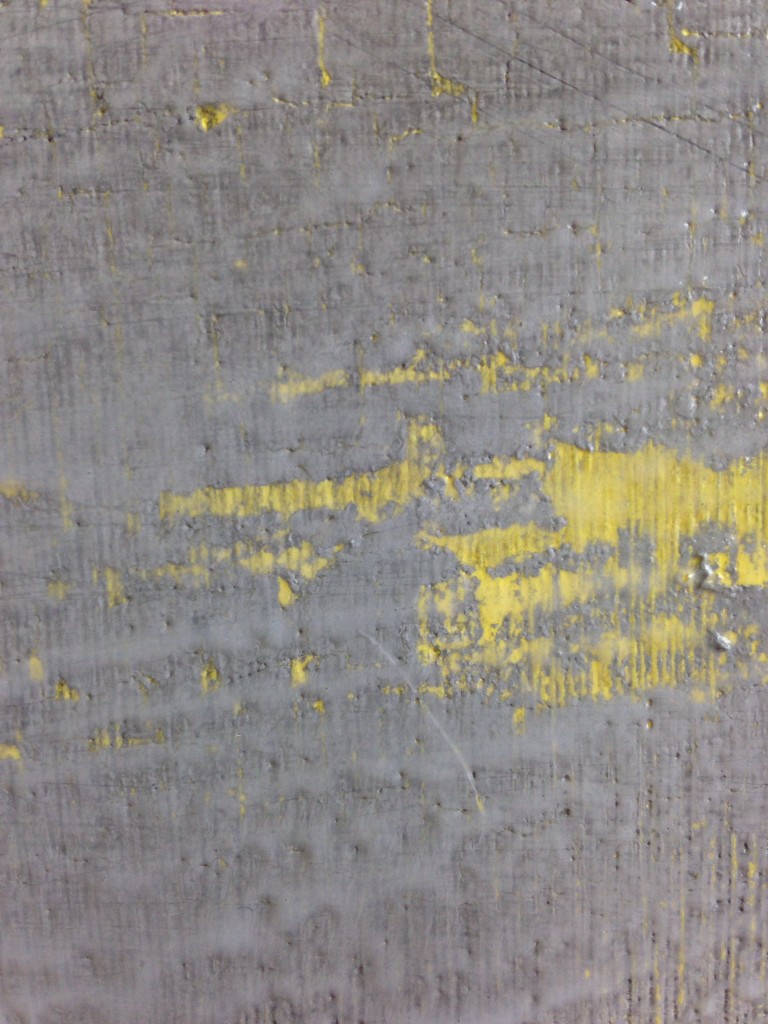 With your 2” Chip Brush, paint on a layer of your Crackle Tex in a slip slap fashion. This coat should be slightly thicker than your paint coat but not so heavy that it runs vertically down the sides. Once it turns from white to clear and is dry to the touch you are ready for your next step (about 30 mins).
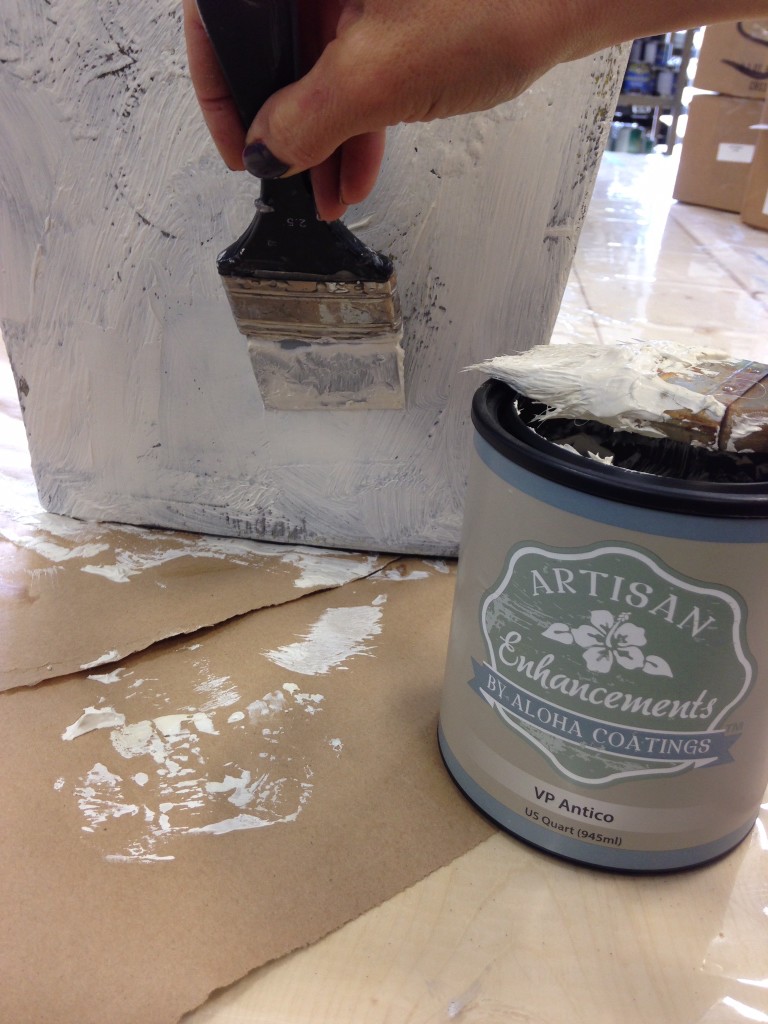
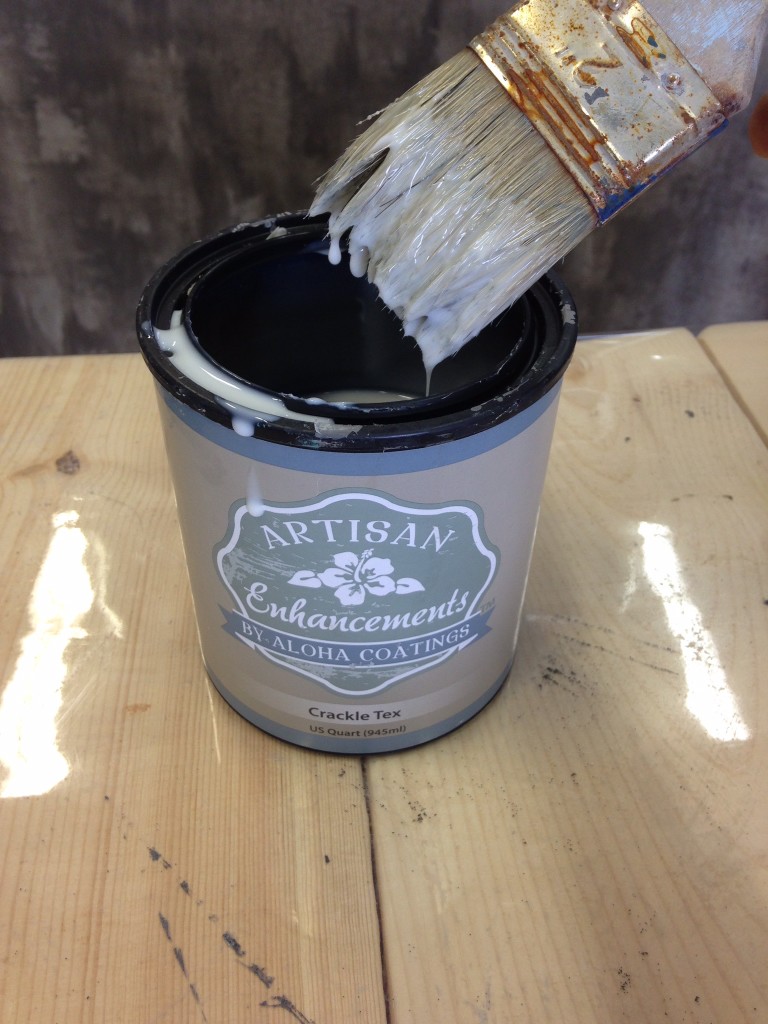 Use a combination of your Texture Spreader Tool and Chip Brush to apply a generous layer of VP Antico Plaster. Use the chip brush to pounce or stipple the plaster into grooves or detailed areas. Use the Texture Spreader tool to spread the VP Antico over the entire surface like you are putting a thick layer of icing on a cake. In this case, you do not want your “icing” to be smooth and perfect. In fact you can go all directions and create as much texture as you like.
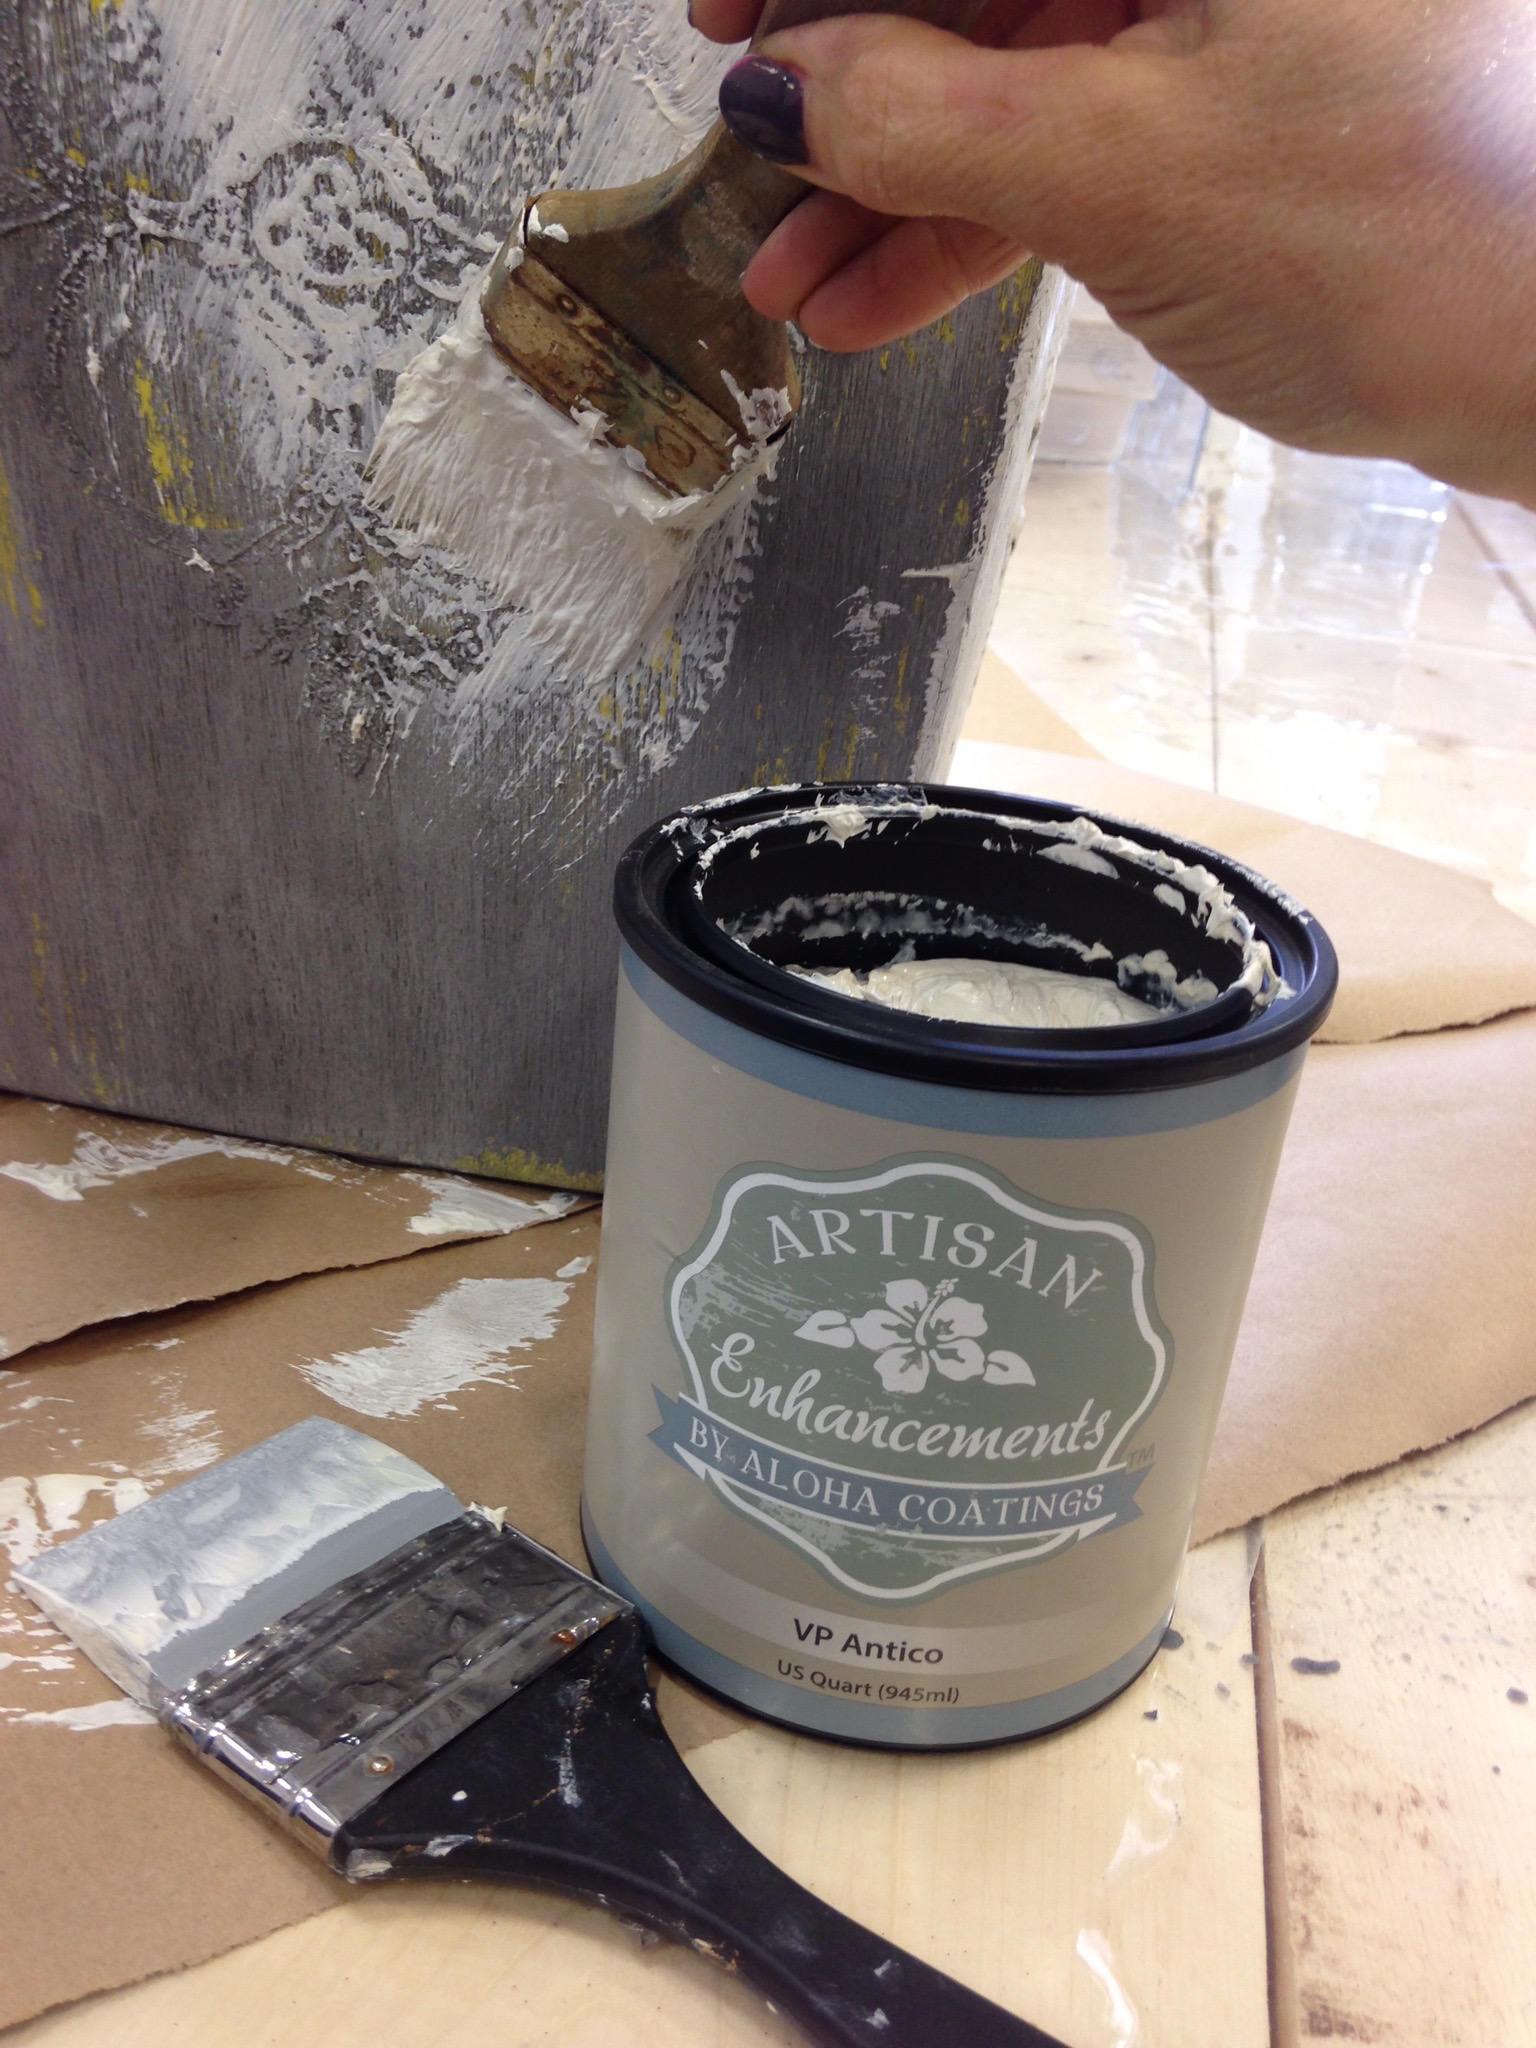
 TIP: Be mindful not to over work the plaster as that may cause the Crackle Tex beneath to start to lift.As your plaster starts to dry you will see the cracks start to appear. How thick you have applied your plaster will determine the dry time. Once it no longer appears wet and feels dry to the touch you can move to the next step.To add visual interest we added an embossed design with Fine Stone. Fine Stone is a plaster with tiny sand grains in it that makes it's finish look and feel like stone.
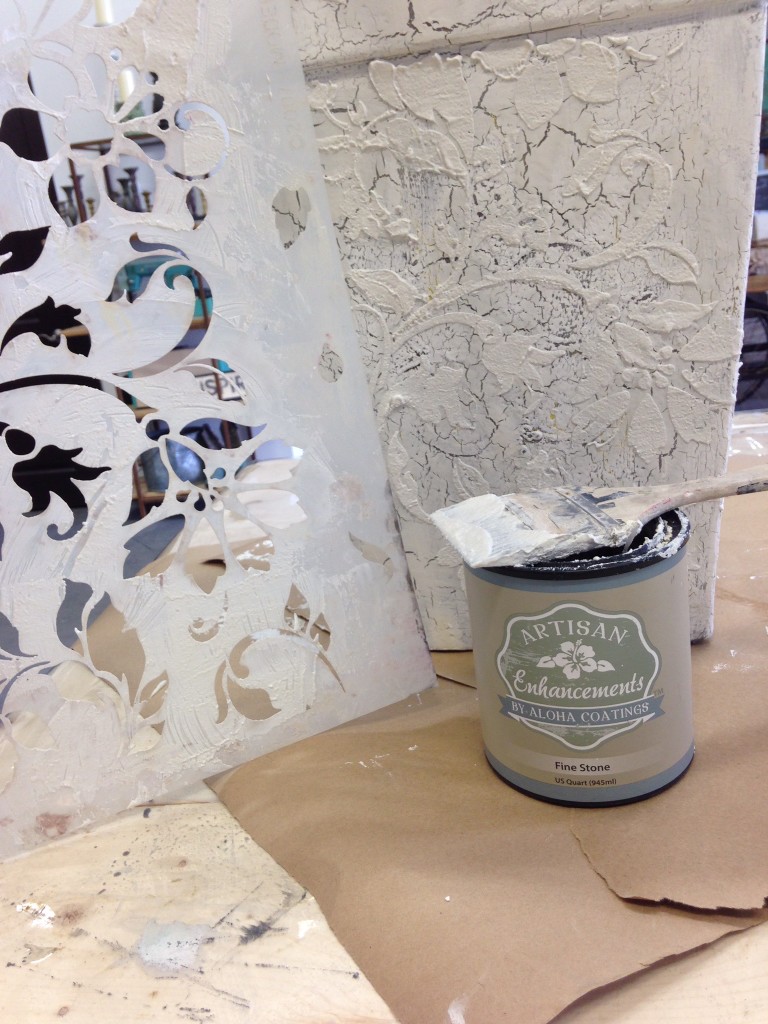 Pick out any stencil you like. We have plenty to choose from in our studio! Ours was a floral and vine pattern. Place your stencil where you want it on your pot and tape in place with some painters tape. Get your Texture Spreader Tool and scoop up some Fine Stone plaster. Hold the edge of your tool at about a 45 degree angle and drag along the surface of your stencil. Apply gentle pressure. You don’t want to push too hard and force the Fine Stone under the stencil. Scoop up more Fine Stone as you need it. You want this layer to be slightly thicker than your stencil. Once you have covered your whole pattern, remove your stencil while the plaster is still fresh and wet. Rinse the stencil immediately with warm water and soap.TIP: Always drag your spreader tool in the same direction, moving in nice, long, slow strokes rather than dragging it back and forth.Once your Fine Stone has completely dried you are ready to glaze! Mix Graphite Chalk Paint™ and Scumble Glaze together (about a 50/50 mix). Rub the mixture all over your plasters using a T-Shirt Rag. This glaze is going to make your white plasters turn grey and feel more like stone. If the colour is too dark for your taste, add more glaze. If it’s not dark enough, add some more graphite. Let your glaze dry. As a finishing step, we used a fine grit sanding sponge and lightly distressed the surface to bring back some of the white plaster and give our pot an aged effect.TIP: For added durability, sealing your pot with Clear Topcoat Sealer by Artisan Enhancements will keep the matte look while protecting your surface.
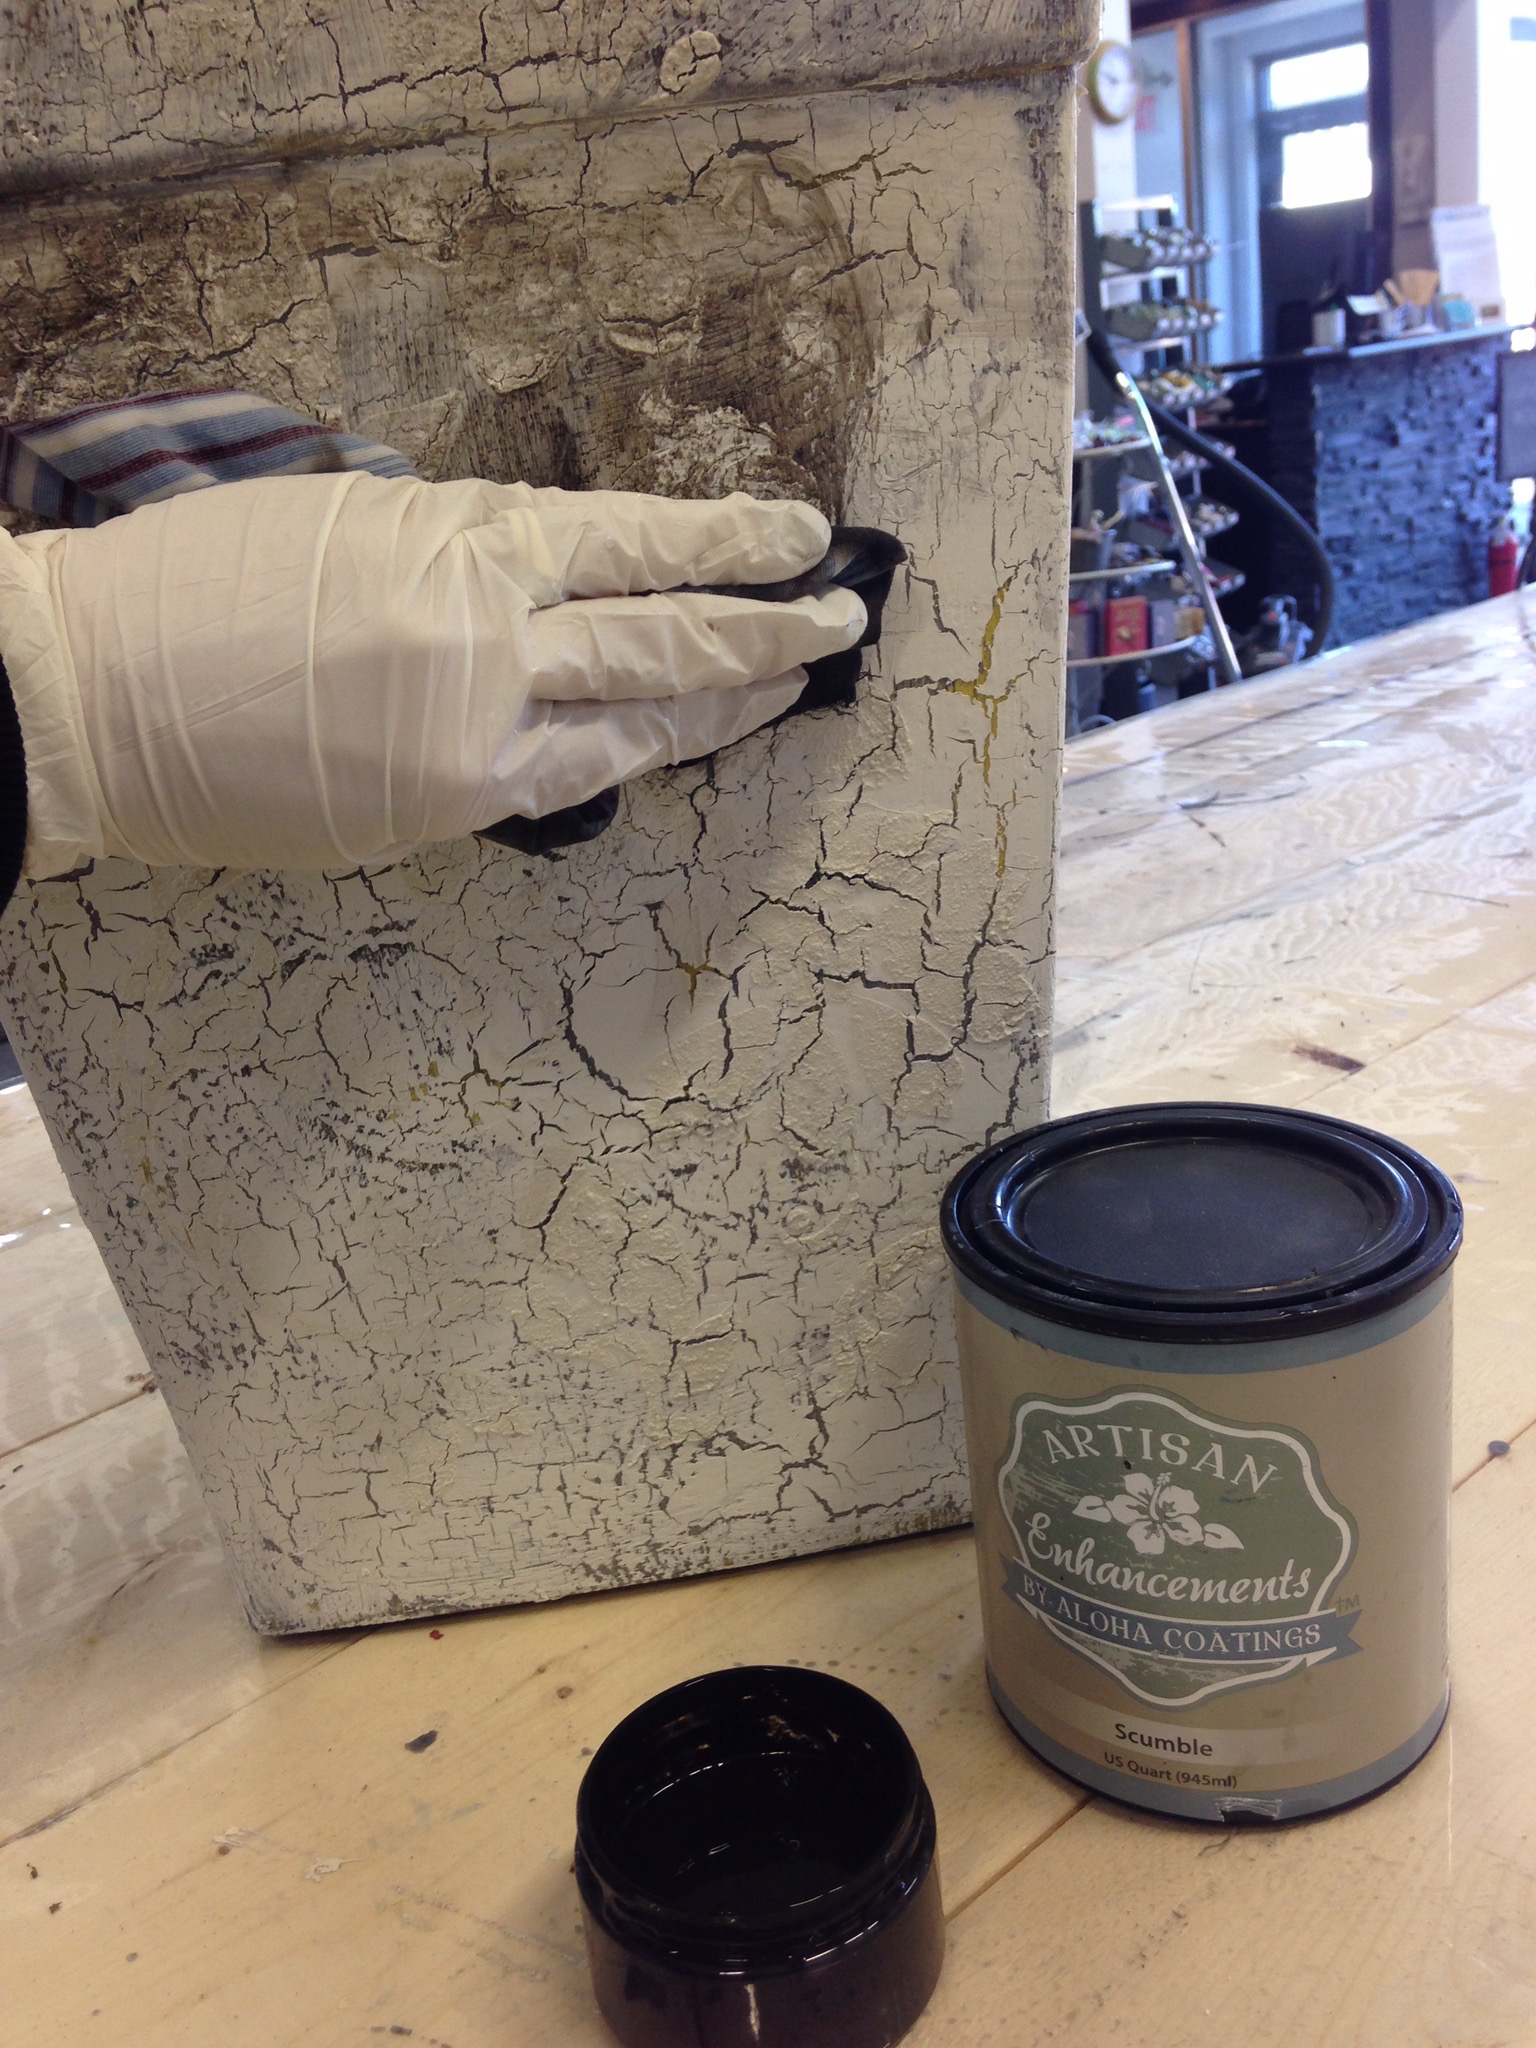 What do you think about our finish? Let us know in the comments below. To see and feel the texture of this Old Stone Pot, visit our studio! We also invite you to bring your own small piece into the studio and use The Paint Bar to play and experiment with all the products mentioned above. Our space, products and tools are all available for your use for just $15/hour. Click here for more info.
 We can't wait to hear your comments! If you have any questions about this finish, any of the products or our The Paint Bar, let us know in the comment section below!Happy Painting!Team ITI