
DIY Pallet Wood Sign Project
[et_pb_section bb_built="1" admin_label="section"][et_pb_row admin_label="row"][et_pb_column type="4_4"][et_pb_text admin_label="Text"]Not only does this project make use of recycled materials but it is quick and easy to put together. My kind of project! Take a look at these stylish home decor signs that can be made to suit your style! Curious how to make your own? Let me show you how... Here's what I used:
- Pallet wood pieces (cut to about 2 feet)
- Premade cardboard words from the dollar store
- Old White Chalk Paint™ by Annie Sloan
- Annie Sloan Small Oval Paint Brush
- Small Artists Paint Brush
- Annie Sloan Chalk Paint™ Waxes in Clear, Brown, Black & White
- Medium Wax Brush
- T-Shirt Rags
- Gorilla Wood Glue
Here's what I did: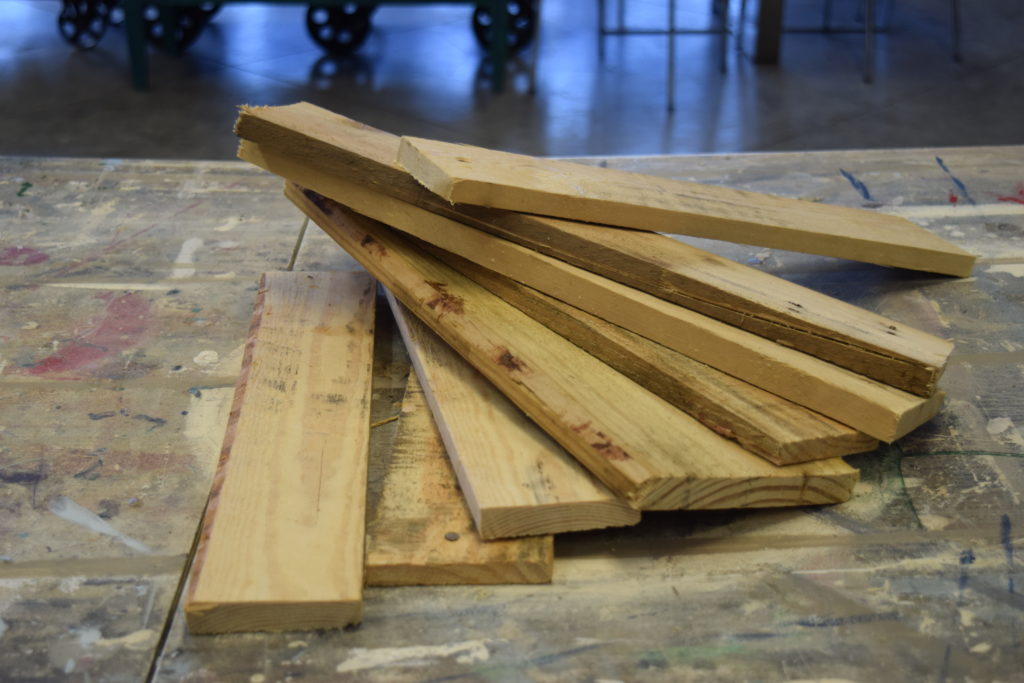 Using a circular saw I carefully cut a wooden pallet into pieces and trimmed them to size. If you don't have access to power tools, or are uncomfortable with this step, ask someone you know who has the tools and skills to help you. If there are no handy-men (or women) in your circle of friends, check your local hardware store for help. Often if you buy a piece of wood they will cut it for free!
 Lay the pieces of wood on a flat surface to dry fit them. Try to line up your pieces so the edges fit snugly against each other. The more surface that touches, the stronger your glue bond will be. Place your cardboard word on top and decided where you want it to go. I decided that it looked best with the word family closer to the bottom. You might notice I cut my pieces slightly different lengths because I like the rustic feel of the uneven lengths.
 To add variation, and make the pallet wood look much older and worn, I used Annie Sloan's Chalk Paint™ Waxes in Clear, Brown, Black & White . To apply the waxes I used a Medium Wax Brush and some old T-Shirt Rags. The wax is a paste that not only adds colour but seals and protects the wood. It is commonly used with Chalk Paint™ by Annie Sloan to protect the paint finishes. This wax works great on dry porous surfaces like raw wood.
 Wear some gloves to keep your hands clean. Scoop about a loonie sized amount of wax out of the tin with your wax brush. Use the wax brush to press the wax into the wood with a back and forth motion. In this photo I am applying the black wax to stain the wood black.
 Apply the wax to about half the cut piece of wood then immediately use the t-shirt rag to wipe away the excess wax. The wood is absorbant so it will soak up as much wax as it can, be sure to wipe away all the extra with sturdy pressure.
 Here's a look at the Dark wax being applied which is a dark brown colour.
 This one is the white wax which gives a sun bleached or white washed look.
 This board was already a silvery grey colour so I used the clear wax to make some of those tones pop out.
 If the colour of the wax isn't quite right you can mix or layer the waxes. Take a look at the third board from the left in the photo above. After I applied a layer of white wax I wanted it to be more grey so I mixed some black and white wax together to create a grey wax, then I applied a layer of the grey wax on top of the white.
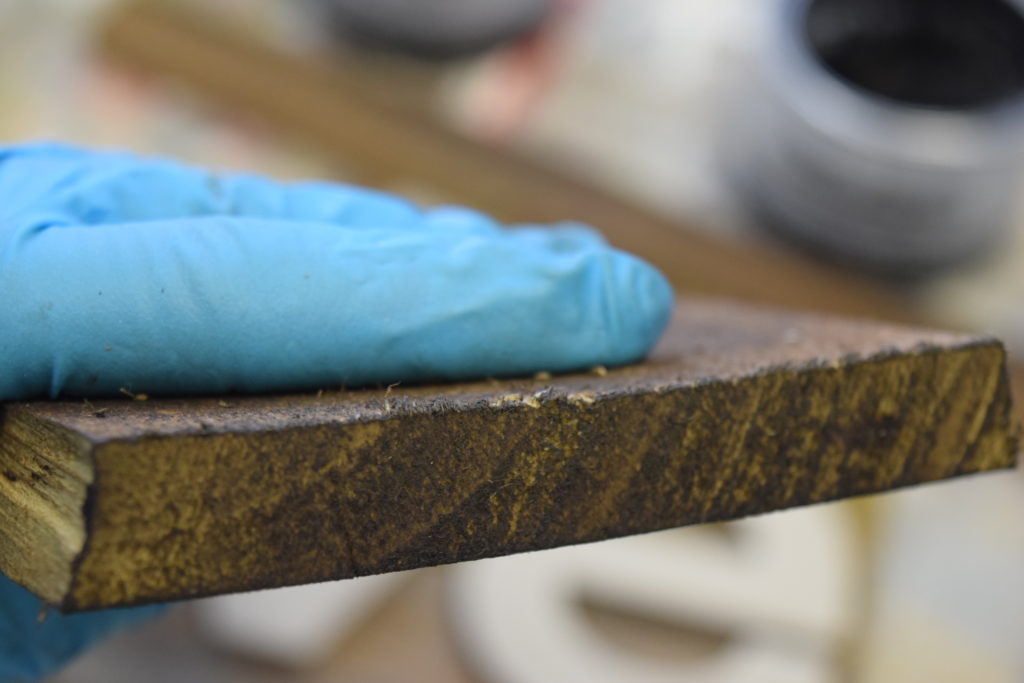 Do not apply wax to the sides you will put glue on, the glue will stick better to the raw wood. Remember to apply wax to the ends of the boards and the out side edges that will be seen.
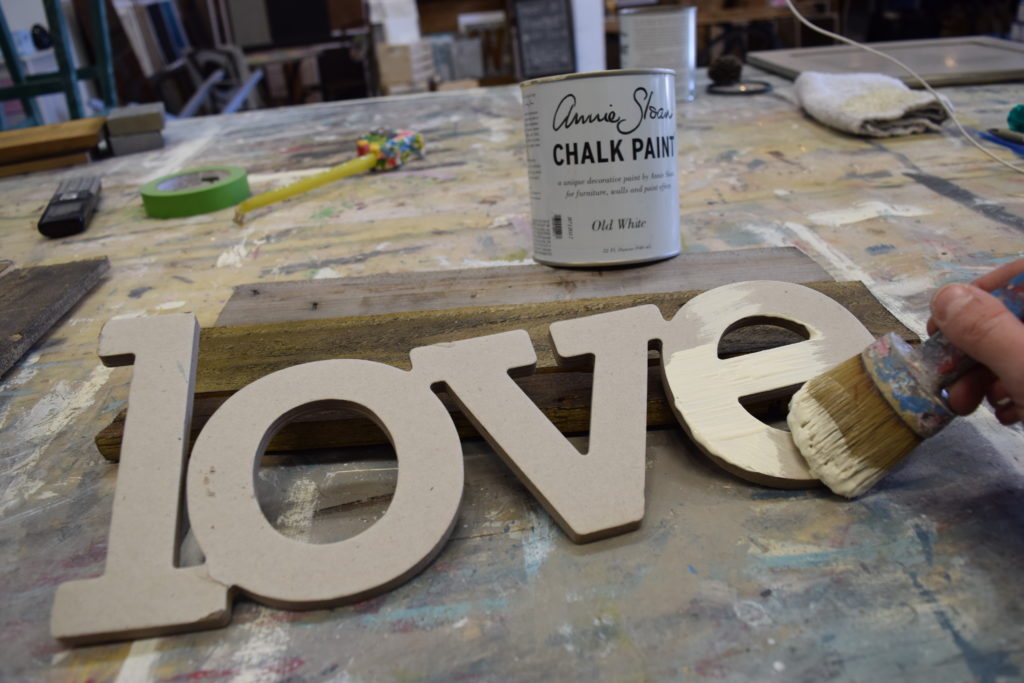 Aren't these thick cardboard word cutouts awesome? They were only a few dollars to purchase and I just love how versatile they are. Check your local dollar store or craft store to see what they've got, wooden letters would work great too. I used my favourite Chalk Paint™ by Annie Sloan in the colour Old White to change the look of the cardboard words. Love working with this paint because it's easy to use and in this case covered in one coat! I used an oval brush which holds onto a lot of paint so I don't have to dip back into my can as often.
 I also like to have a smaller sized artists brush handy to get into the smaller spaces and sides of the cutout. Once the words were completely coated in paint, I left them to dry and went back to working on the background.
 I applied a generous layer of Gorilla Glue Wood Glue on all of the edges of my wood.
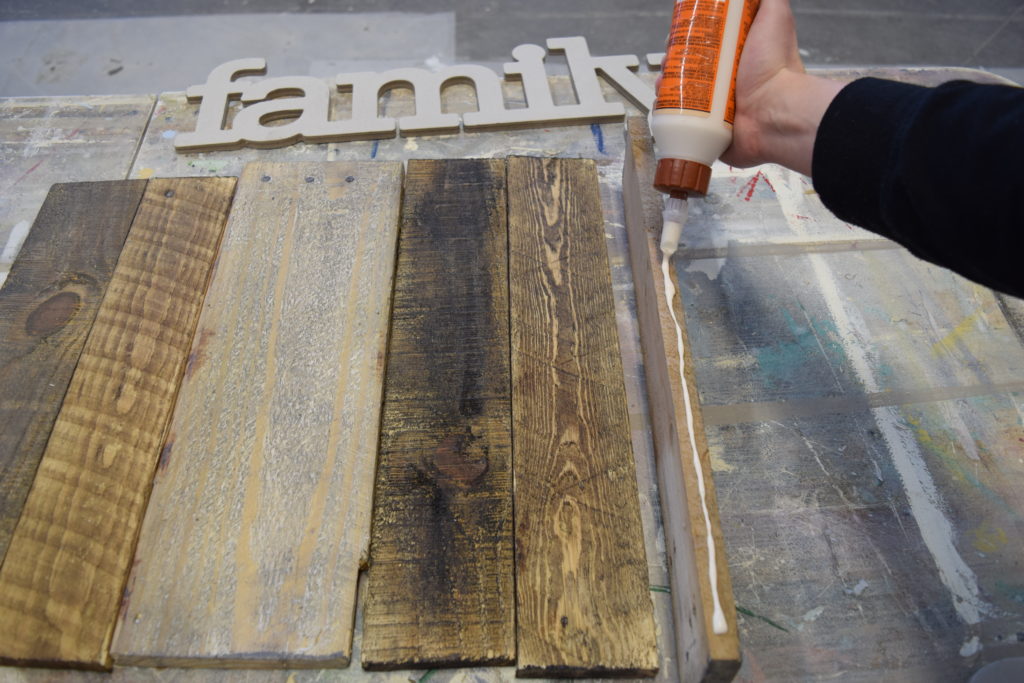 Lay the pieces on a flat surfaces and press the edges together firmly ensuring contact. I left the boards to sit overnight to give the glue extra time to set up and the wax lots of time to fully dry.
 The next day I applied a generous amount of glue to the unpainted backside of the cardboard letters and glued them in place on the pallet wood background.Here's a final look at the two signs I made. These are great to sit on a shelf or hang on the wall in your home. Thanks for checking out this how to post. Stop by our studio in Calgary, Alberta to see up close the awesome products I used for this project or shop our online store. Need a place to work? Call to reserve a seat at The Paint Bar! Call us at 403-243-7433.Please comment below with your questions about this project and the products used! We'd love to help! Happy Painting Everyone!Deanna[/et_pb_text][/et_pb_column][/et_pb_row][/et_pb_section]