
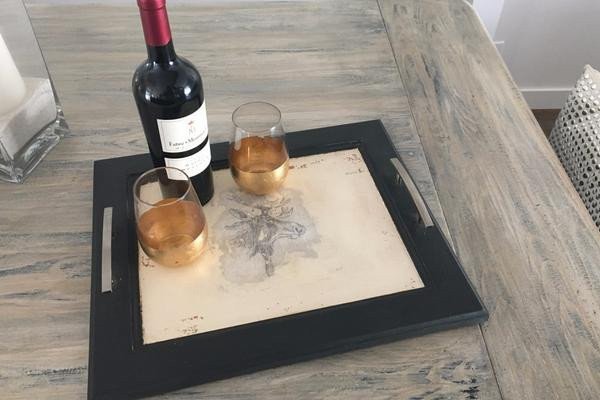
DIY Upcycled Wine Glasses
 Hello! It’s Deanna from Interiors To Inspire here bringing you another easy and fun DIY project. This project will show you how to turn your ordinary glassware into classy tableware that is sure to shine! I love this project because it can also be used on other items like candle holders or décor items like flower pots, the possibilities are endless!Let’s get started…Materials List:Wine glasses (or other décor items)1” painters tapeGraphite Chalk Paint™ by Annie SloanArtists Paint BrushLeaf & Foil SizeMetallic Leaf (Gold, Silver or Copper) about 2 sheets per glassClear Topcoat Sealer
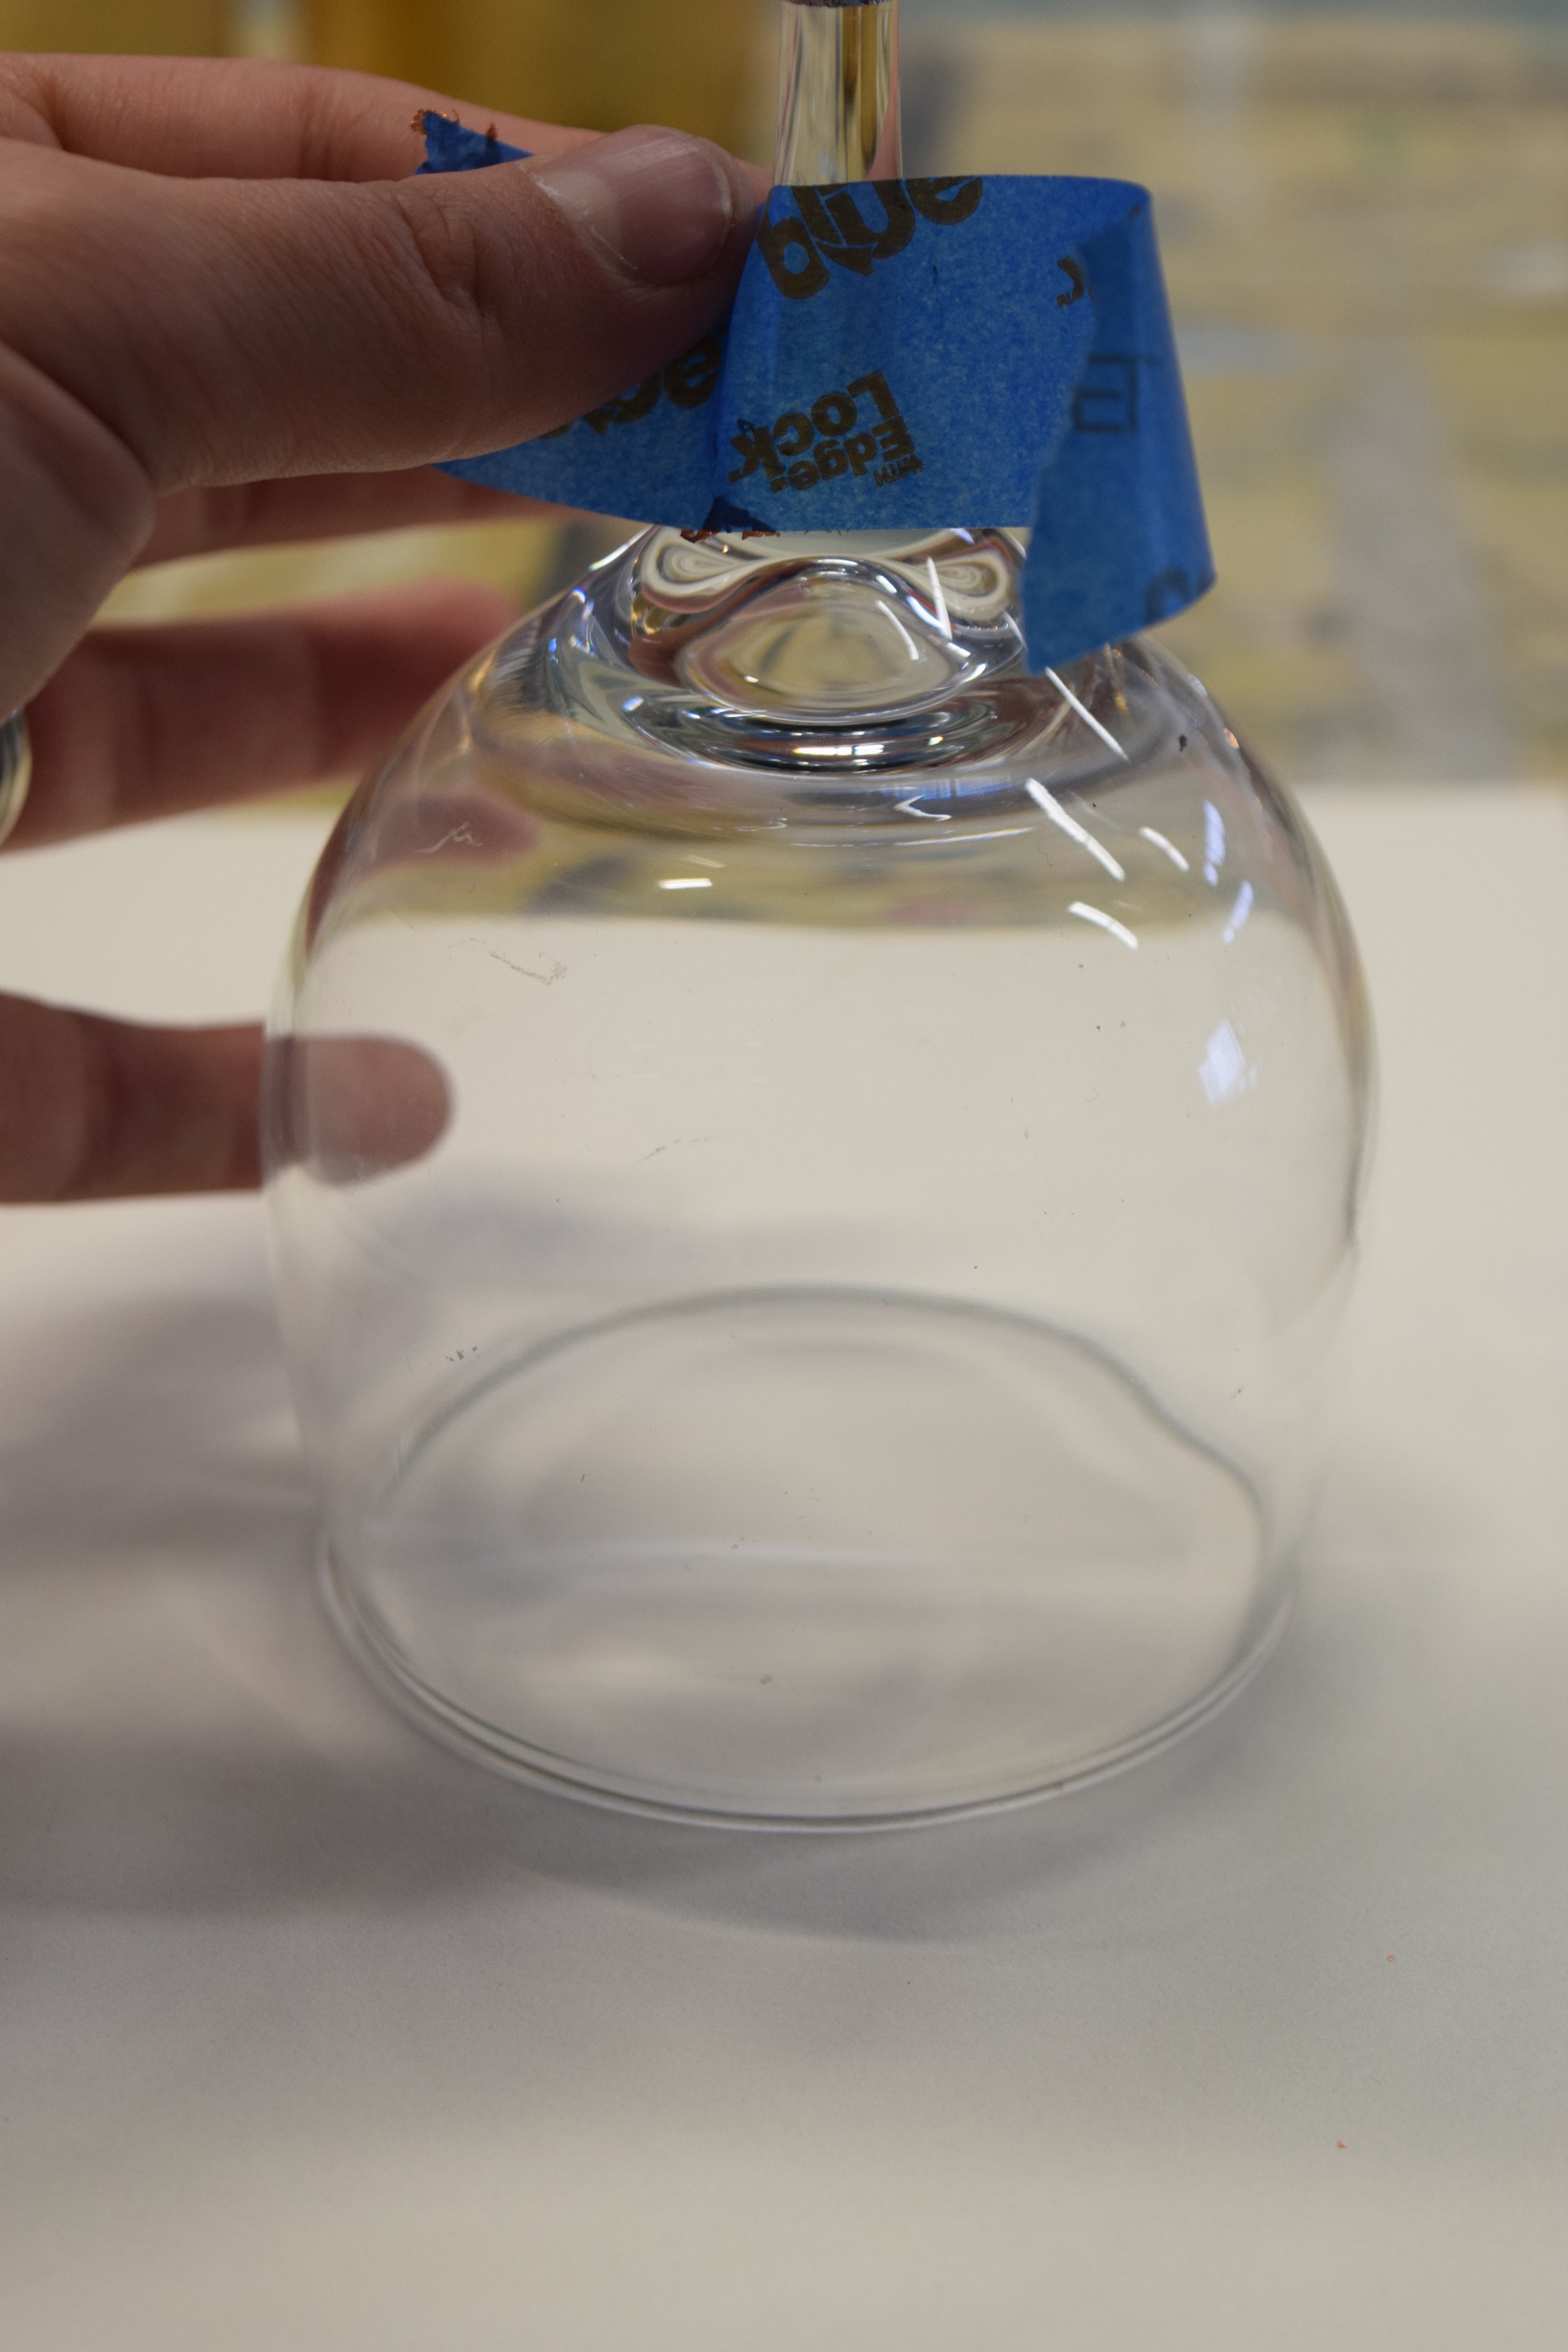 Start by taping a line at the top of the wine glass stem, this is to create a clean line where you want your metallic finish to end. You can be creative and tape wherever you like, maybe your metallic finish will come half way up the glass!
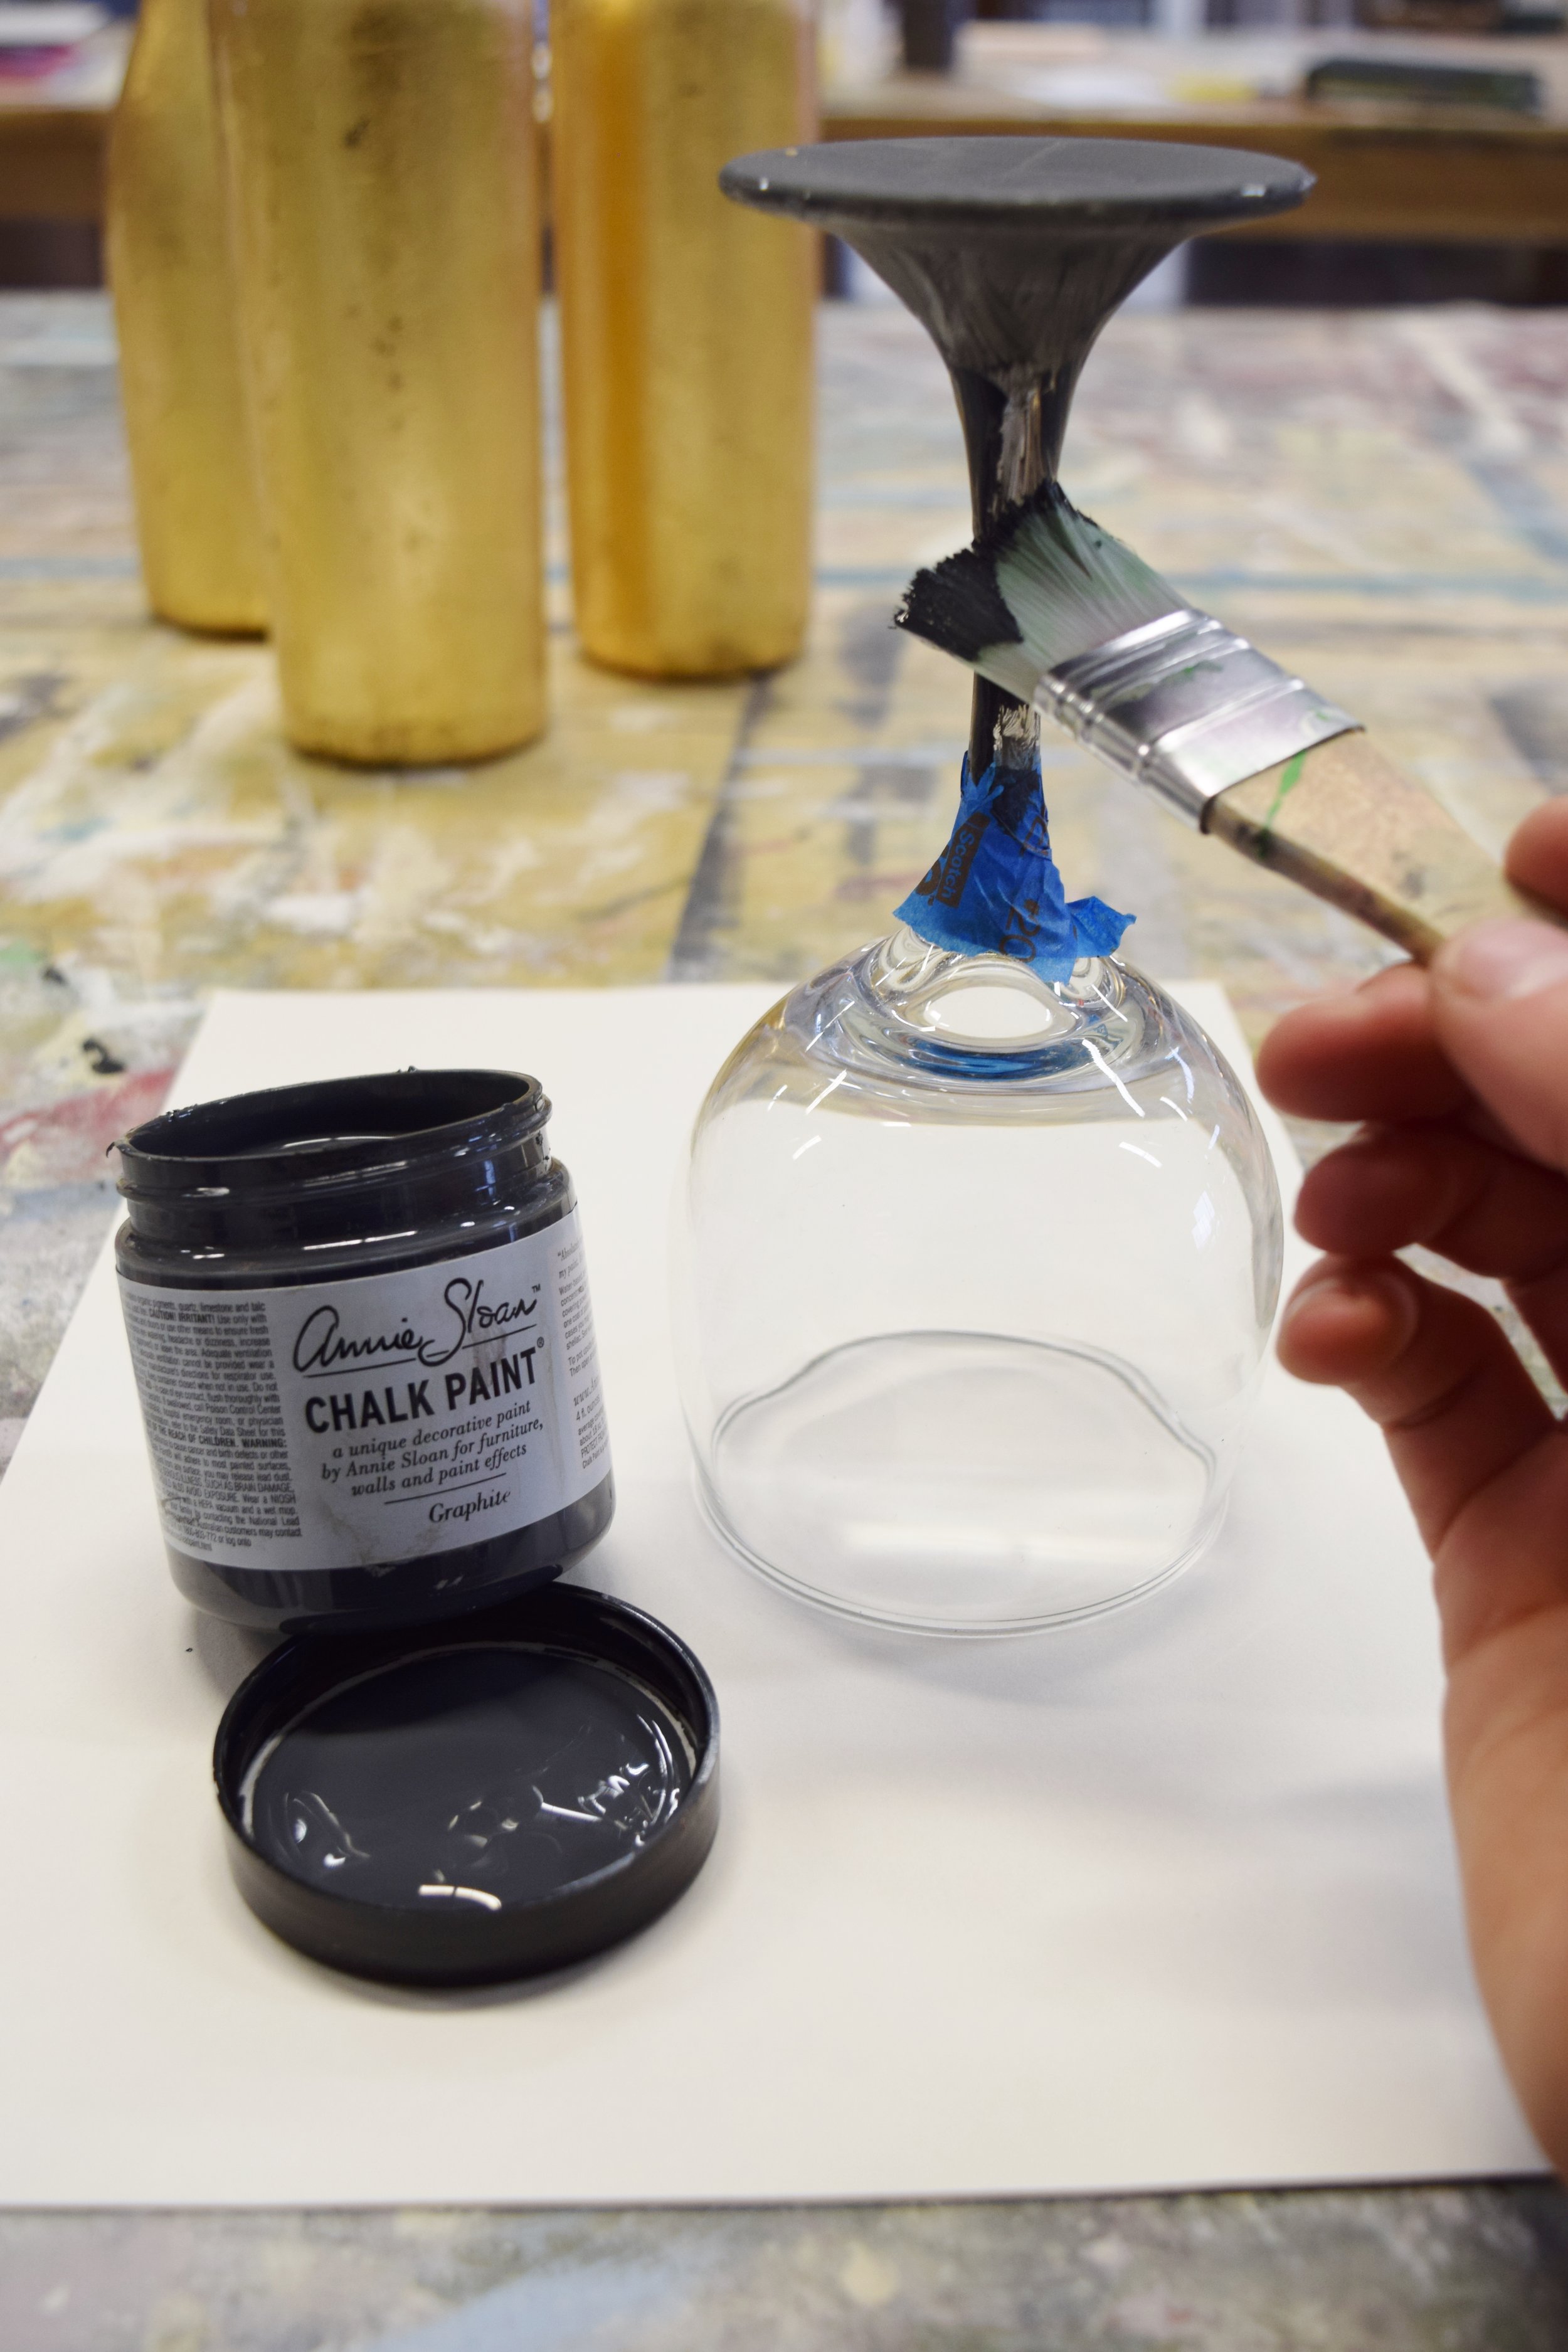 Use a small paint brush and paint the area you want to finish with Graphite Chalk Paint™. I like to use Chalk Paint™ when working on glass because it adheres to glass well and it has a nice dry porous finish which the next layers of product will stick to well. Allow your first coat to dry (about 20 minutes) and then apply a second coat to make it more solid. Do not worry about brush strokes, this does not need to be perfect or even.
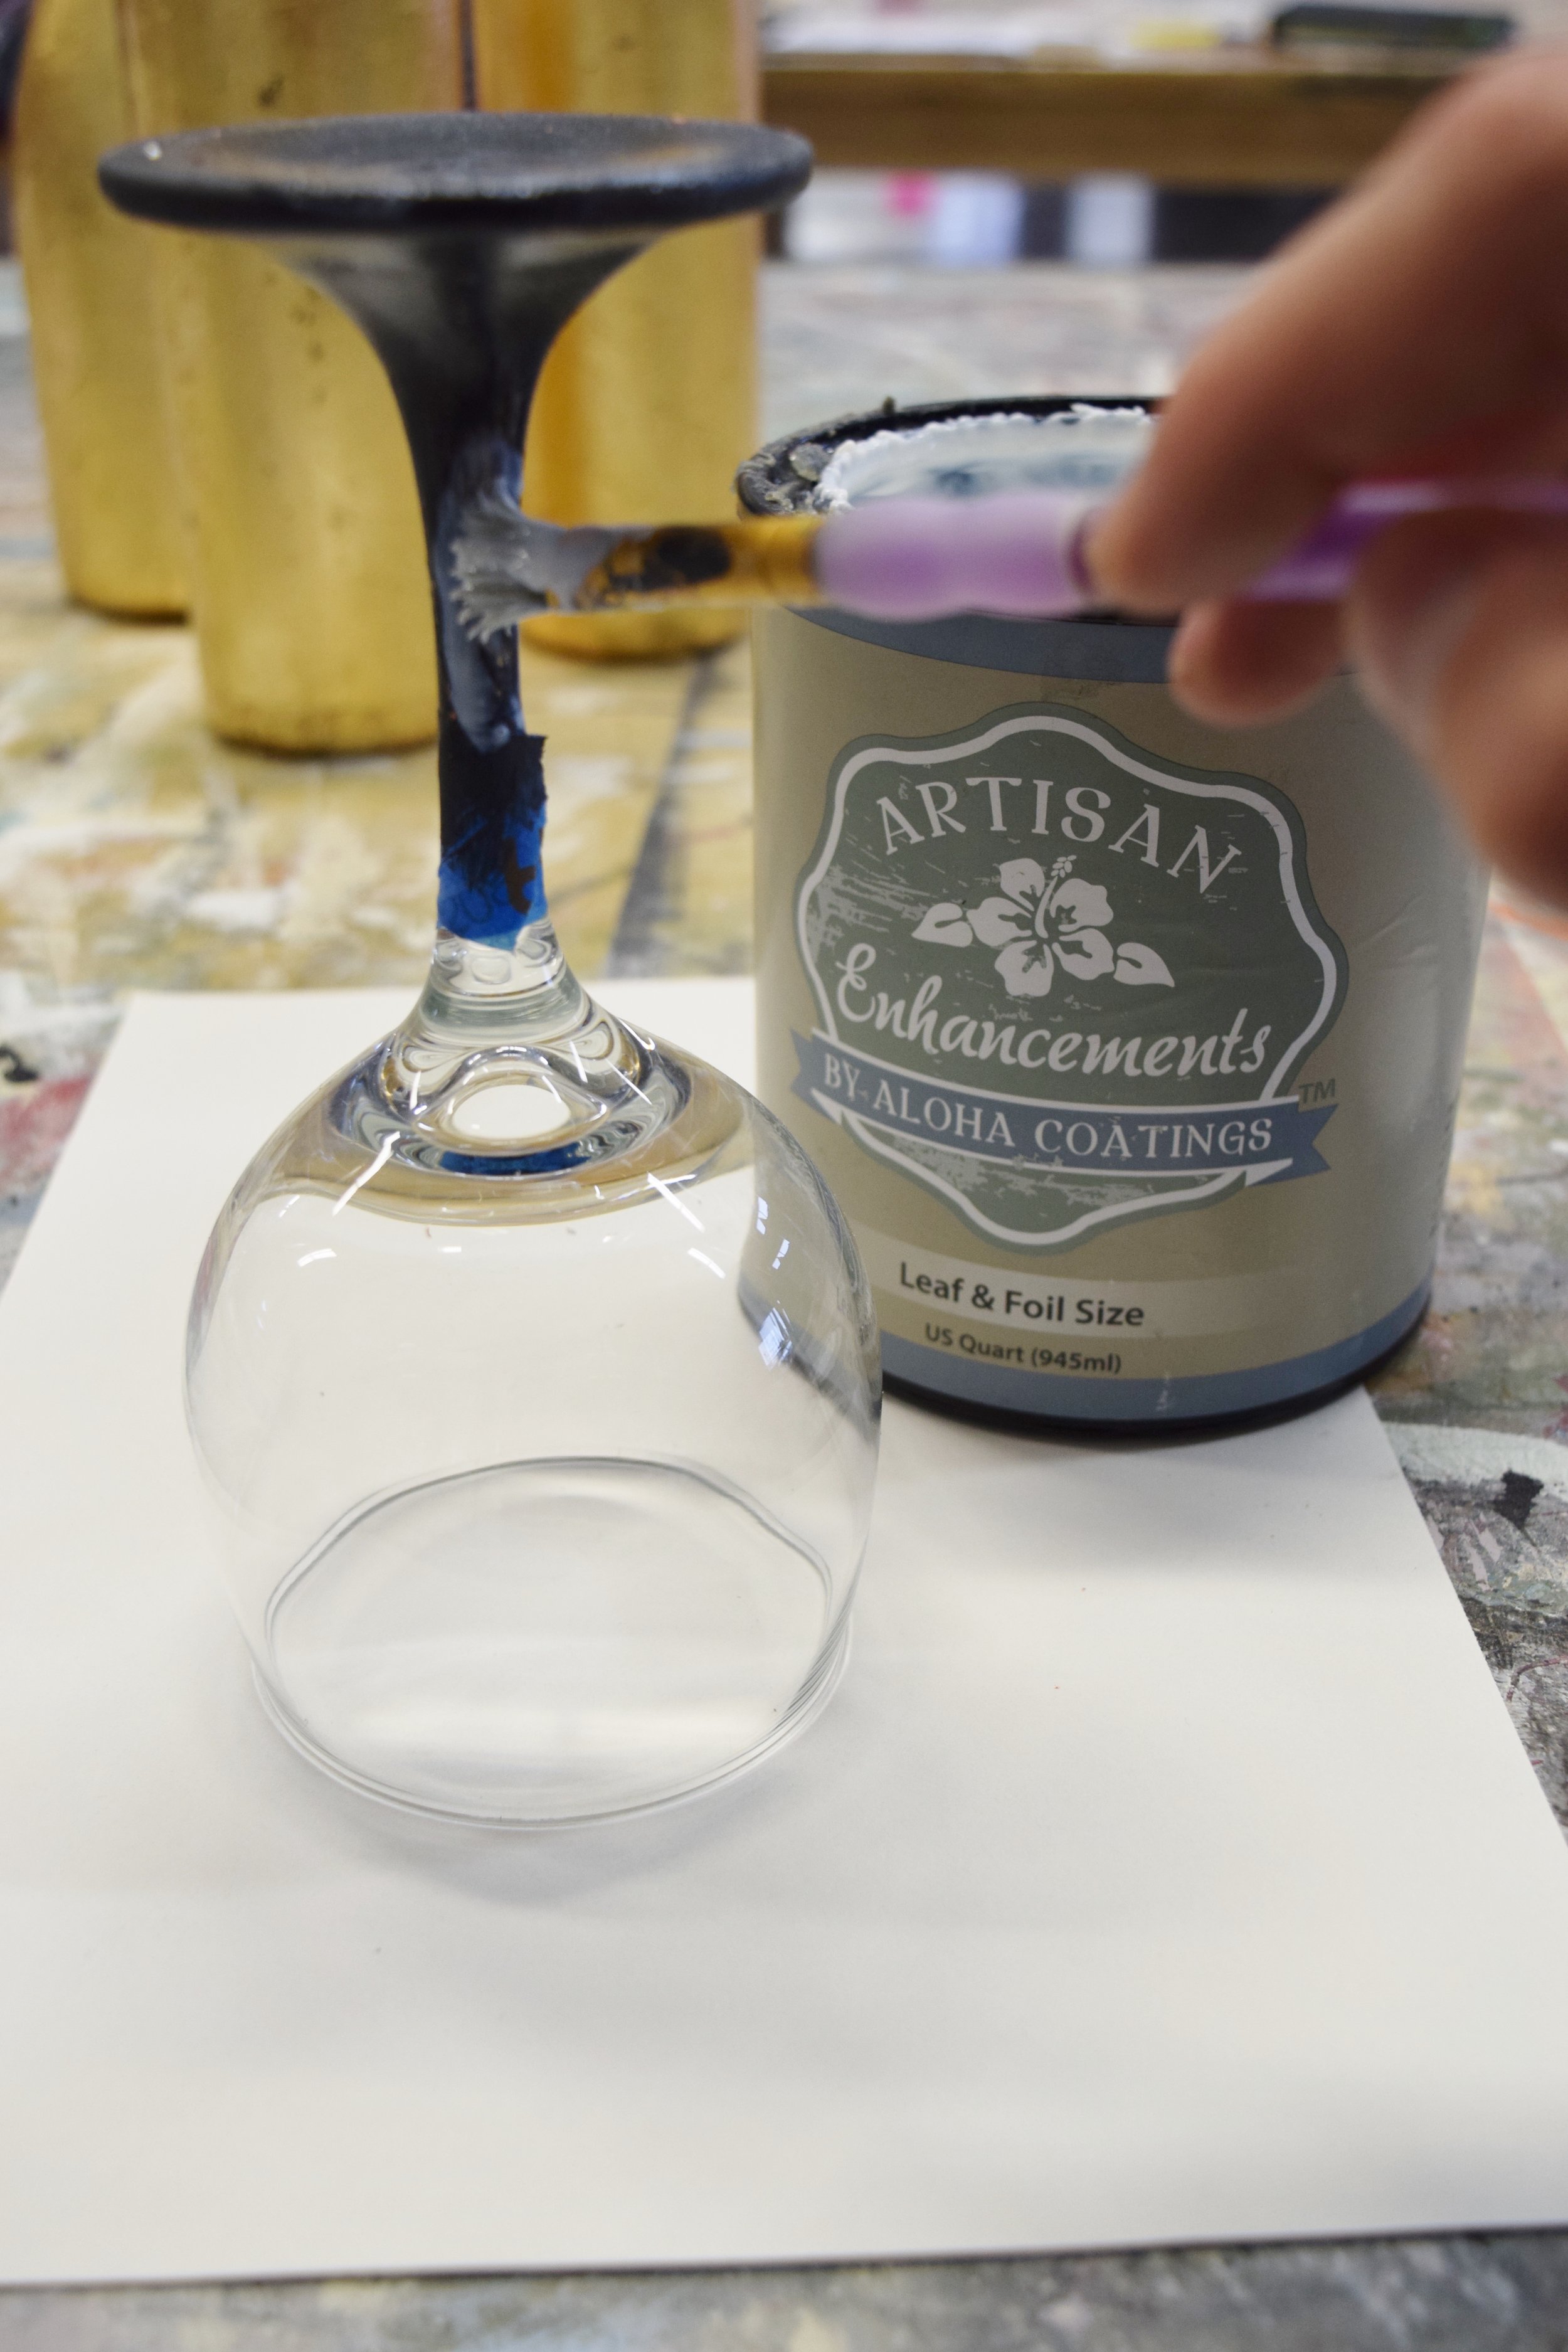
 After your paint is dry it’s time to apply a layer of special glue, this product is called Leaf and Foil Size. When this glue dries it remains tacky which is perfect for our leaf. Use a small paint brush and paint on a layer of the Leaf and Foil Size. One coat will do for this product and if you miss a spot you can always come back after and do it again so no big deal. This will go on white and as it dries it turns clear. Wait about 25 minutes or until it is completely clear and then you know it’s dry. When all dry it will still be tacky so try not to touch it.
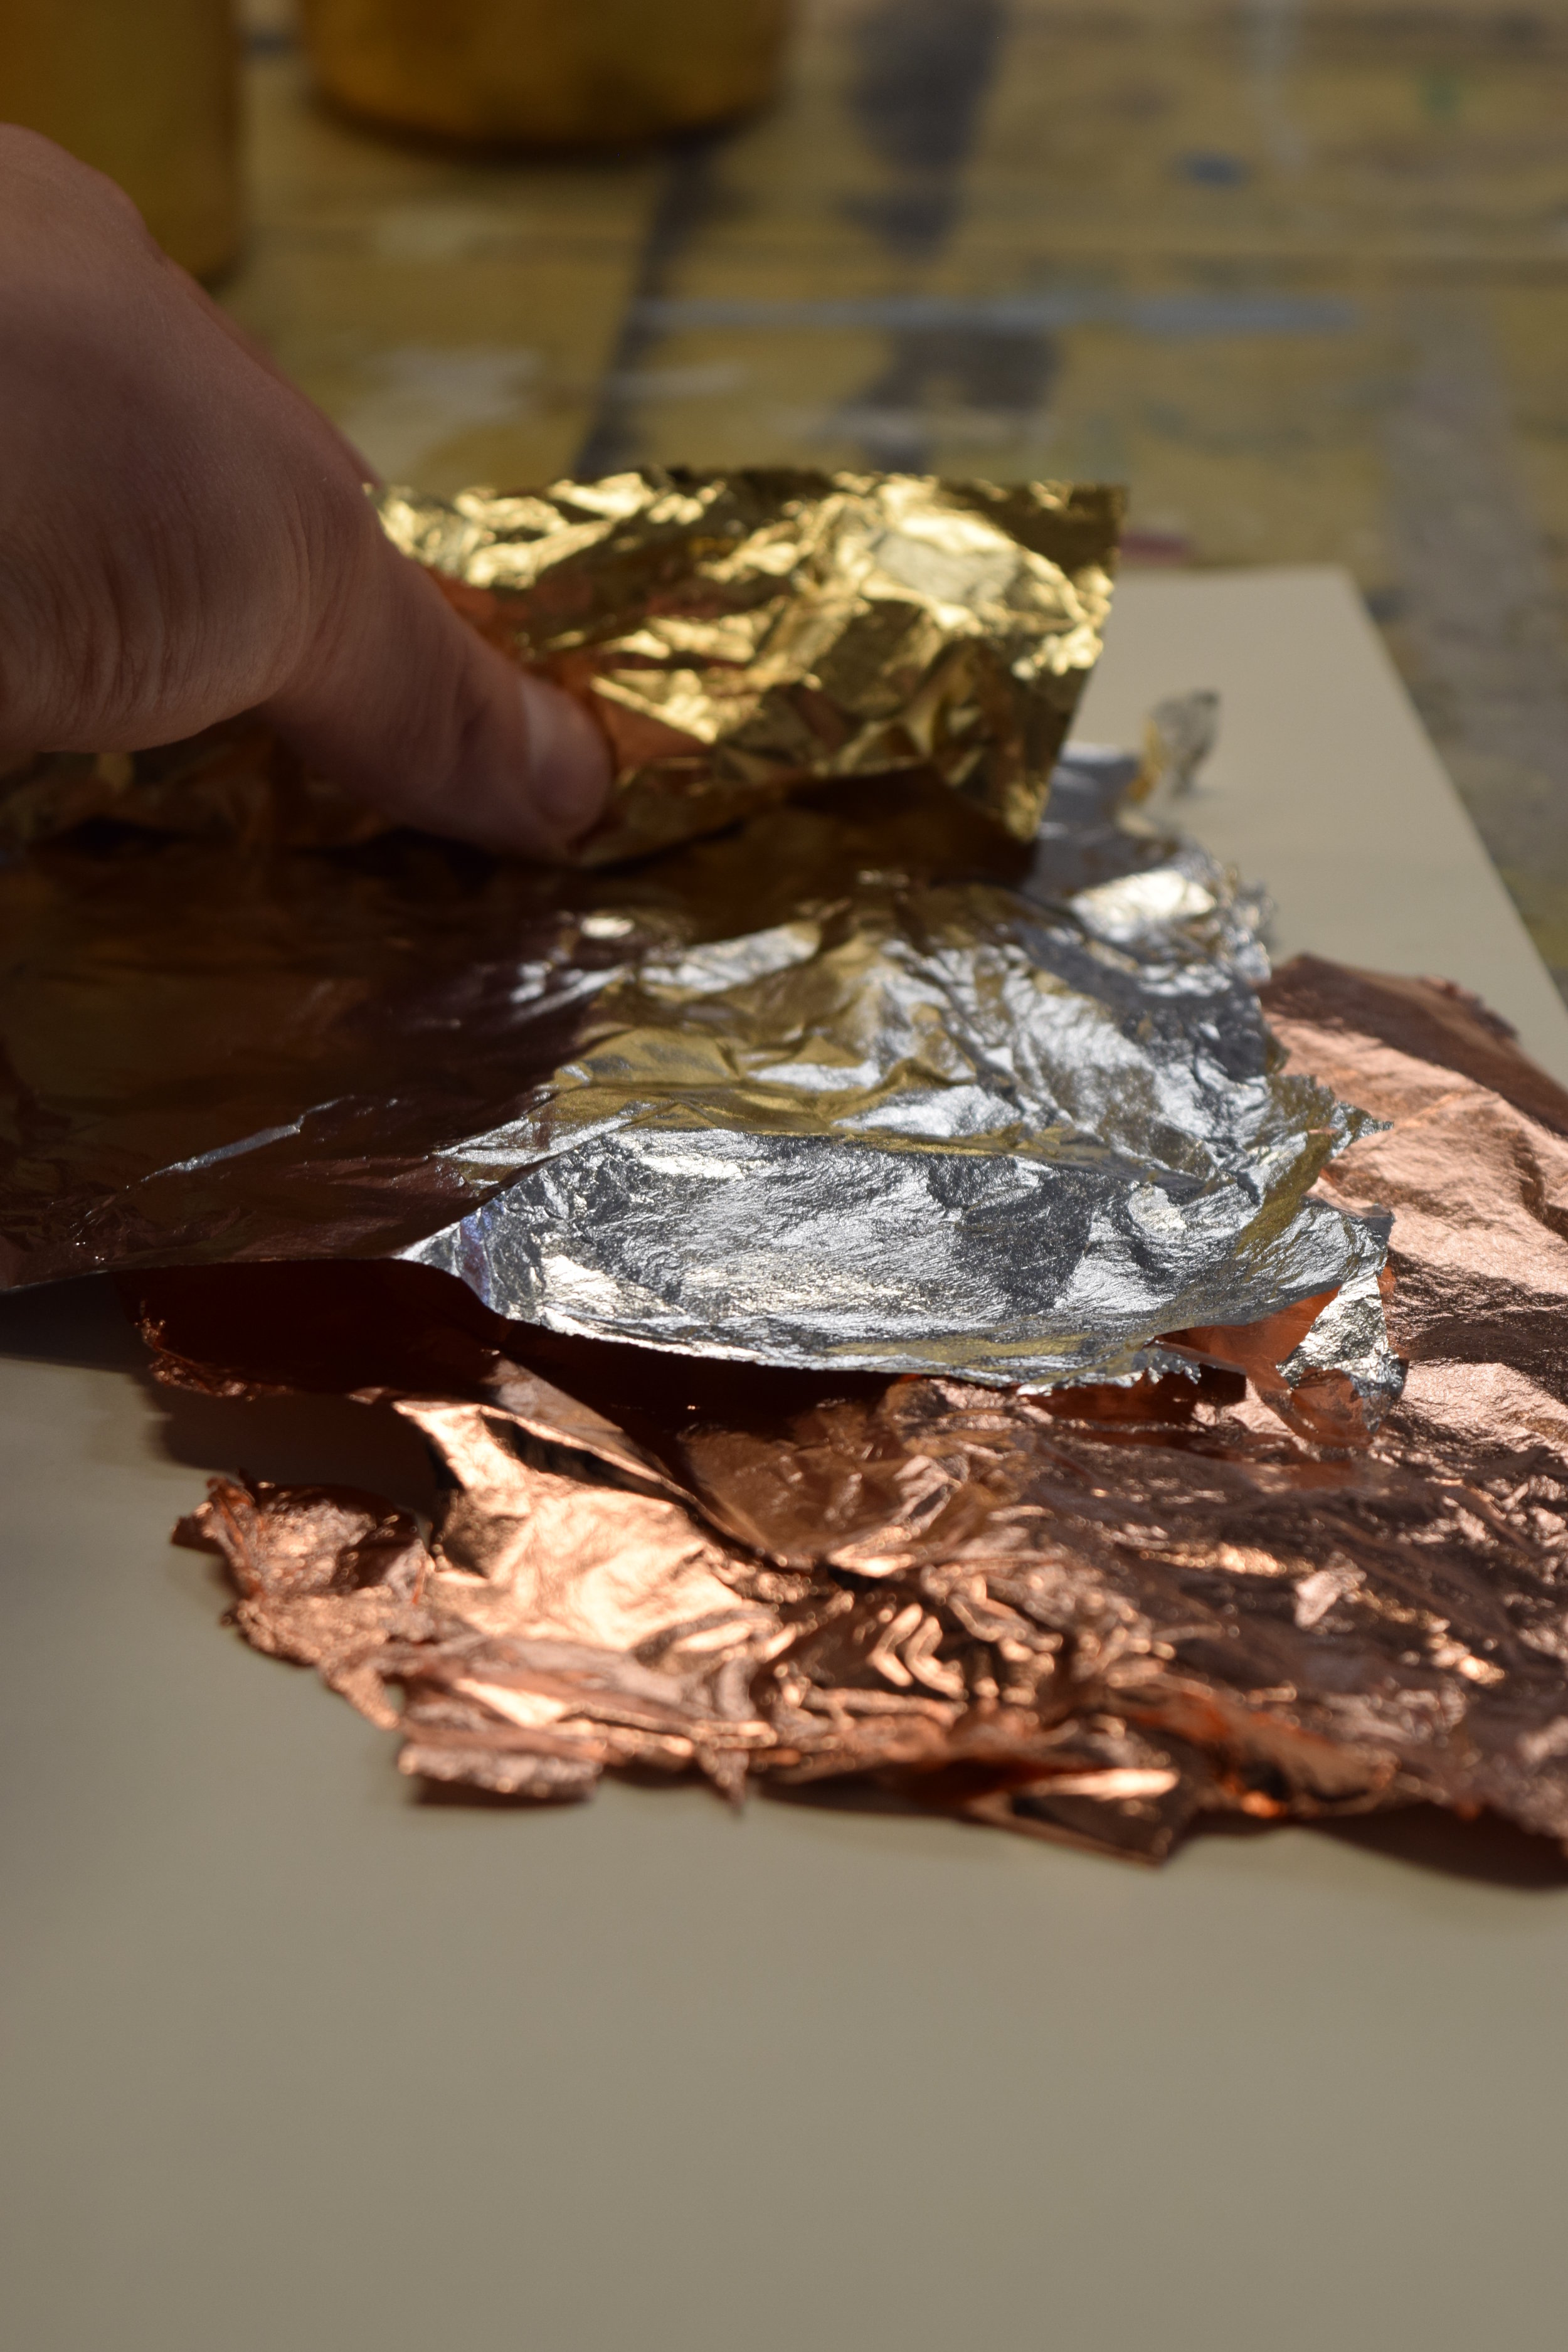
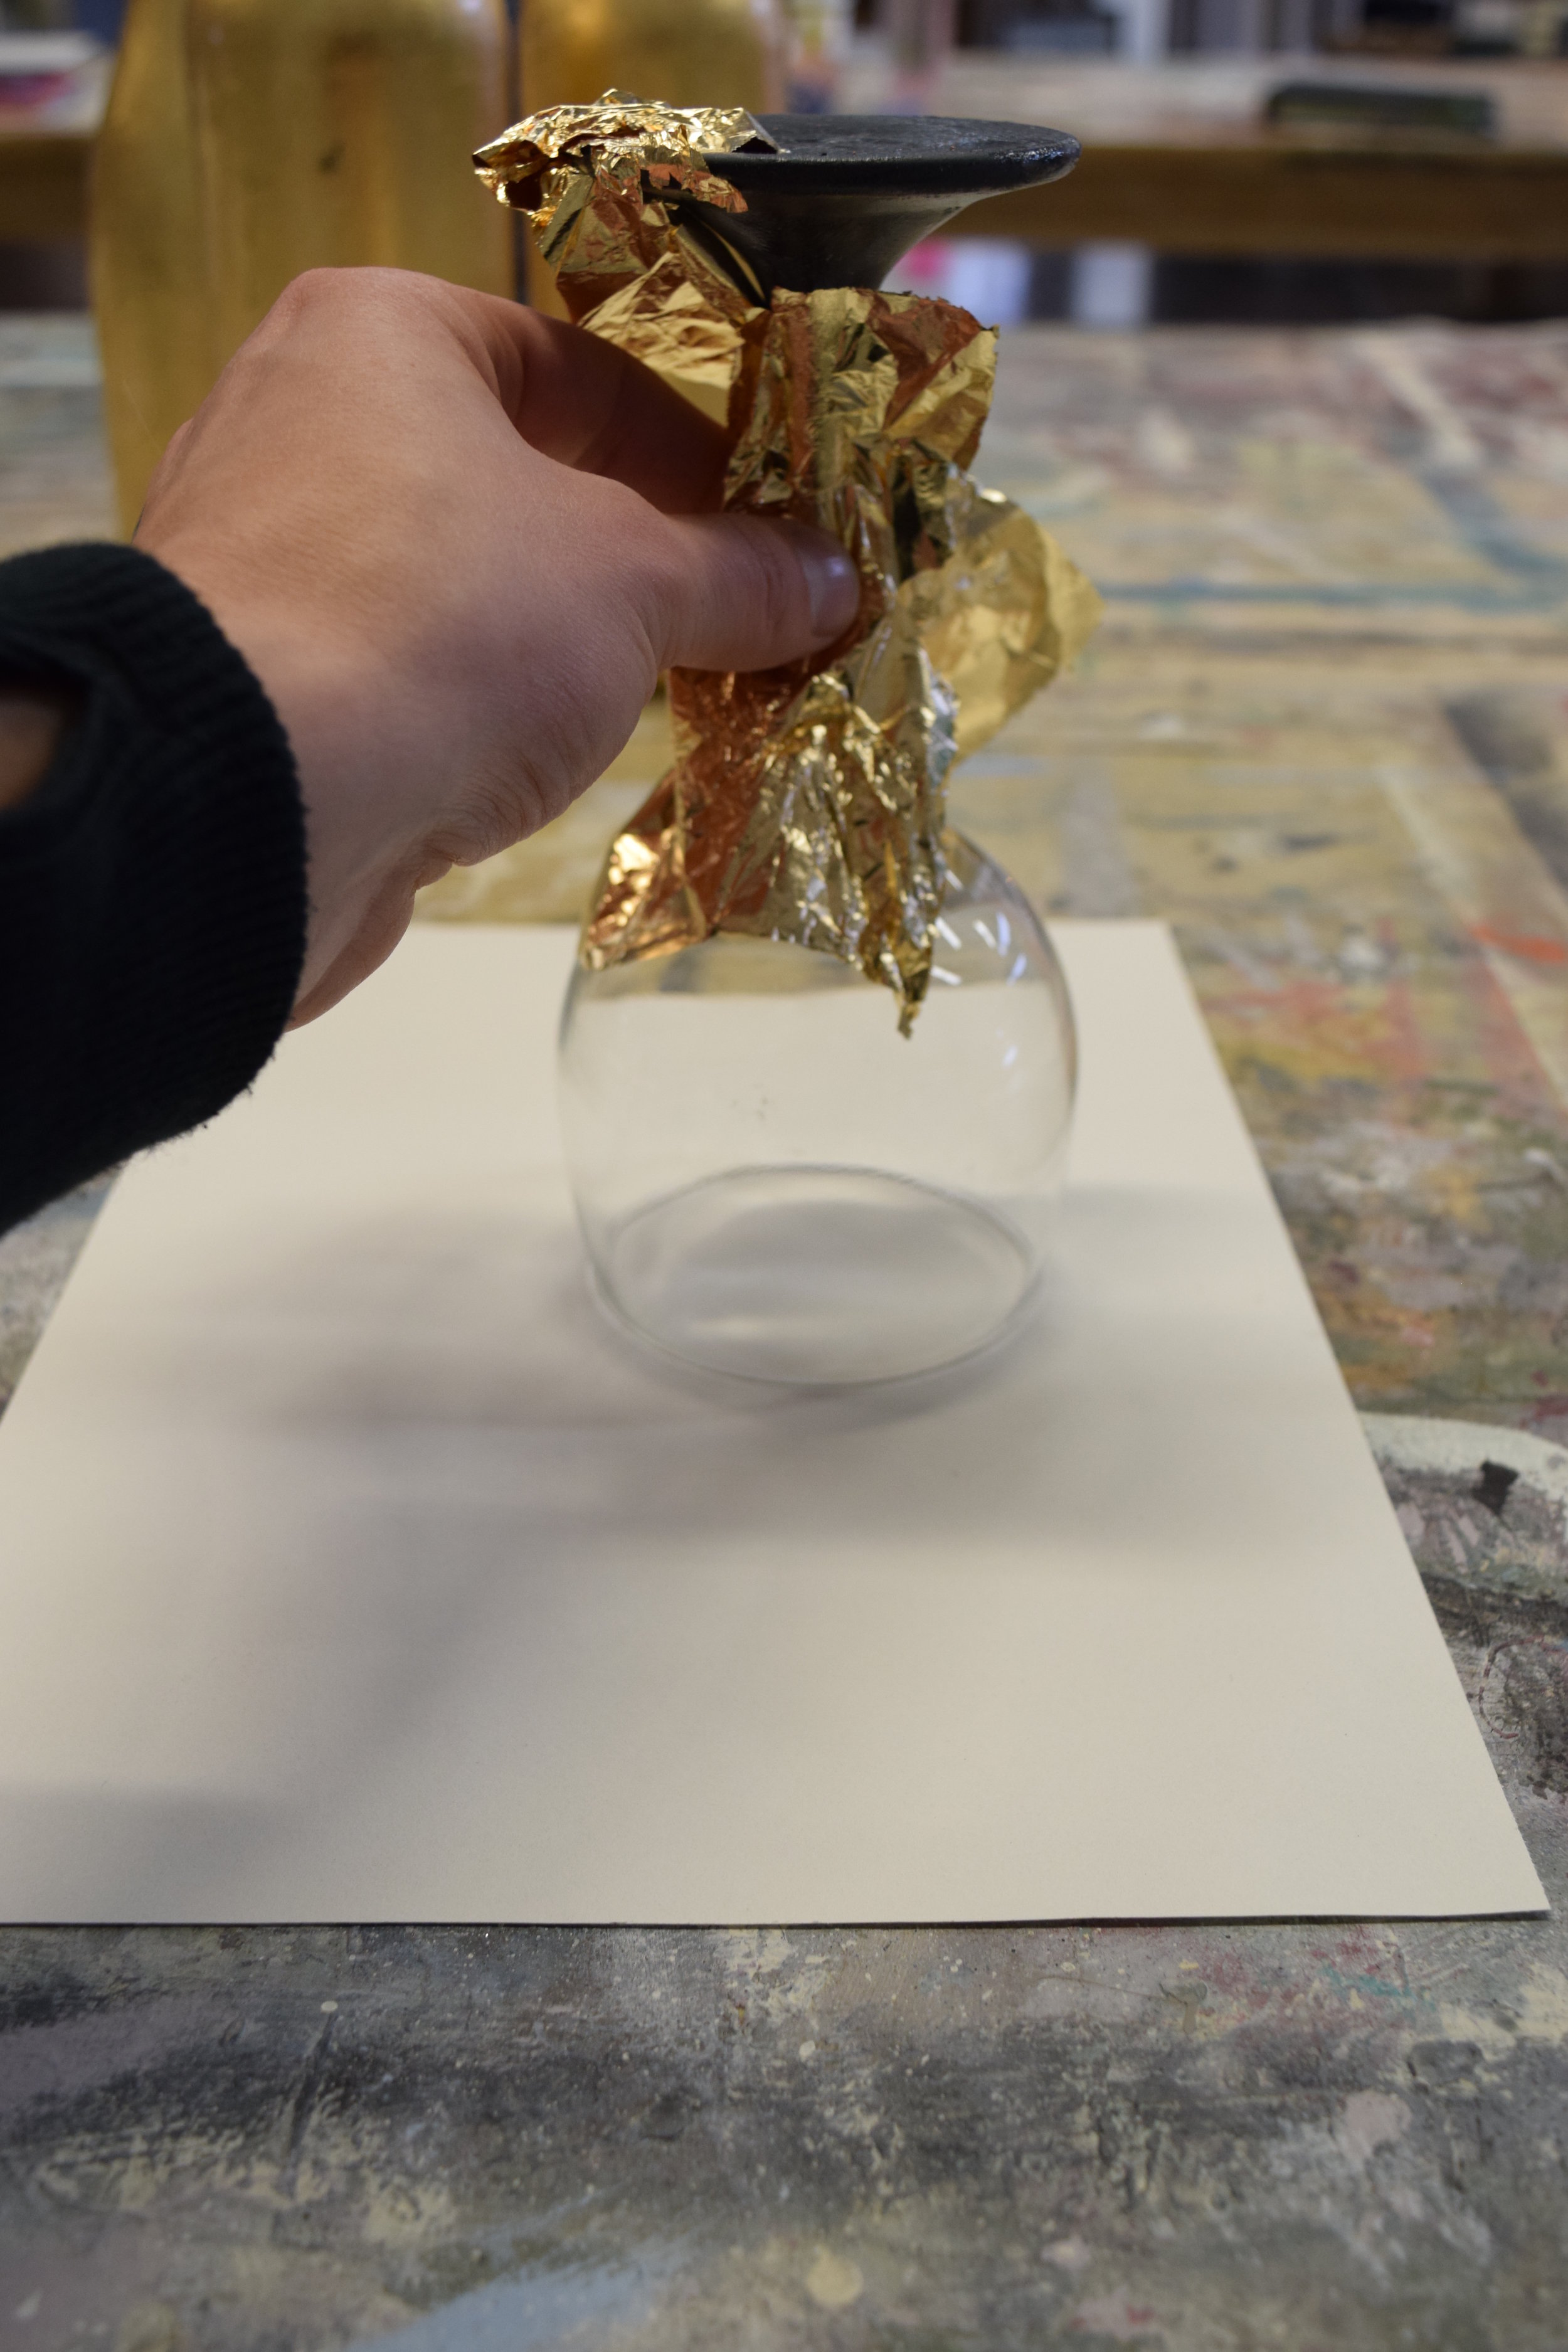 Leaf time! Gently pick up a sheet of your metallic leaf and with a soft touch press it onto the tacky Leaf and Foil Size, if the sheet of leaf brakes just pick up the pieces and stick them on other areas. Keep going until most or all of the Graphite Chalk Paint™ colour is covered.
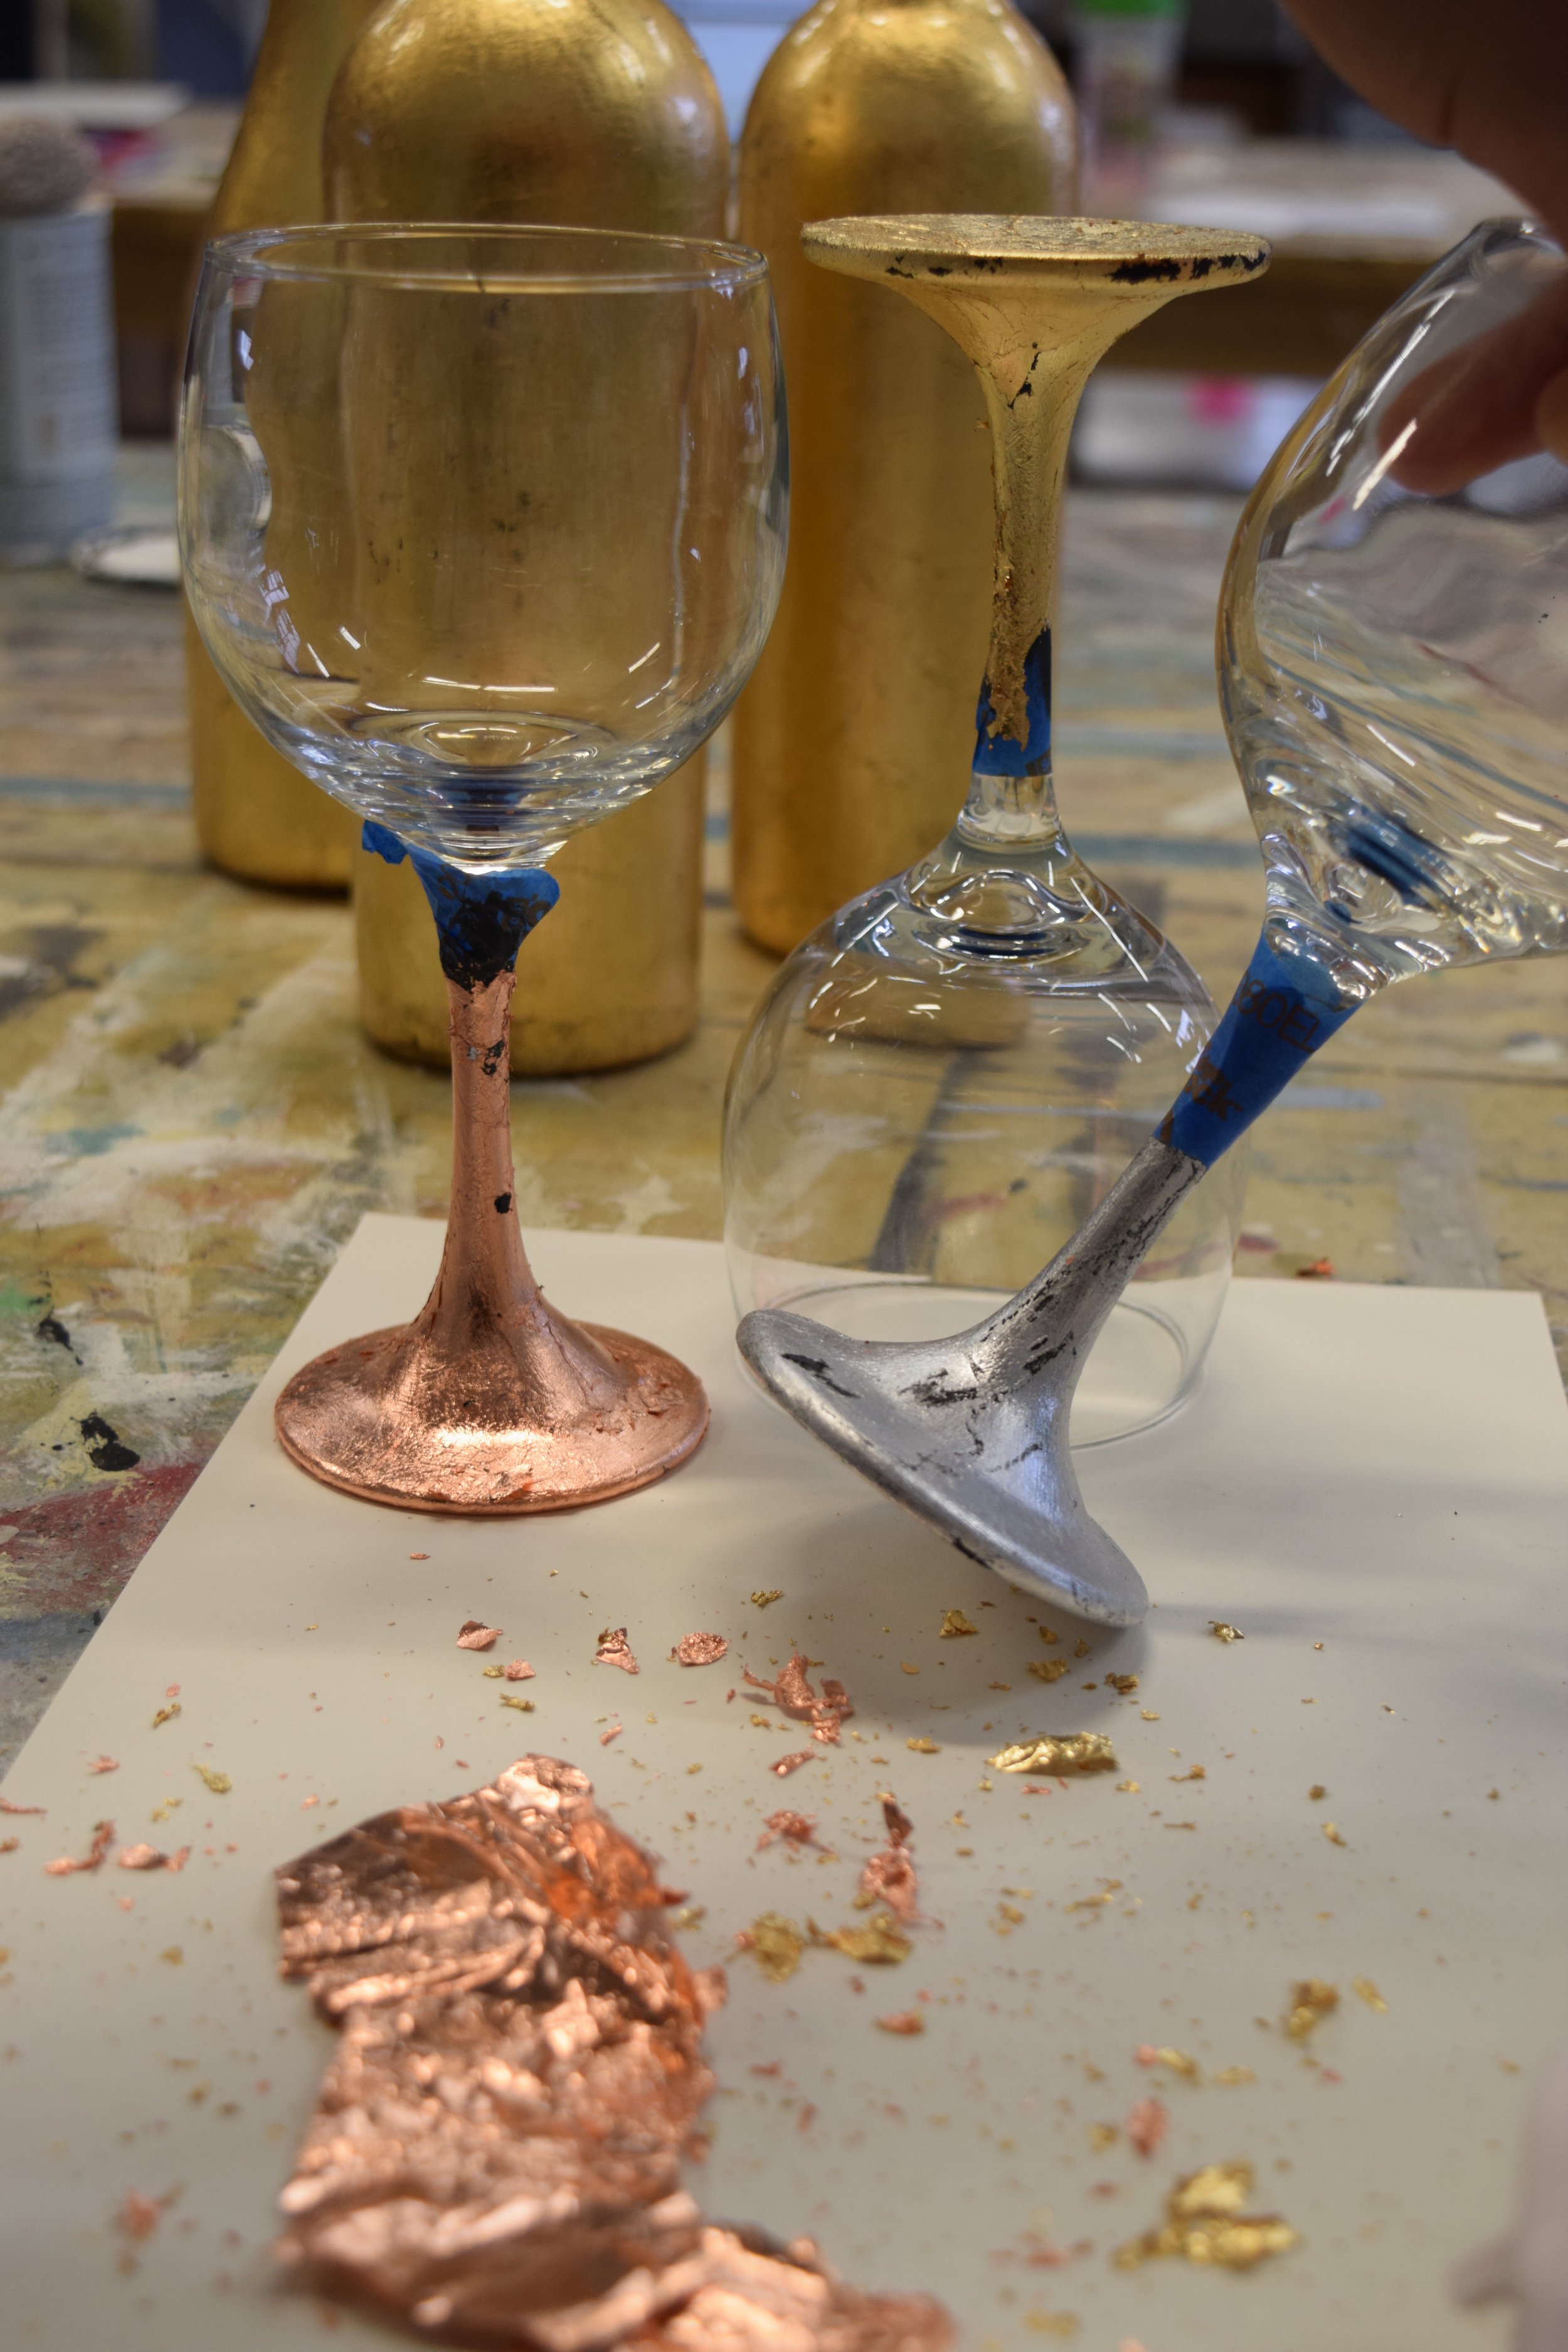 I sometimes like to leave little bits of black showing through to give a distressed or antique look.
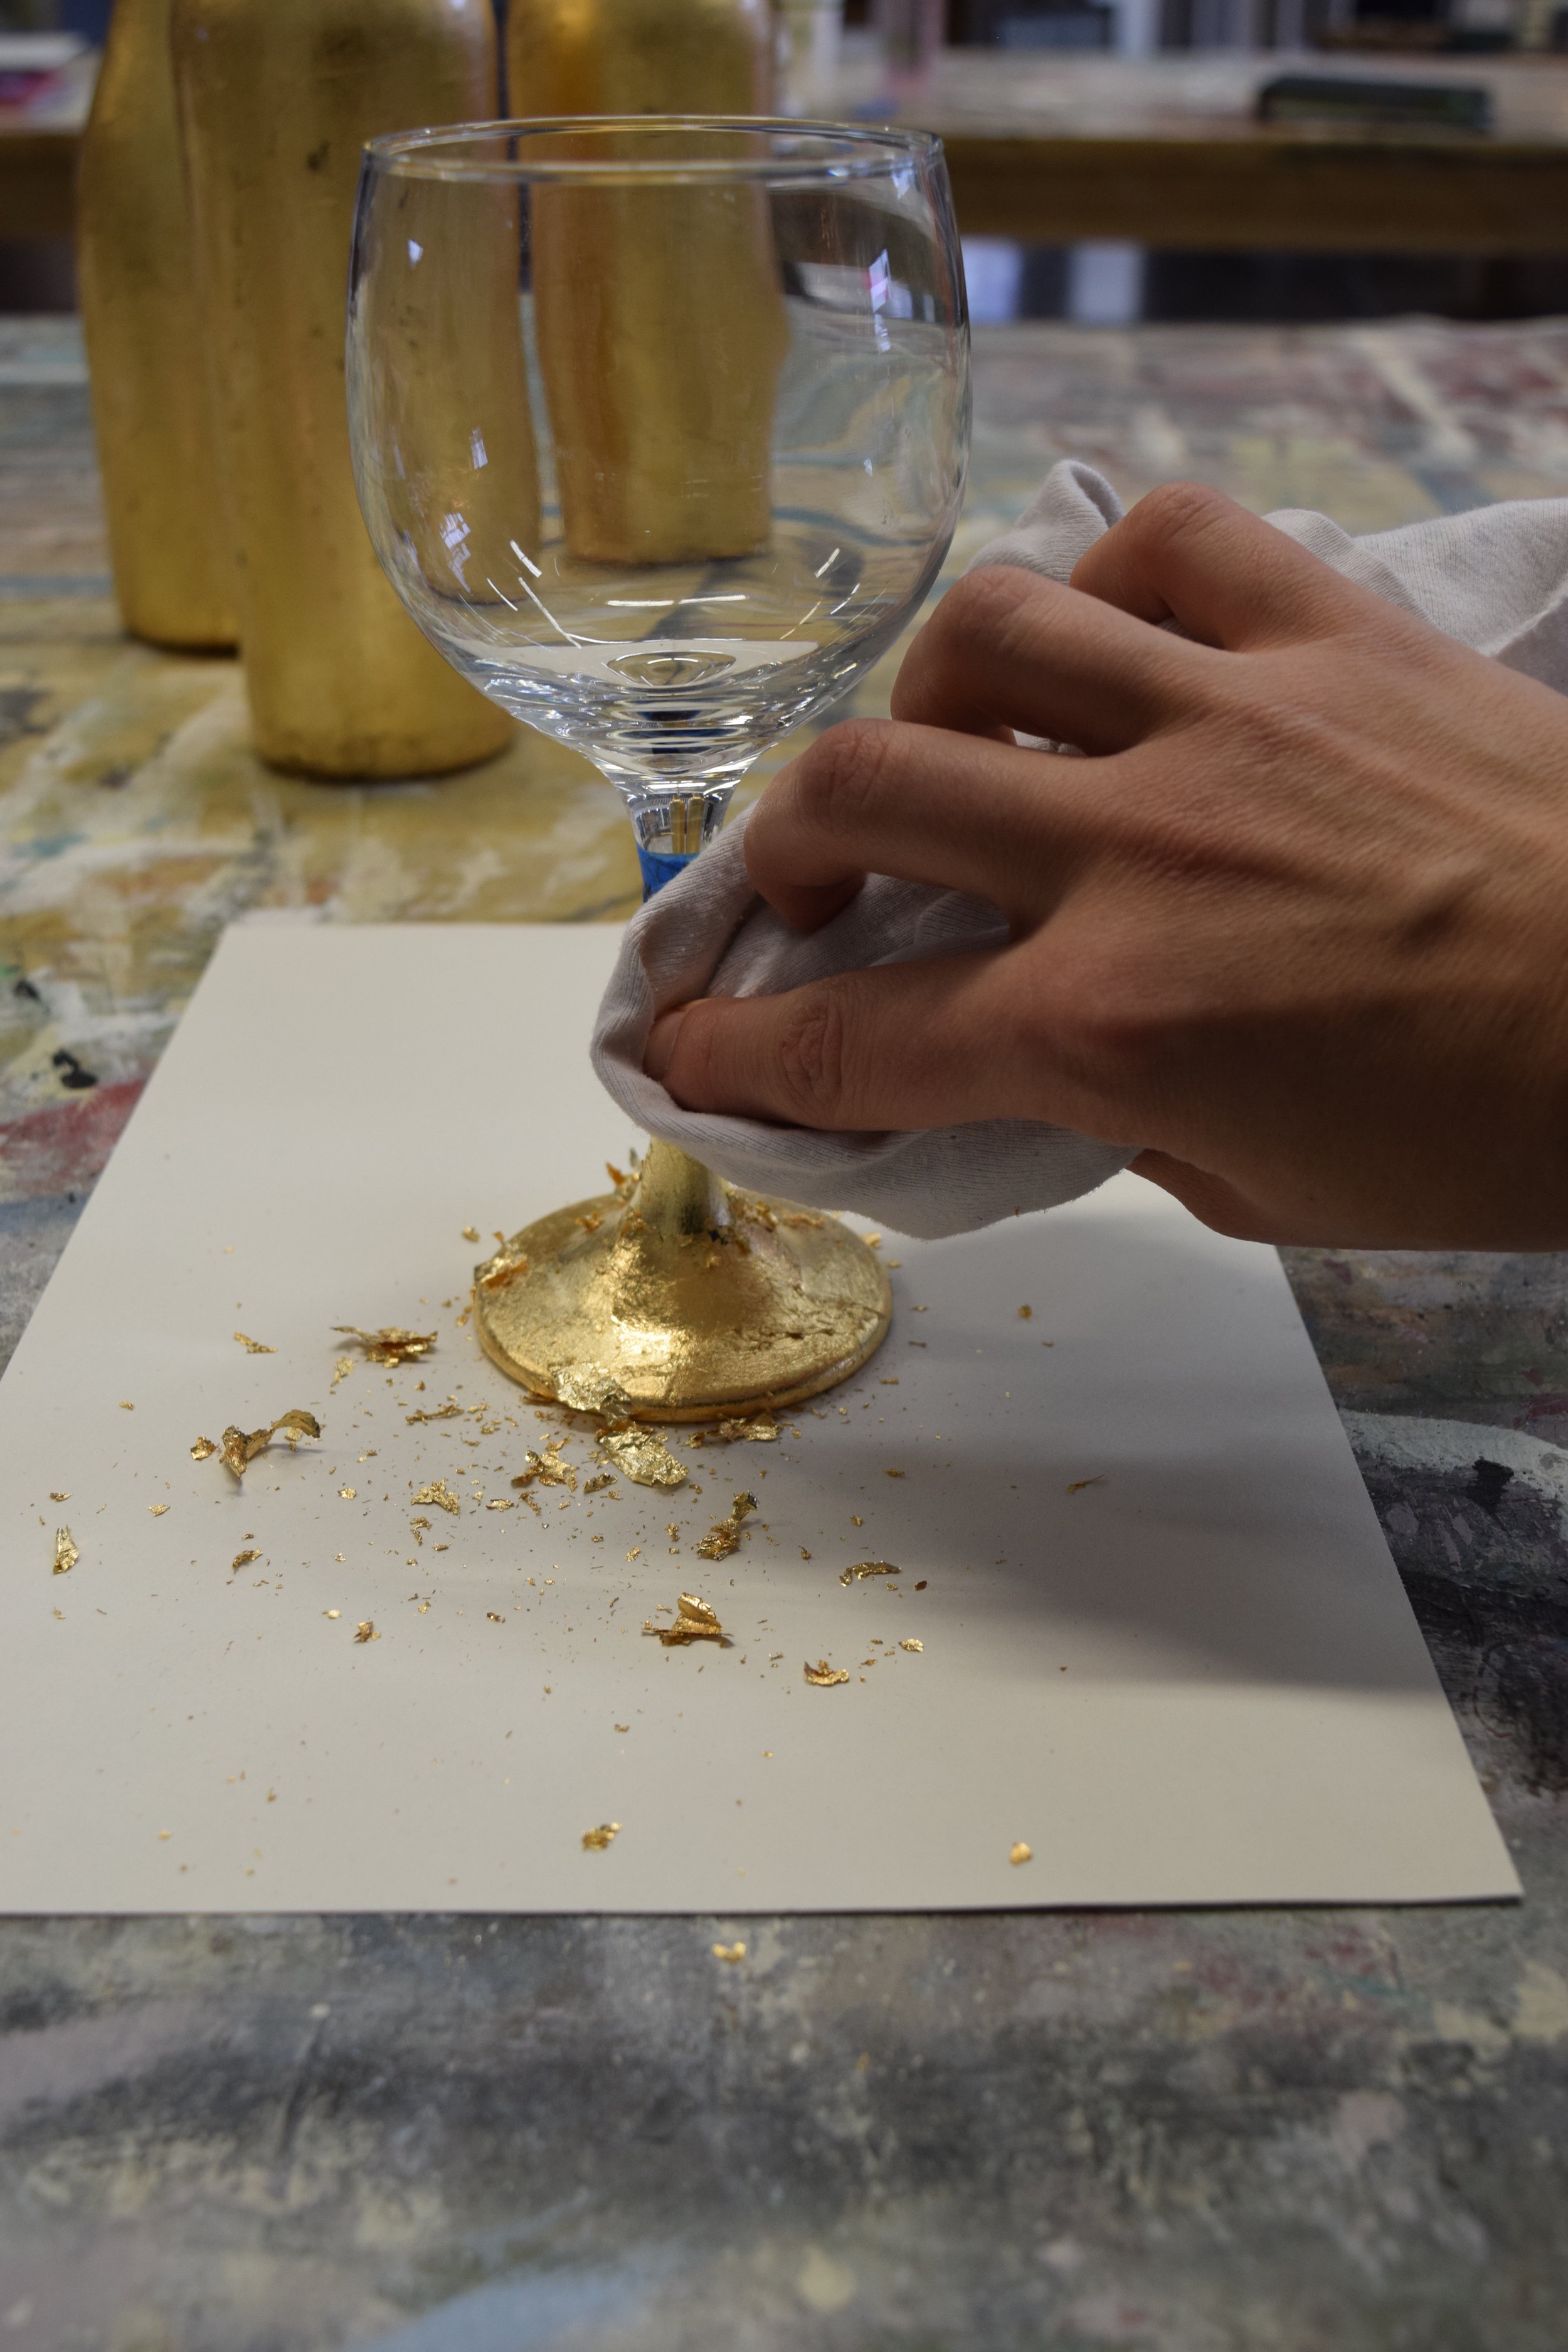
 Take a soft cotton rag like an old t-shirt and gently rub the leaf, you will notice tiny crumbs flaking off. This is ok, just keep rubbing until all the loose bits have flaked away. The surface will have some crinkles and creases but should be fairly smooth.
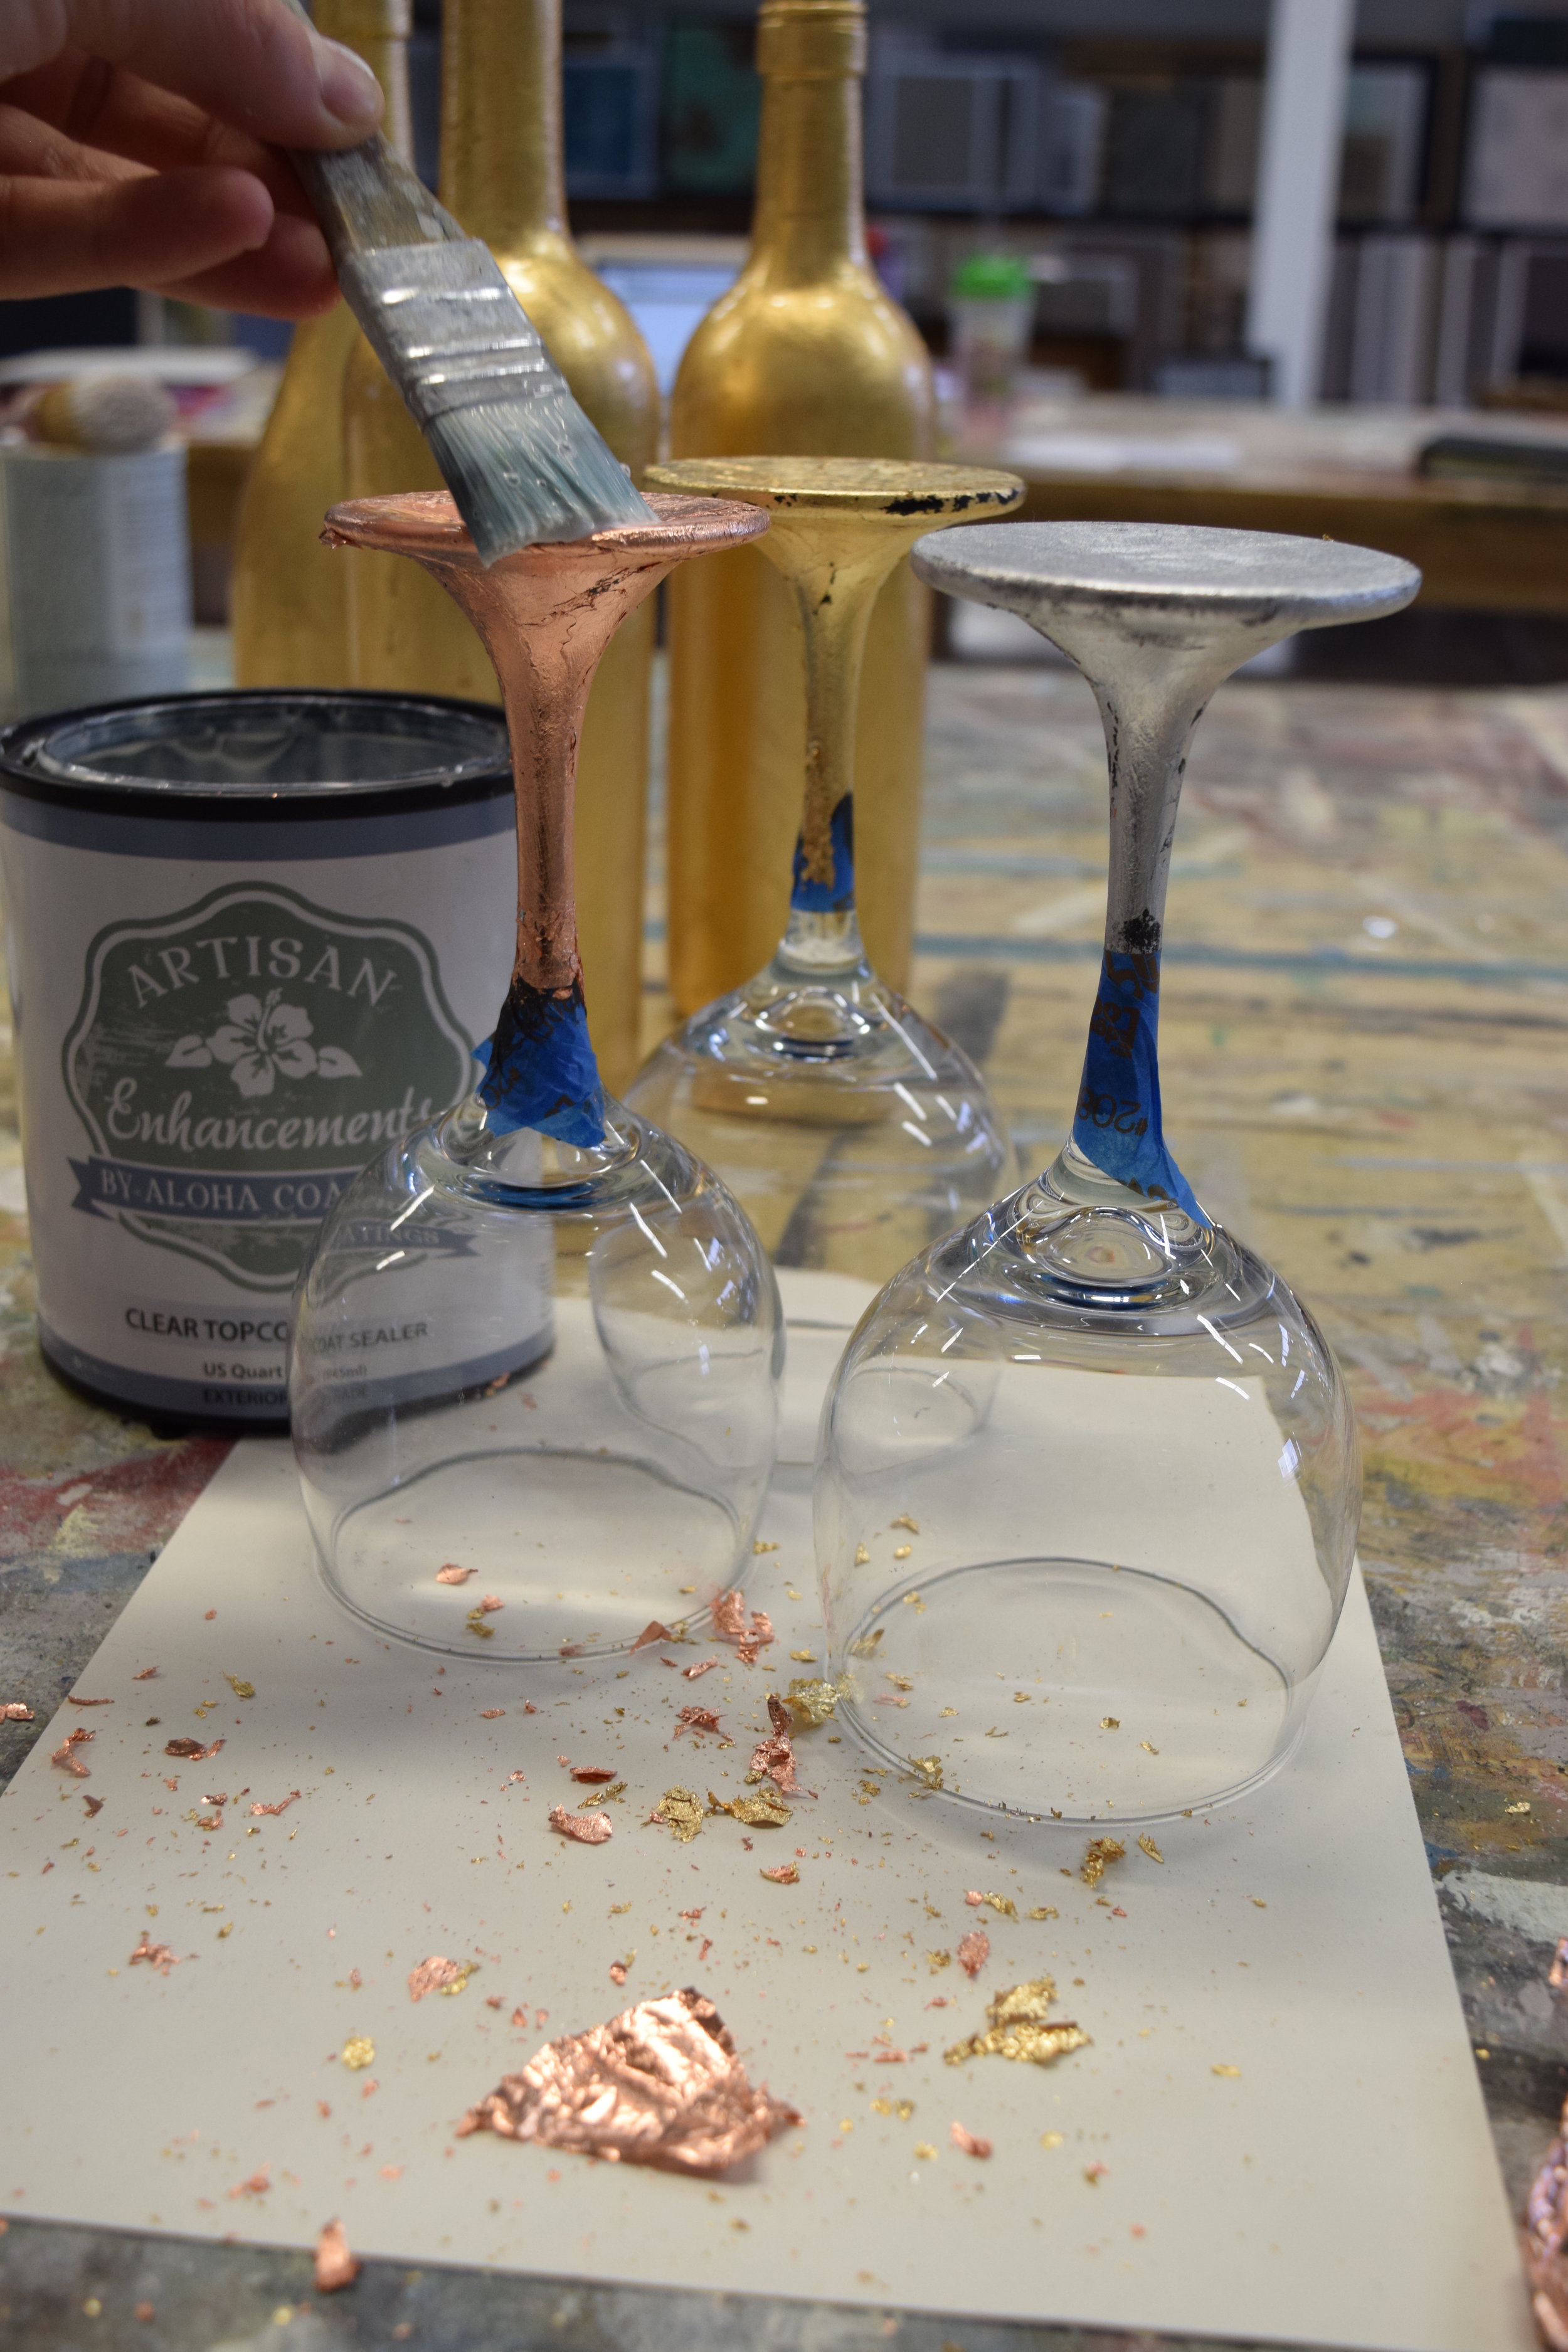
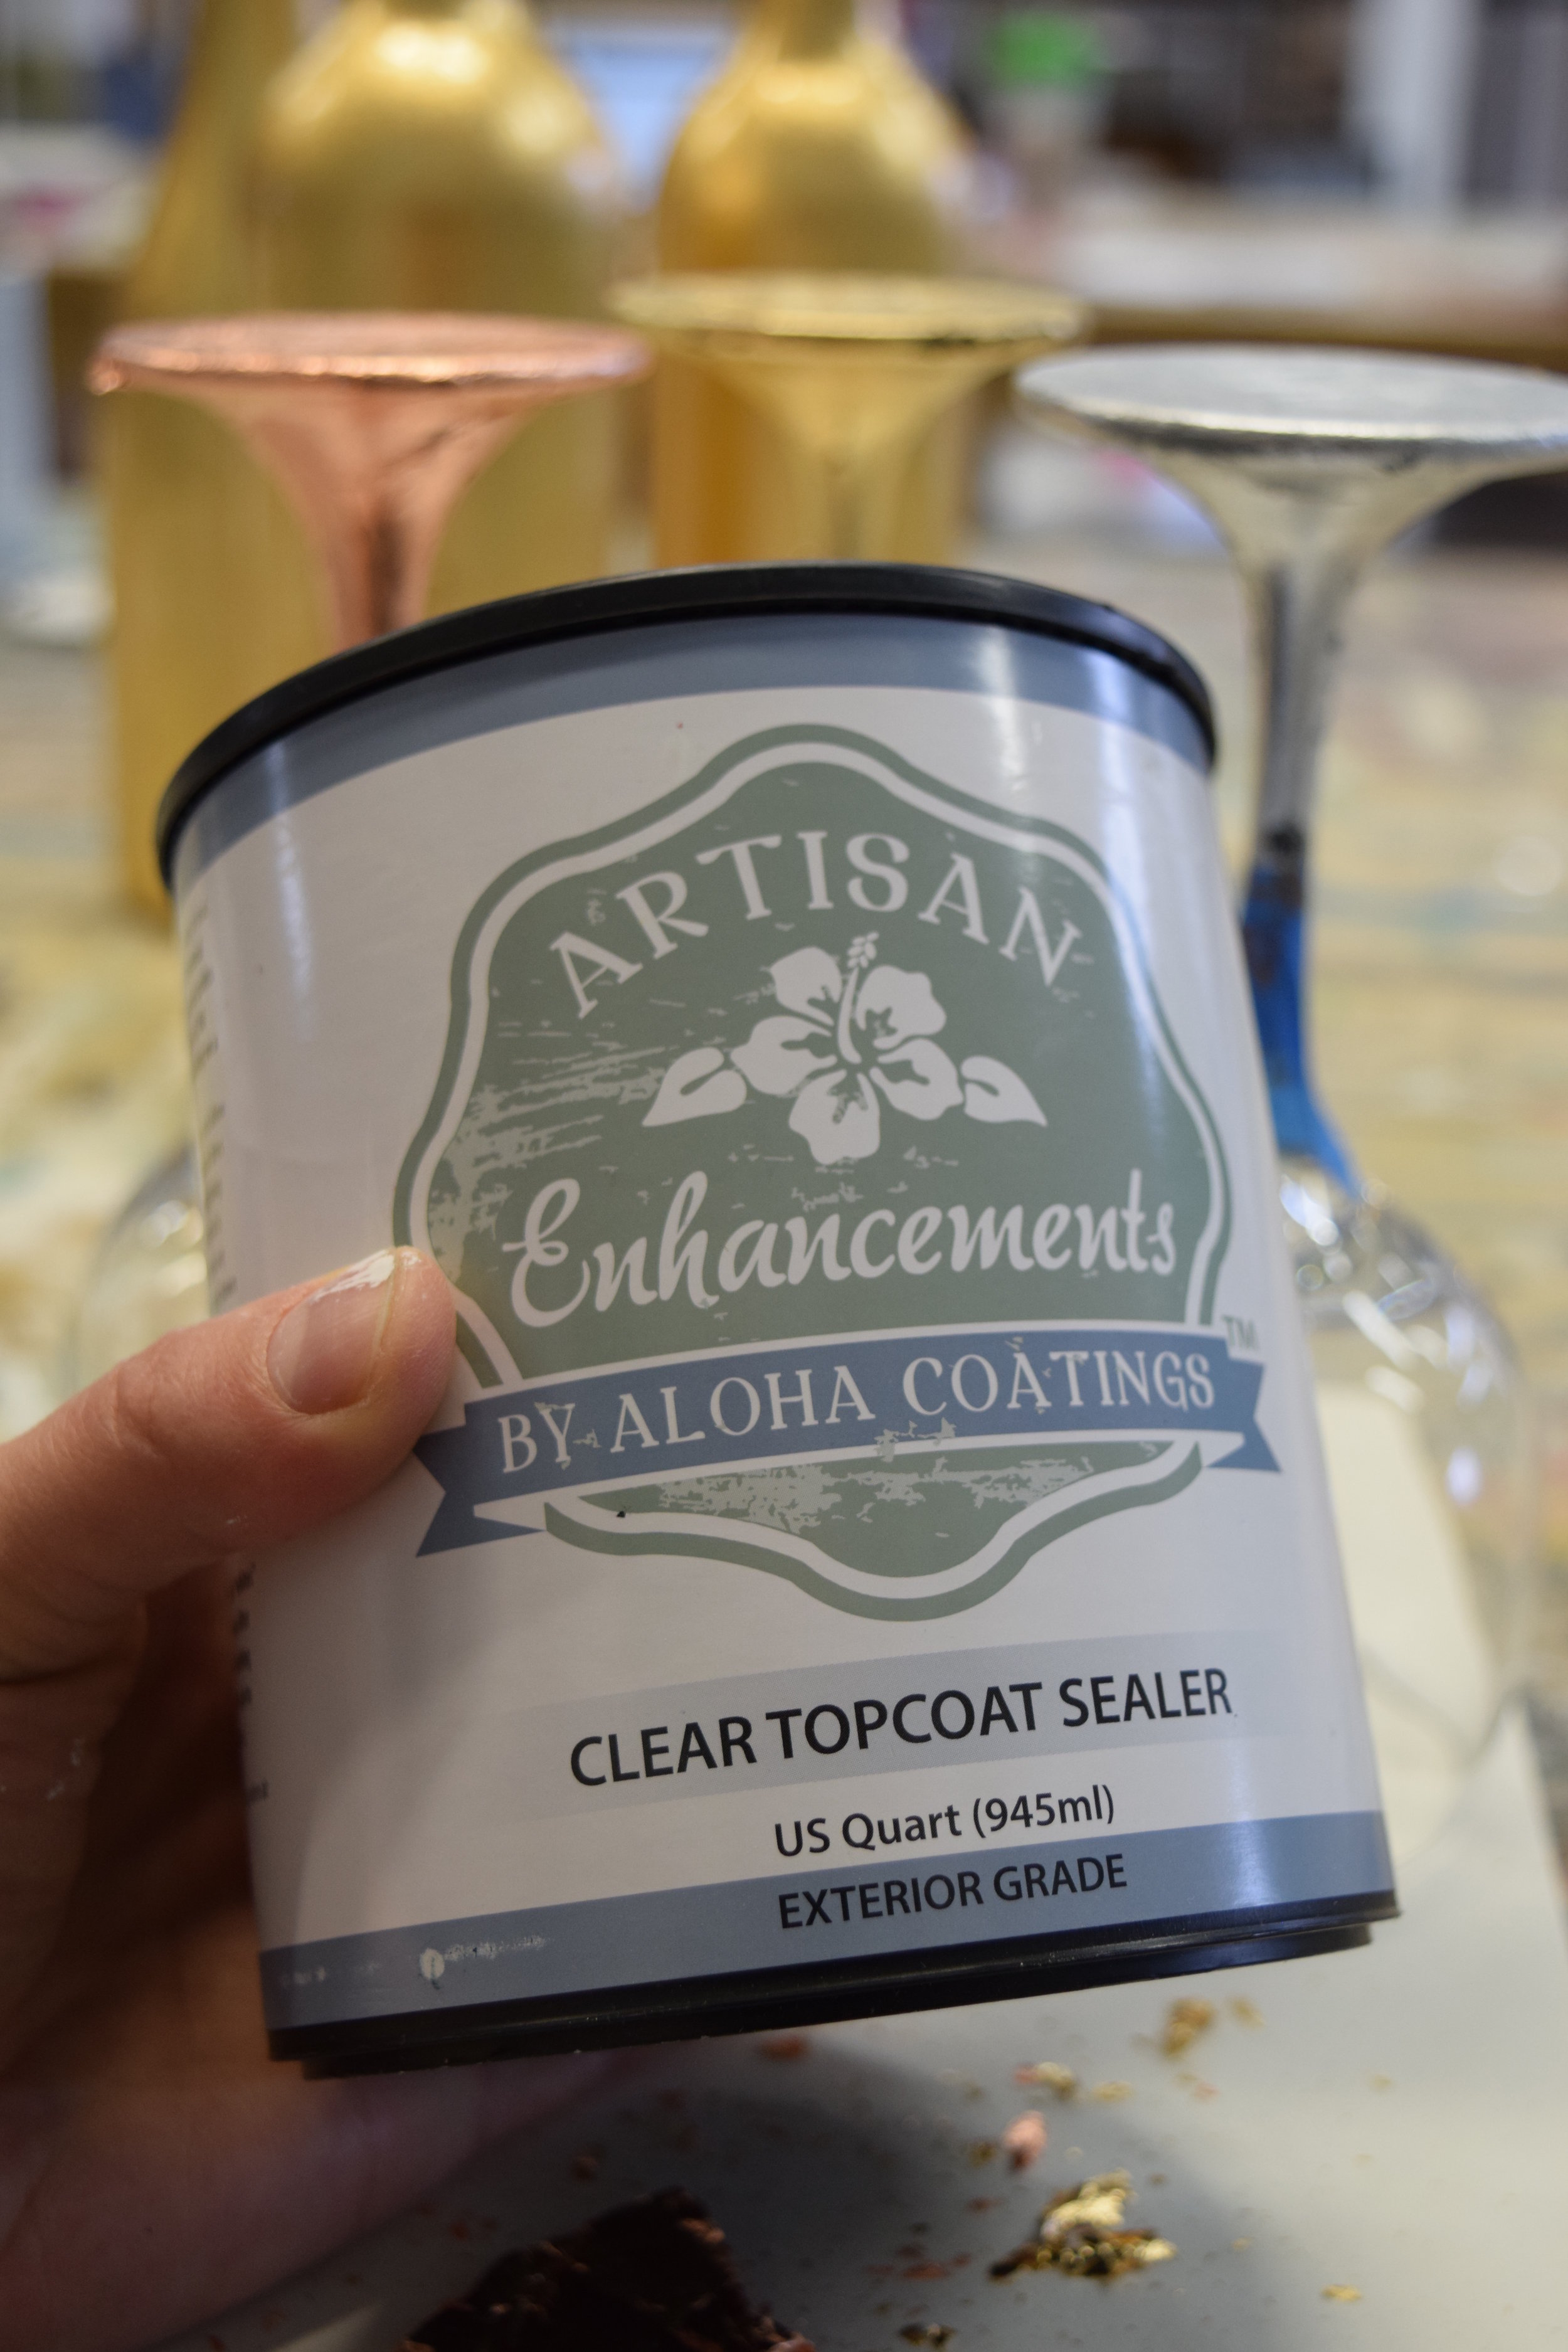
 Because these glasses will be picked up and used we want to put on a couple layers of our sealer to protect our gorgeous leaf finish. This time I choose Clear Topcoat Sealer because it’s a natural product (made from soya beans) and water repellant. Use the same small brush as before and paint on a layer. You will want to apply 3 layers of this for good protection, allow to dry between layers. This product looks kind of creamy when it is wet but dries clear.
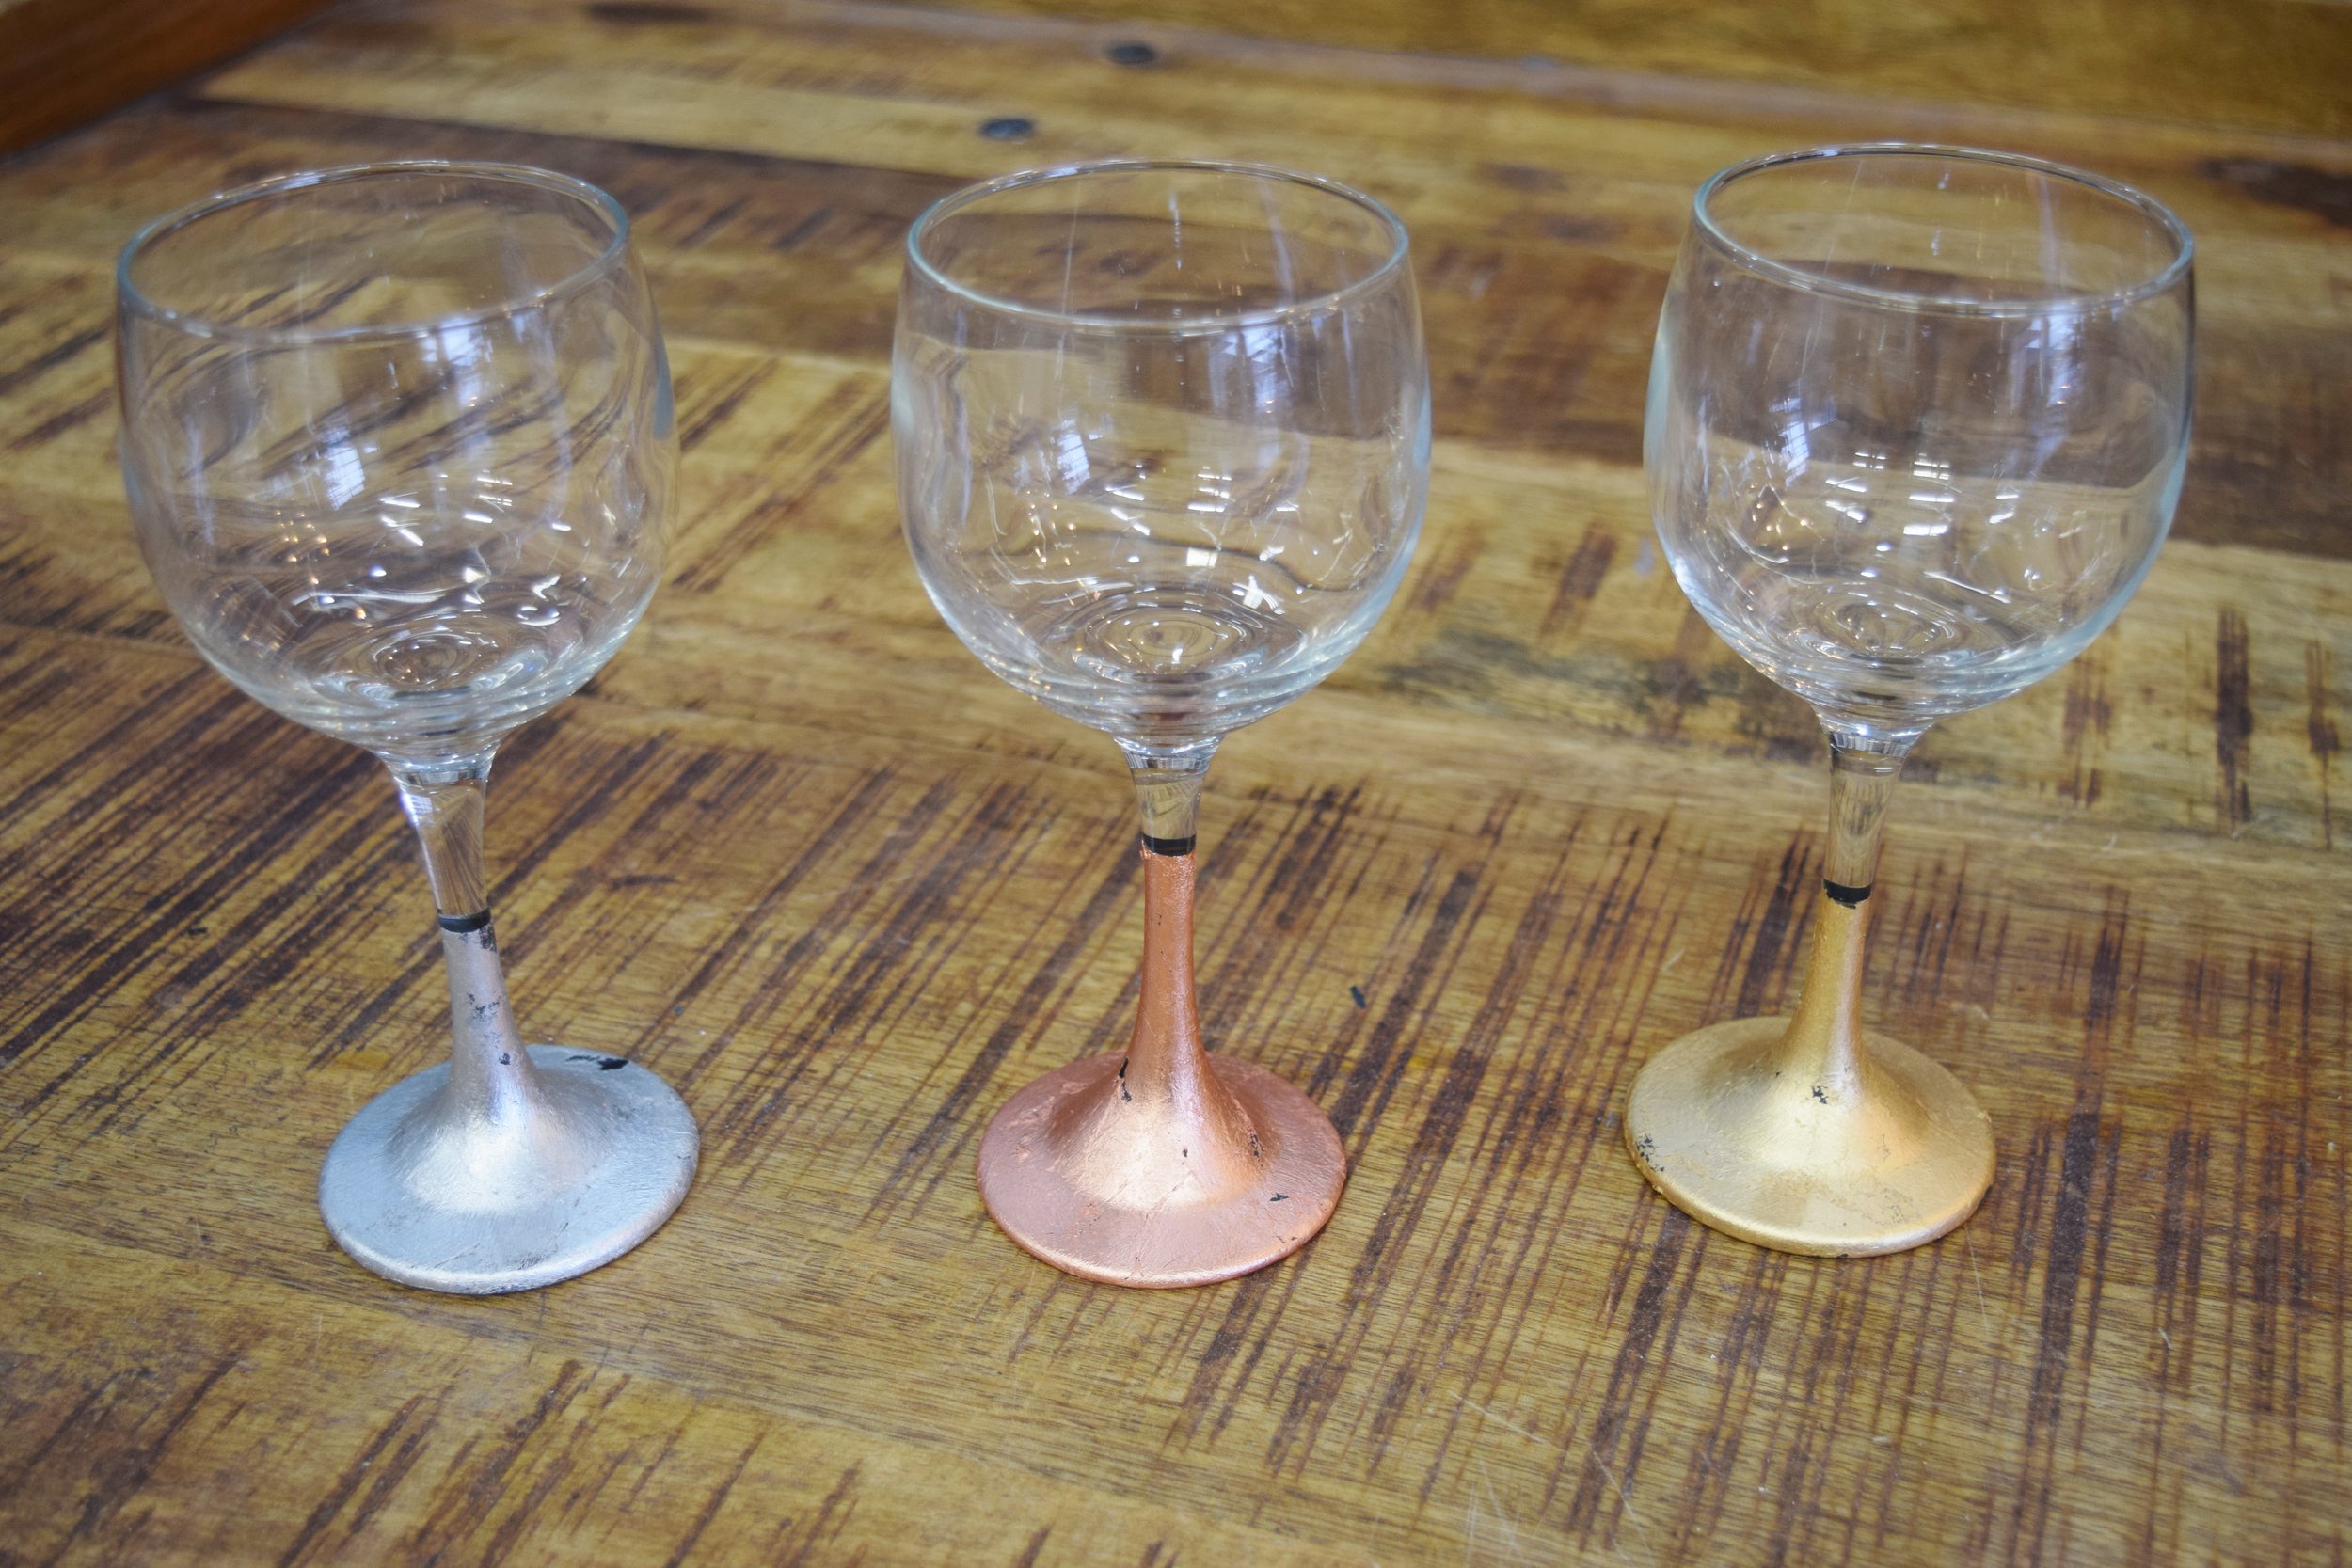 The finish is fairly matte when dry which makes the leaf soft or dull looking. You could also choose to use a glossy sealer if you would like to have a shiny finish. Remember, you are not going for perfection so don’t get hung up on texture or things being even. I suggest hand washing to protect the finish, I haven’t tried but I am sure the dishwasher would do its job and scrub away some of your leaf, best not to test it.I hope you are inspired to go and create your very own leaf project, remember that you can apply this technique to more than just wine glasses. Take a look around the house, I am sure you will spot something from last season that could use a little glam makeover!All the materials used in this project can be found at Interiors To Inspire in Calgary or through our Online Store and if you need a little help with your project you can sign up for our Leaf Wine Glass workshop by clicking here! Visit our studio to chat with me or one of our other artists, we are full of ideas and inspiration!If you have any questions about this project or the products we used, please leave a comment below! We love to help with your DIY and paint projects!Happy Painting!Deanna