
Furniture Transfers
What are furniture transfers? We're glad you asked!We have been seeing and hearing a lot about this amazing product so we just had to try it for ourselves. In a nutshell, a furniture transfer is a pre-printed design (pattern, words, floral, etc.) on a backing sheet that gets rubbed onto a surface (furniture, wall, decor item, etc.) you pull away the backing sheet and the design stays behind. Clear as mud, right? Good thing we made a video to show you just how easy these transfers are to use, keep reading to find out more and to be inspired!Here's a peek at what a furniture transfer is and how they work. P.S.: These are transfers by ReDesign with Prima[embed]https://youtu.be/uWg-EkIIrBo[/embed]Seems pretty easy right? That's because it is!When you open your transfer packaging here's what's inside... 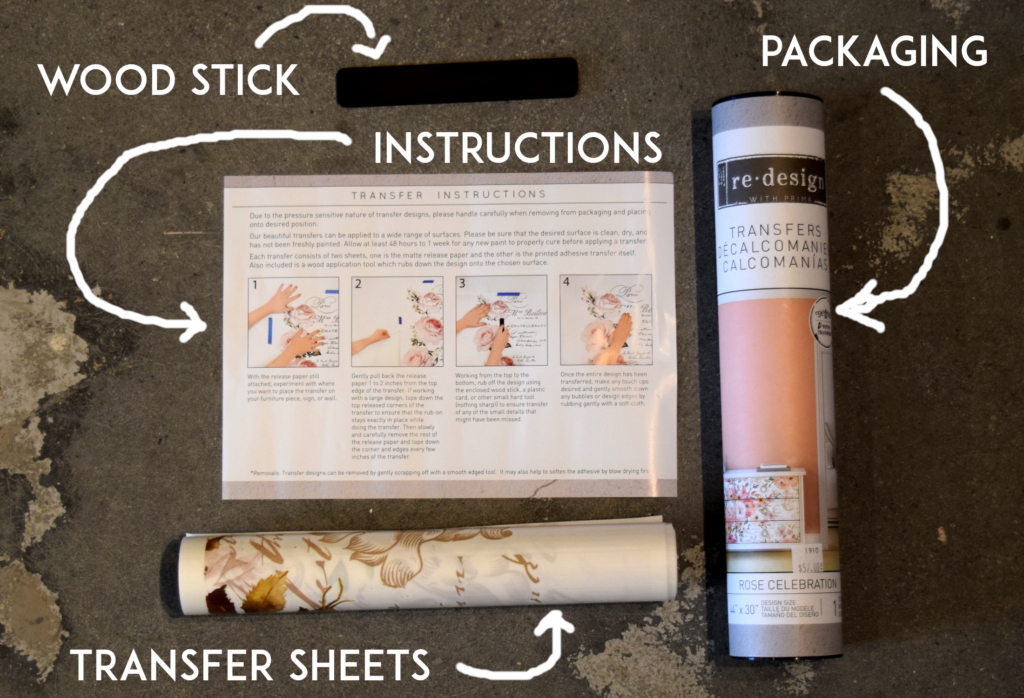 PACKAGING - packed up in a sturdy tube to prevent any damage to your transferINSTRUCTIONS - tells you exactly what to doTRANSFER SHEETS - sometimes the transfer is big so it comes in multiple pieceWOOD STICK - use this to rub the transfer onto your surfaceHere's a closer look at the instructions.TRANSFER INSTRUCTIONSDue to the pressure sensitive nature of transfer designs, please handle carefully when removing from packaging and placing on desired position. Our beautiful transfers can be applied to a wide range of surfaces. Please be sure that the desired surface is clean, dry, and has not been freshly painted. Allow at least 48 hours to 1 week for any new paint to properly cure.Each transfer consists of two sheets, one is the matte release paper and the other is the printed adhesive transfer itself. Also included is a wood application tool which rubs down the design onto the chosen surface.
- With the release paper still attached experiment with where you want to place the transfer on your furniture piece, sign or wall. Tack in place with painters tape.
- Gently pull back the release paper 1 to 2 inches from the top edge of transfer. If working with a large design, tape down the top released corners of the transfer to ensure that the rub-on stays exactly in place white doing the transfer. Then slowly and carefully remove the rest of the release paper and tape down the corner and edges every few inches of transfer.
- Working from the top to the bottom rub off the design using the enclosed wood stick, a plastic card, or other small hard tool (nothing sharp!) to ensure transfer of any of the small details that might have been missed.
- Once the entire design has been transferred, make any touch ups desired and gently smooth down any bubbles or design edges by rubbing gently with a soft cloth.
Below are some photos of our first time using furniture transfers. We decided to cut out some flowers from a second transfer and layer them on top of the first transfer we put down. We broke our wooden stick from pressing harder than we needed too, oops! A plastic putty knife worked great to rub down the transfer. With the release paper still attached, position and tack in place with painters tape.
 Gently pullback the release paper a couple inches from the top edge.
 Tack the top edge in place, here we just pressed the transfer down to stick it in place, on a larger piece you would use painters tape to hold that edge from moving.
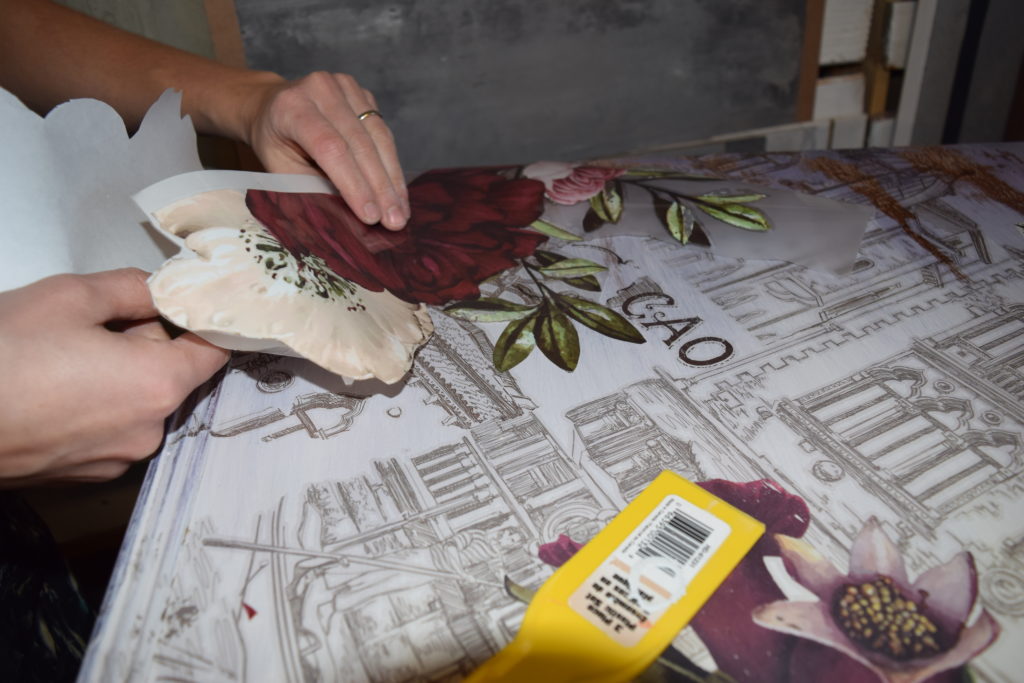 Gently pull back the rest of the release paper.
 Starting at an edge, rub with wooden stick (or other tool if you break yours :) ) working to the opposite side until all bits have been rubbed down. Then peel away the transfer sheet, the image will be stuck to your object and the sheet will just be clear.Oops, forgot to take a photo of that part when were applying the flowers. Here's what it looks like when you are pulling back the clear transfer sheet after you have rubbed down the transfer.
 Once we had the entire transfer rubbed down we gently rubbed with a soft cotton cloth to smooth down a couple edges and bubbles. To add to the overall look of our piece we sanded some areas of the transfer to make it look a little worn and less perfect, just a fine grit sandpaper like 220 - 400 will work and not a lot of elbow grease.

 We had painted this dresser with Chalk Paint™ by Annie Sloan, we applied the transfer right to the Chalk Paint™ and once we were all done then we applied a layer of Clear Chalk Paint™ Wax to the dresser. We applied the clear wax right over the transfer too. Rub the wax on with a wax brush then wipe the excess with a soft cloth.
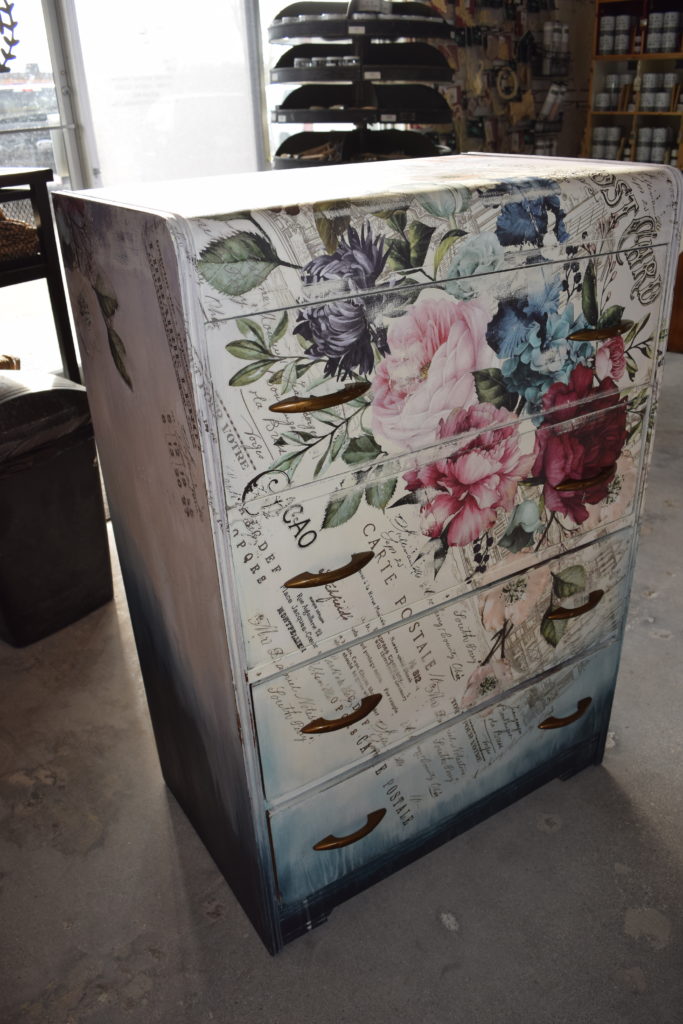 Here's our finished piece, we had so much fun creating it. Have you tried using transfers before??? What did you love? Hate? Which brands did you try? Leave your questions and comments below! To purchase visit our store in Calgary, Alberta or shop online, we ship anywhere in Canada!Thanks for checking out our blog post! Happy painting!